HomeGuidesStar Wars Jedi: Survivor
Star Wars Jedi Survivor Koboh collectible locations: All chests, treasures, seed pods, and moreWhere to find every last chest, treasure, and seed pod on Koboh
Where to find every last chest, treasure, and seed pod on Koboh

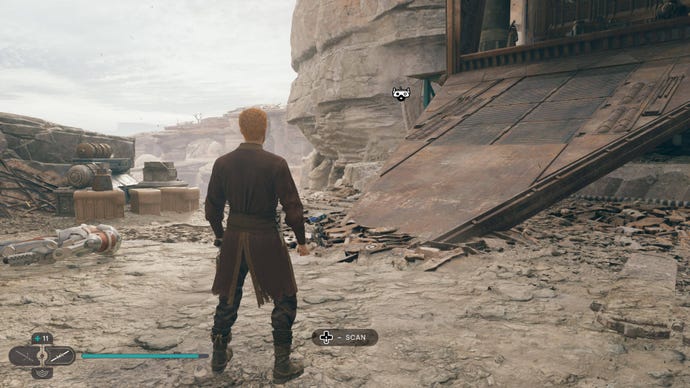
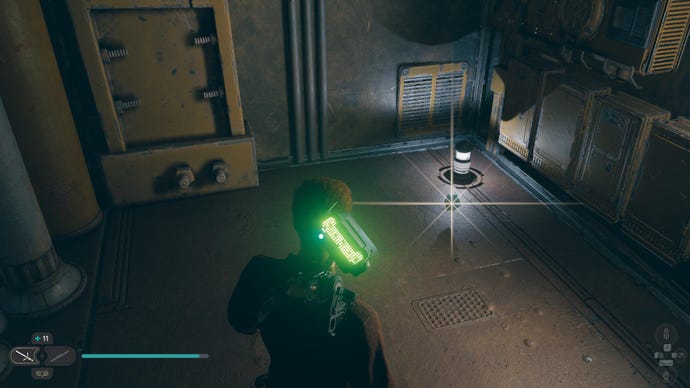
Looking for a certain collectible location on Koboh in Star Wars Jedi: Survivor?It’s a big task, finding every last treasure, plant, chest, and secret in Koboh. This sprawling planet is the largest map inStar Wars Jedi: Survivor, and it’s filled to the brim with literally hundreds of collectibles.
If you’re wondering where that last missing chest or seed pod is on Koboh, then wonder no more. Below we’ll help you to 100% the planet with our guide on every last Koboh collectible location inStar Wars Jedi: Survivor, with screenshots and instructions on each one. We’ve got a lot of ground to cover, Jedi, so let’s dive in.
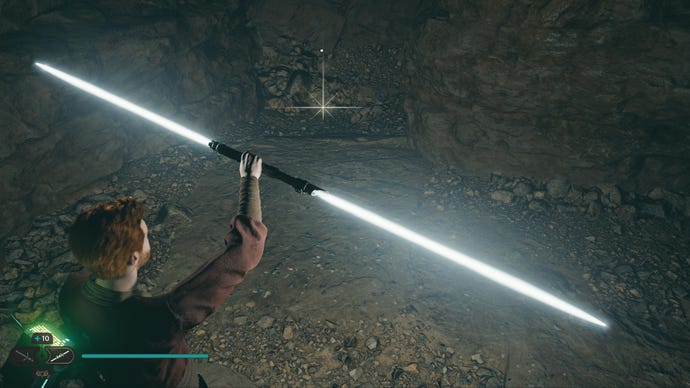
Best Lightsaber Stances In Star Wars Jedi: SurvivorWhat are the best lightsaber stances in Star Wars Jedi: Survivor? Watch this video to find out.Watch on YouTube
Best Lightsaber Stances In Star Wars Jedi: Survivor

Bear in mind that Jedi: Survivor’s maps are built in a Metroidvania style, which means certain paths, secrets, and collectibles won’t always be available to you on your first pass through a region. Instead, you’ll need to progress further through the story and unlock new traversal skills and abilities before returning to find what you missed before.
Take a look below for our in-progress list of every last collectible location on Koboh in Jedi: Survivor.
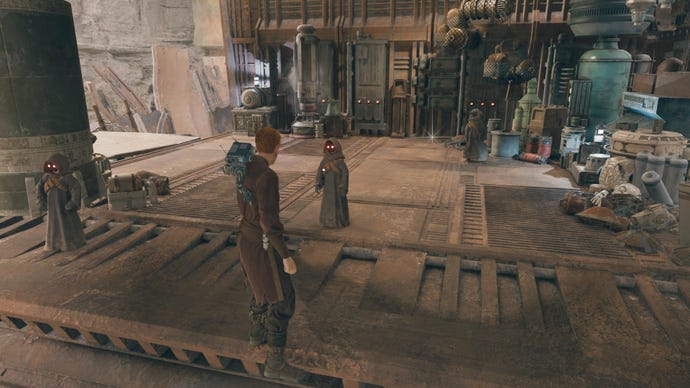
Koboh collectibles: All locations
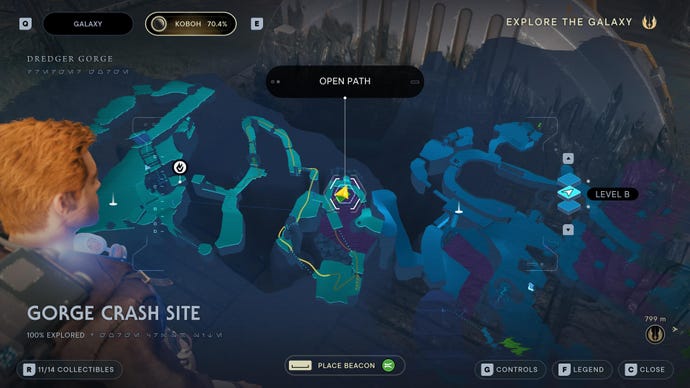
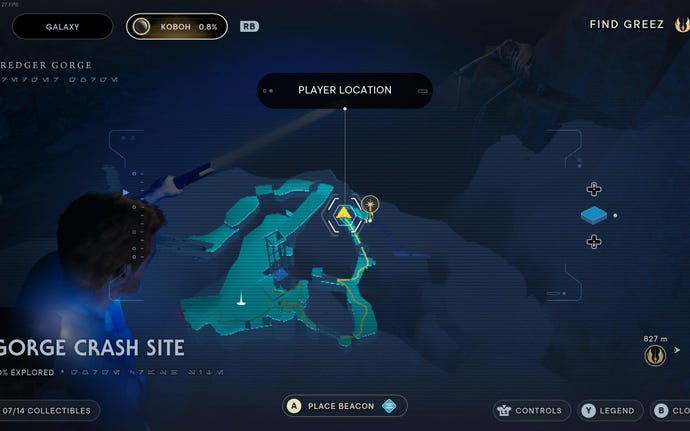
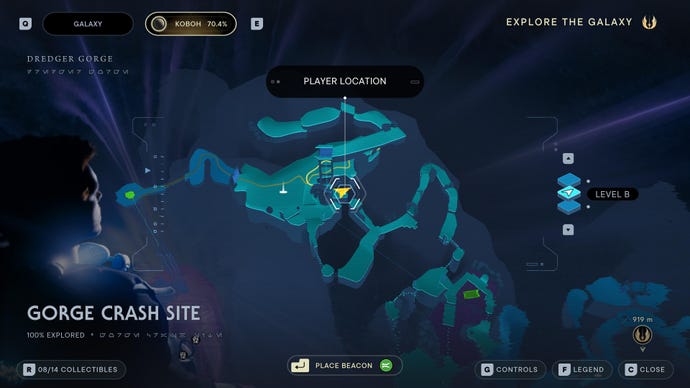
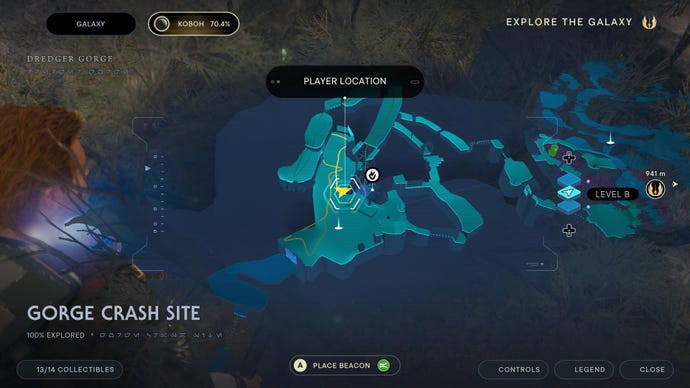
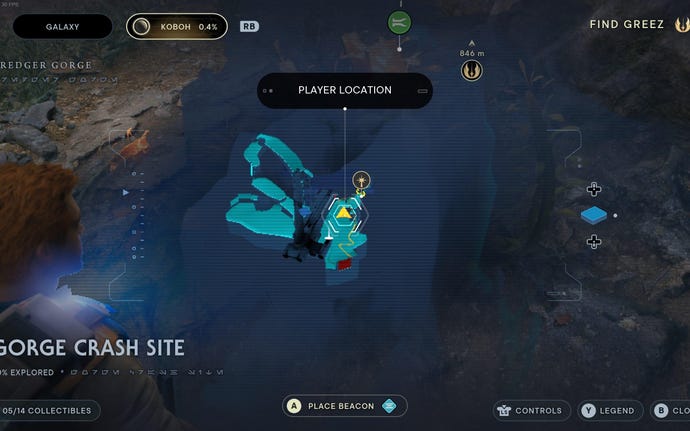
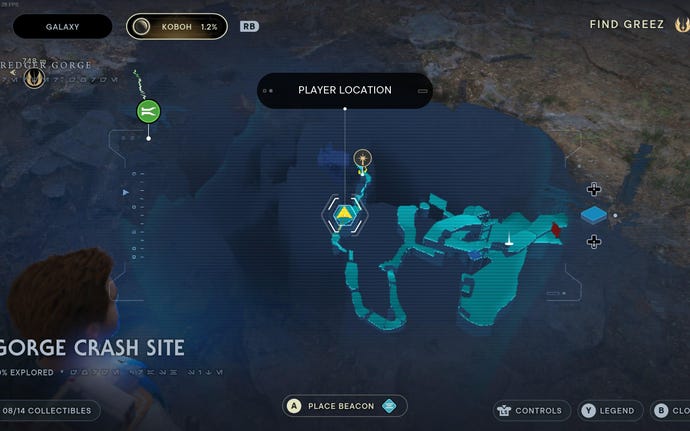
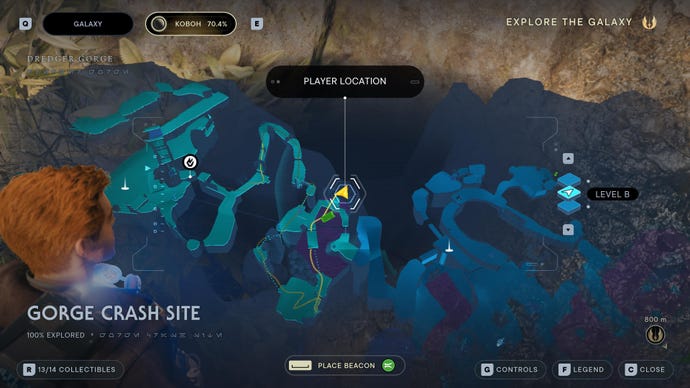
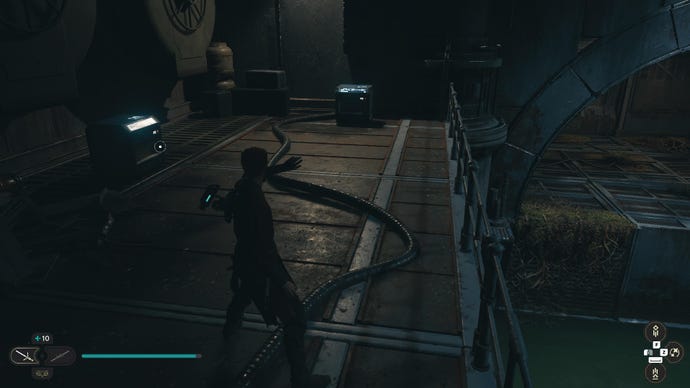
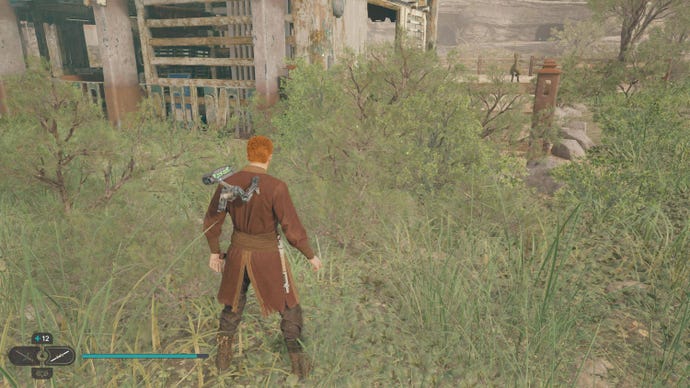
Gorge Crash Site collectibles
Gorge Crash Site is where you start your journey on Koboh. It has 14 collectibles in total:
Gorge Crash Site Chests:

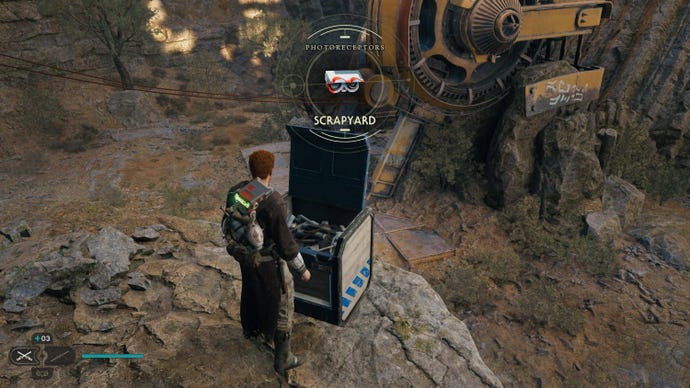
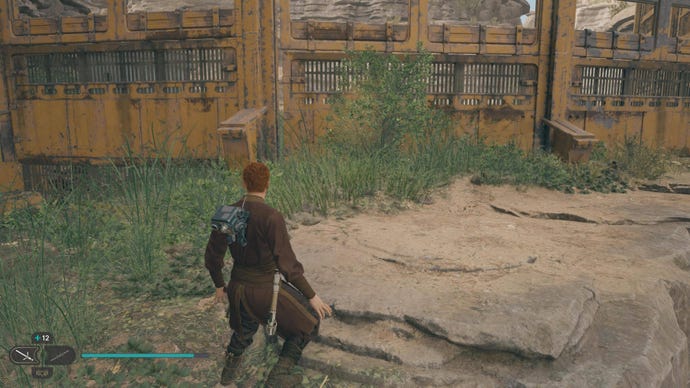
Chest #1 (Scrapyard photoreceptors):Up the ledge in front of the Gorge Crash Site Meditation Point.

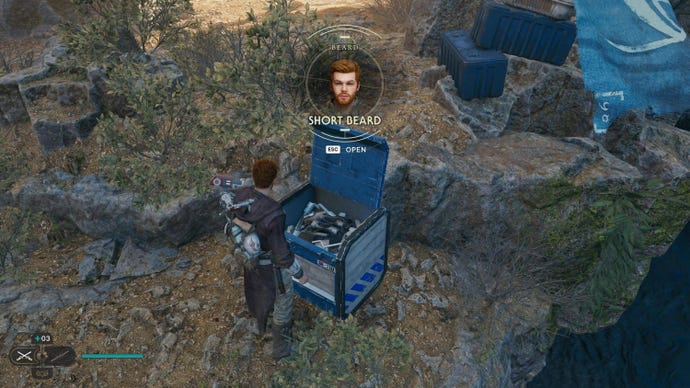
Chest #2 (Short Beard):On the far side of the mud pit at the end of the region, hidden in the leaves.
Gorge Crash Site Essences:

Skill Point Essence:Use Force Lift on the pit droid’s ship that’s stuck in the tar pit towards the end of the region. Then climb onto the ship to get the essence.
Gorge Crash Site Databanks:


Force Echo (Broken Dredging Machine):A short way down the river path from the Gorge Crash Site Meditation Point.


Databank (Broken Mining Droid):Continue past the Broken Dredging Machine in the river path to find another broken machine at the end.
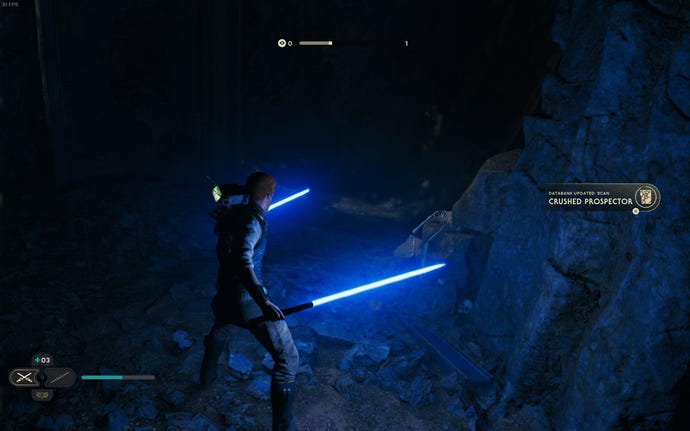
Databank (Crushed Prospector):In the dark tunnel after the first batch of Bedlam Raiders.


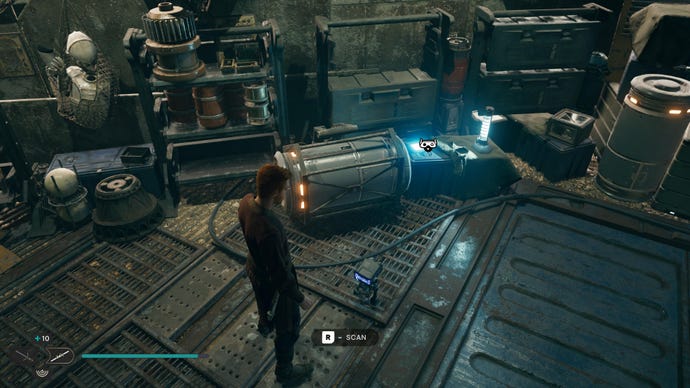
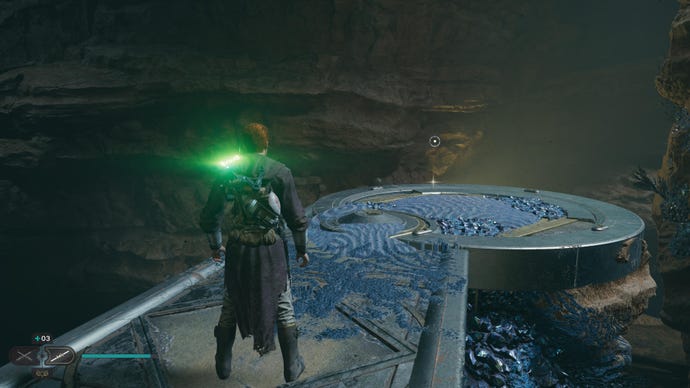
Databank (Koboh Tar):Scan the tar pit at the end of the region.
Gorge Crash Site Force Tears:

Force Tear (Fractured Burden):Requires Force Lift. Look underneath the elevator right next to the Meditation Point.
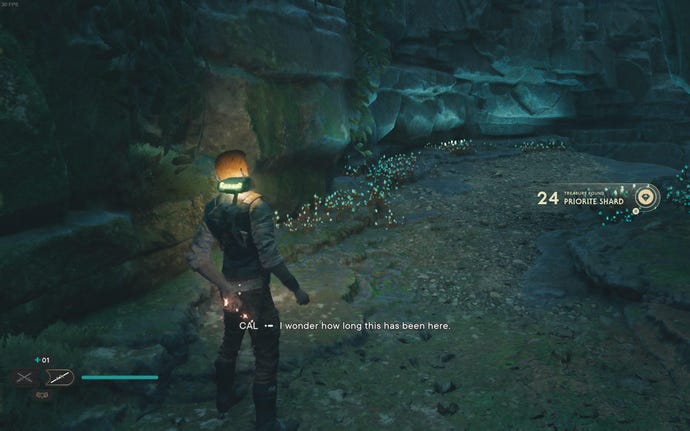
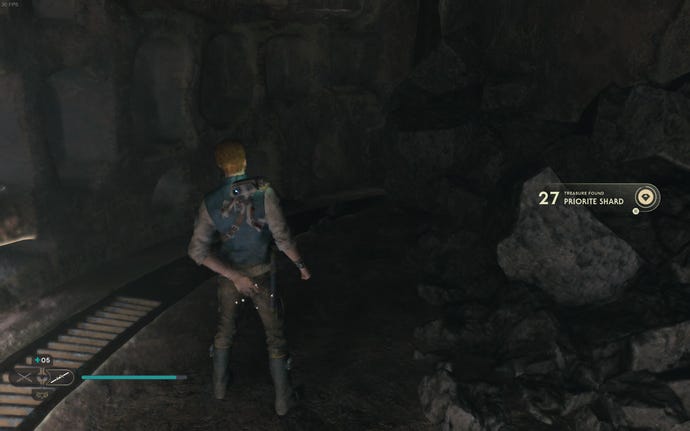
Gorge Crash Site Treasures:


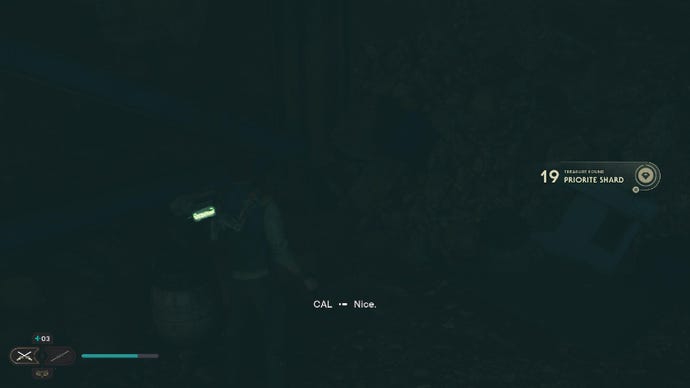
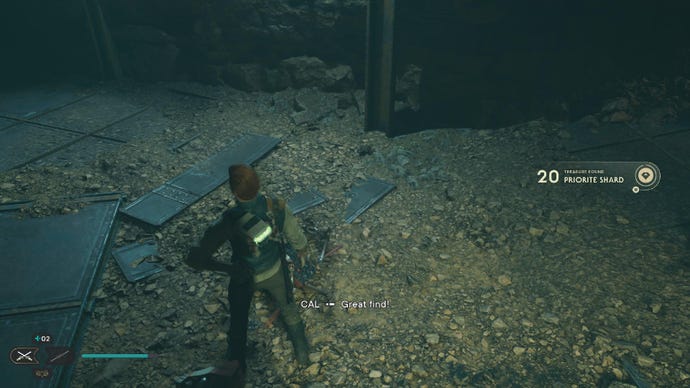
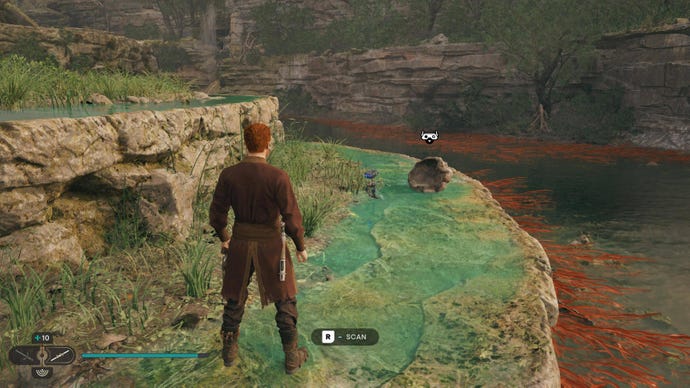
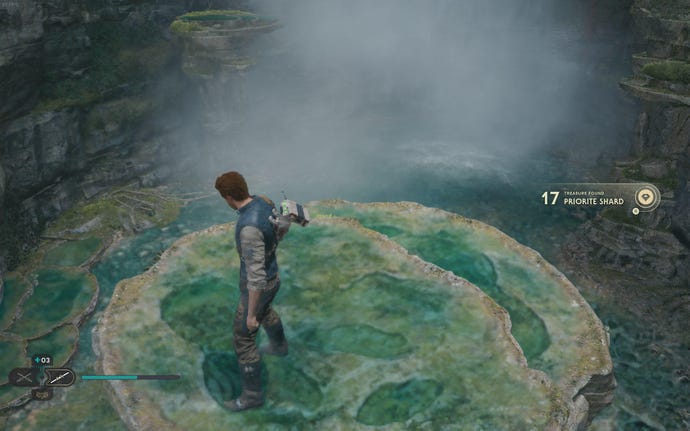
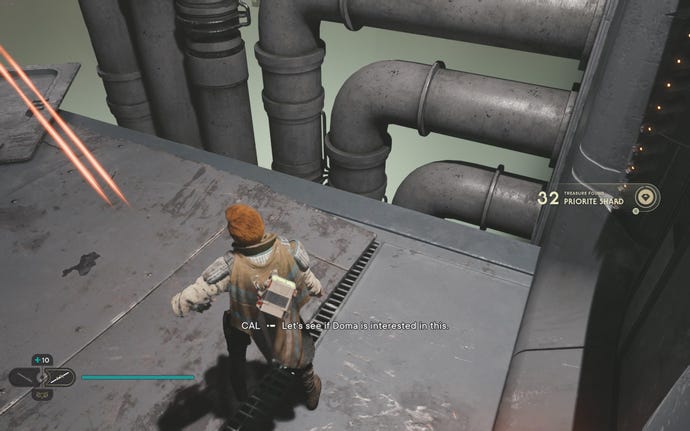
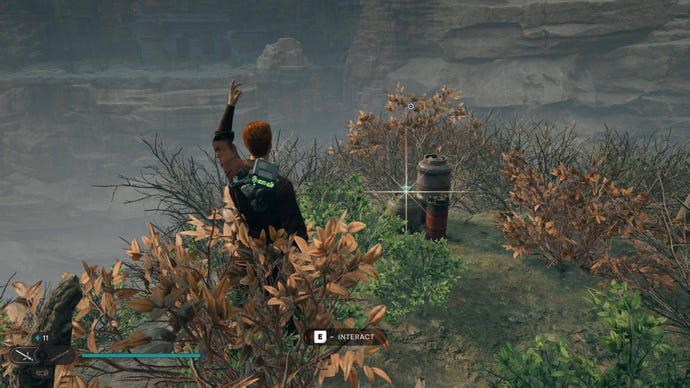
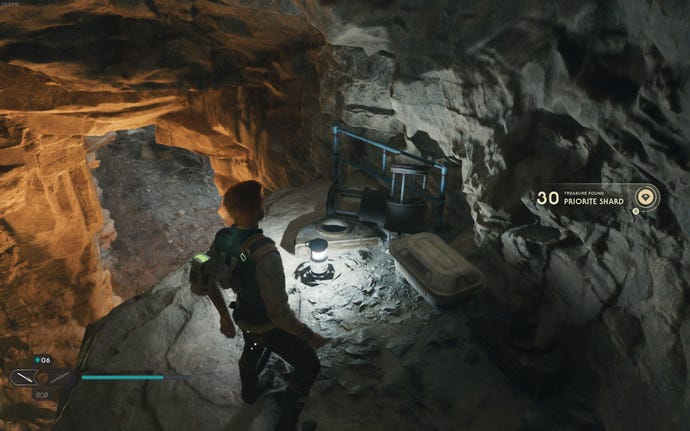
Priorite Shard #1:In the nest up the ledge at the end of the river side path. Wall-run to get there.


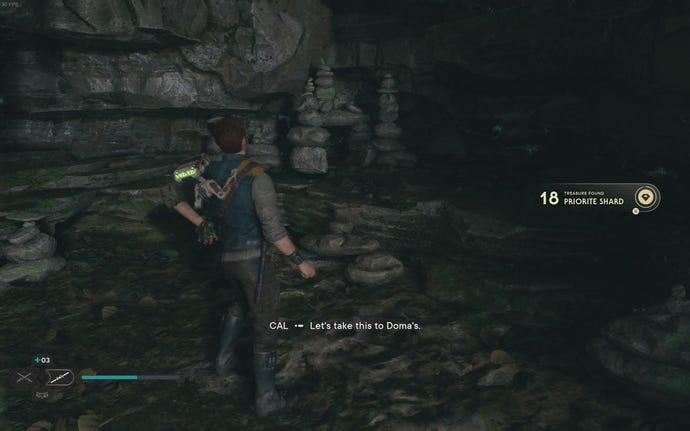
Priorite Shard #2:Just after the first two B1 droid enemies, in the cave on the left.
Gorge Crash Site Seed Pods:


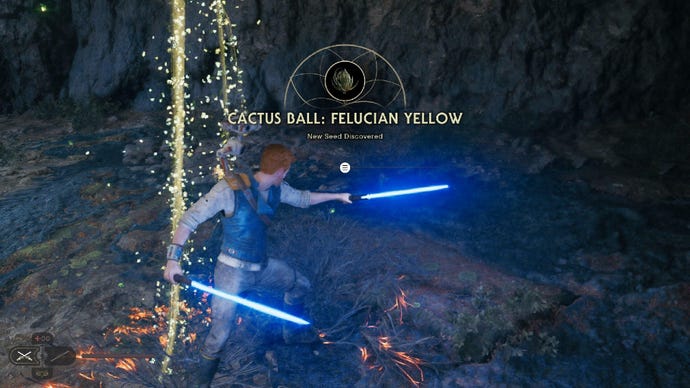
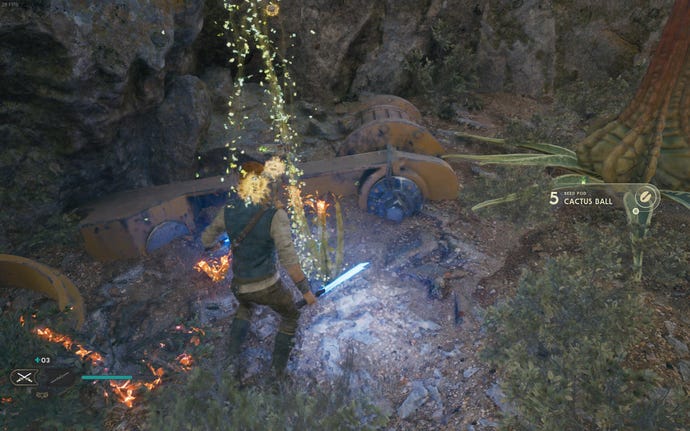
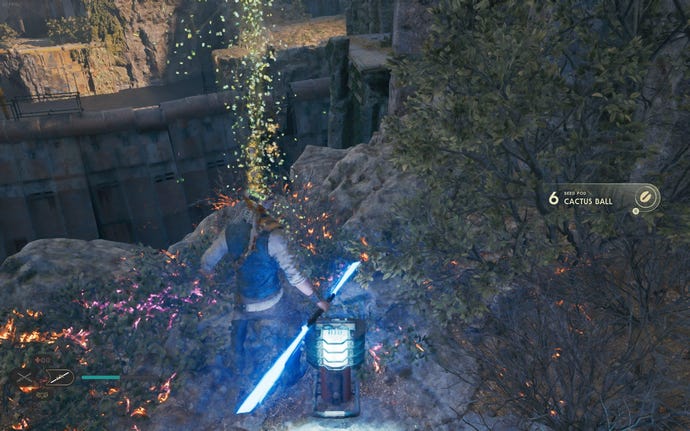
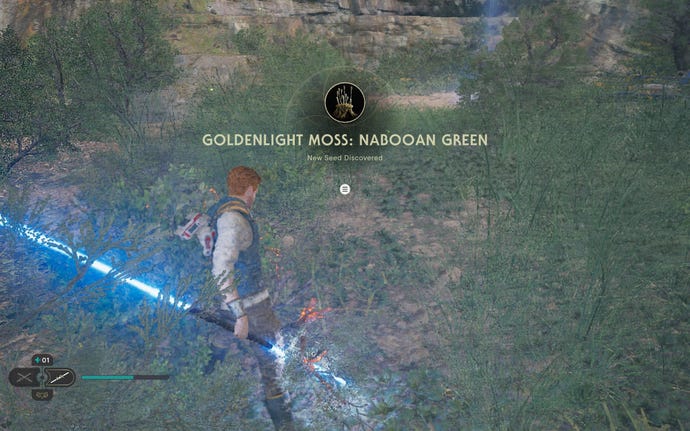
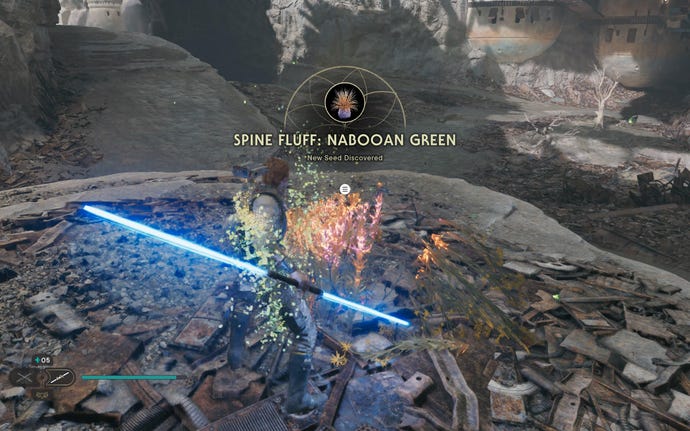
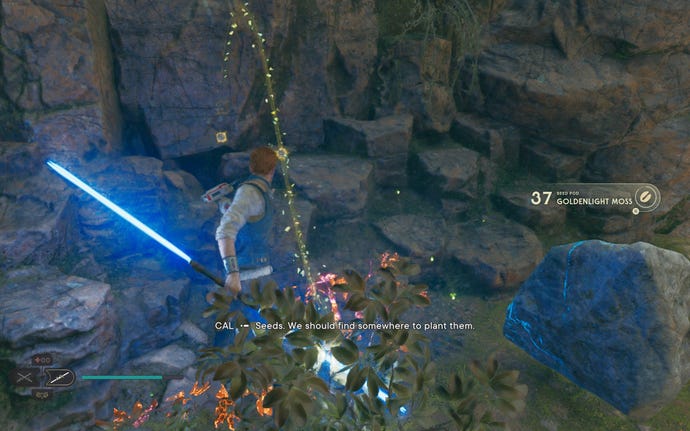
Cactus Ball (Nabooan Green):To the side of the stacked crates which leads to the Scrapyard photoreceptors chest, right next to the Meditation Point.

Cactus Ball:Head down the main path until you reach the platform with a pole leading out from it, back towards the cave. Slash the glowing plant in the centre of this platform.

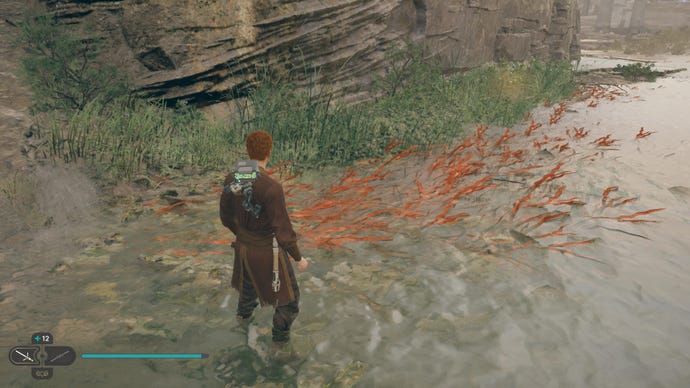
Fire Pineapple (Nabooan Green):On the edge of the tar pit just beyond the droid.
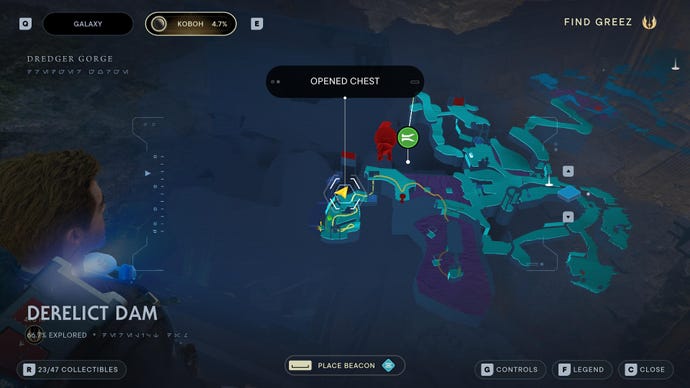
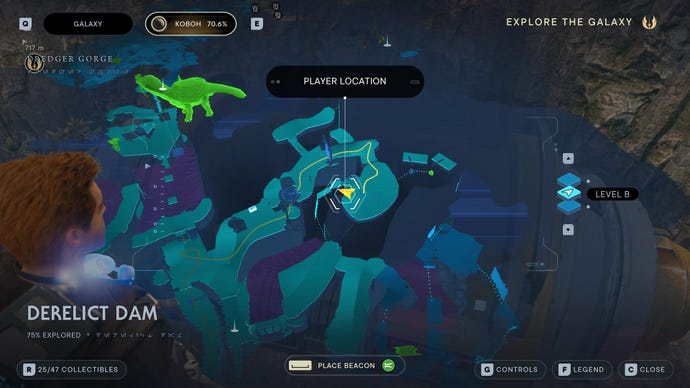
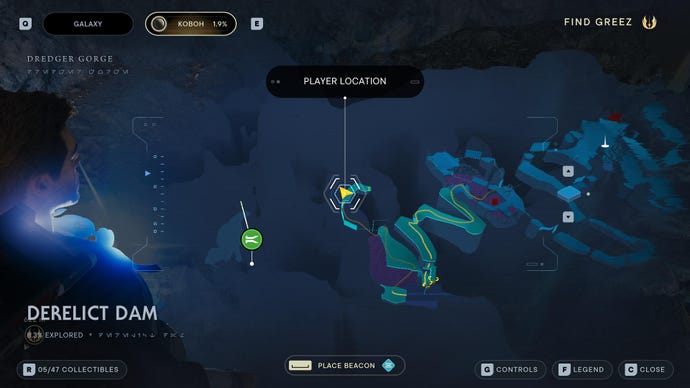
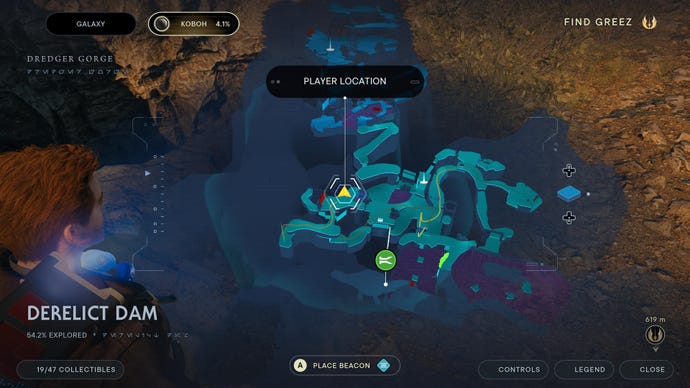
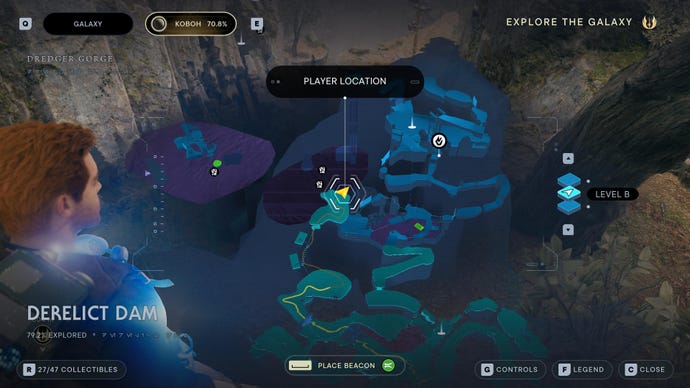
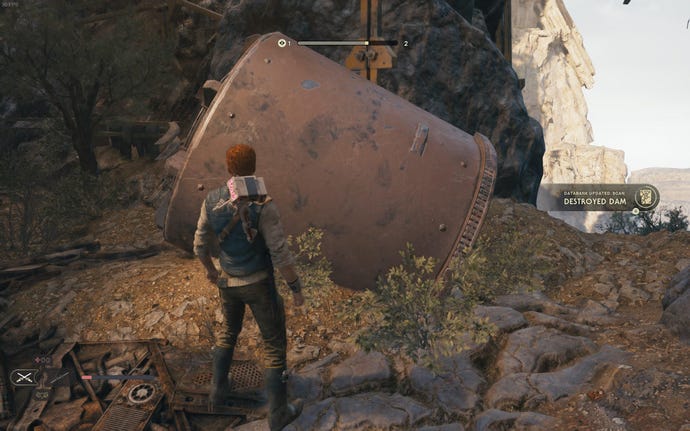
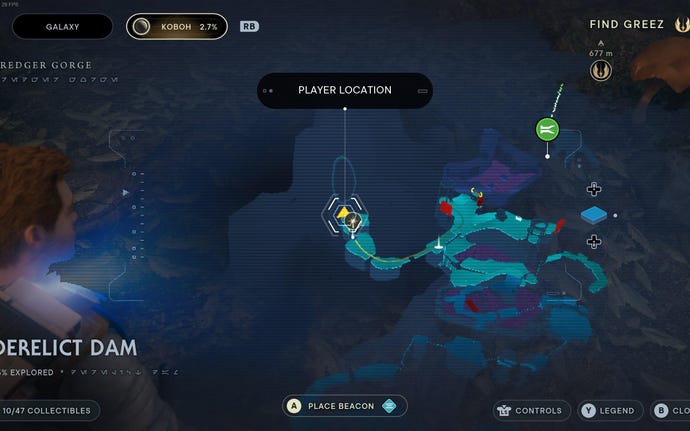
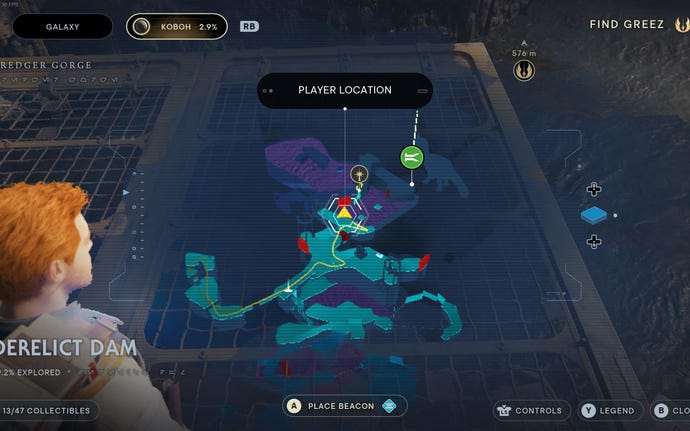
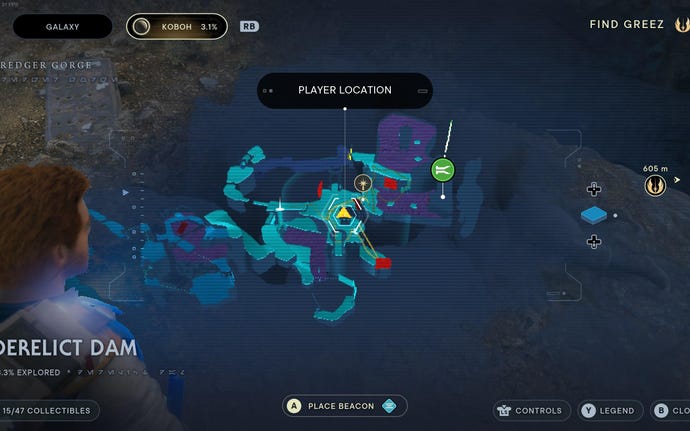
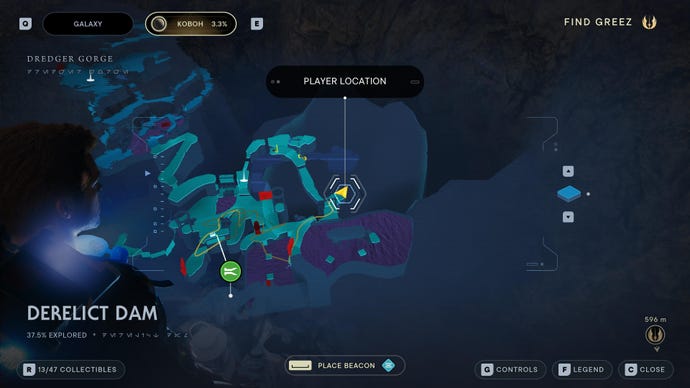
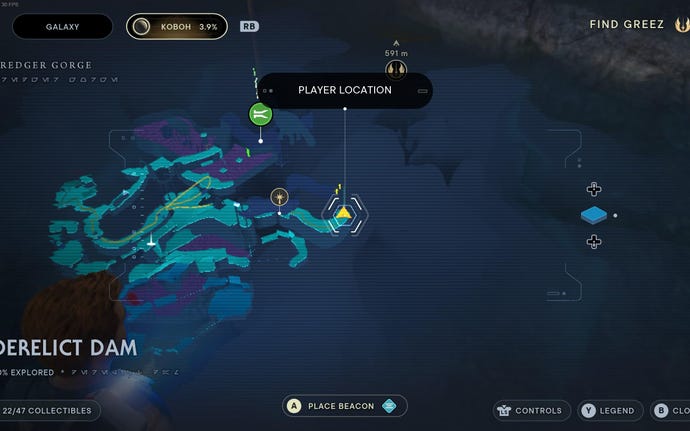
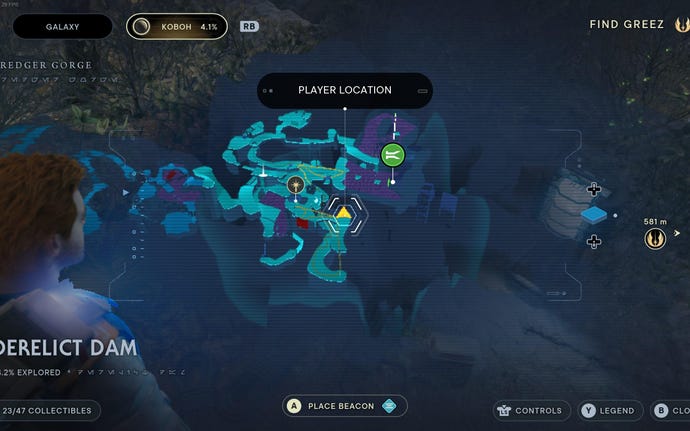
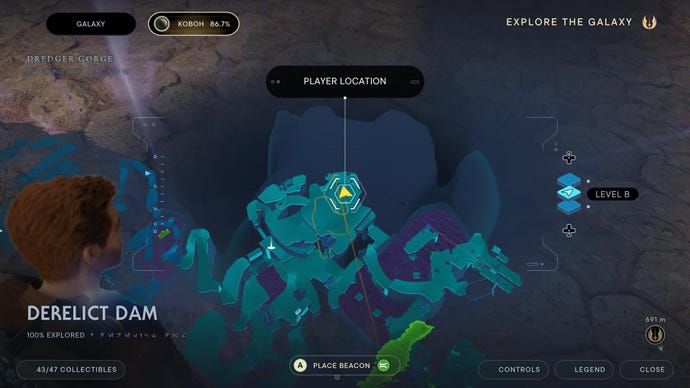
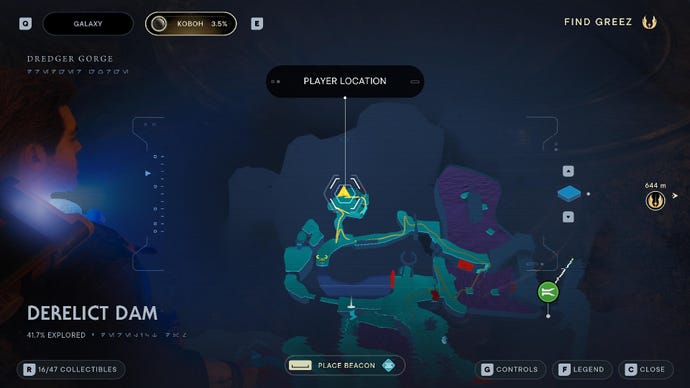
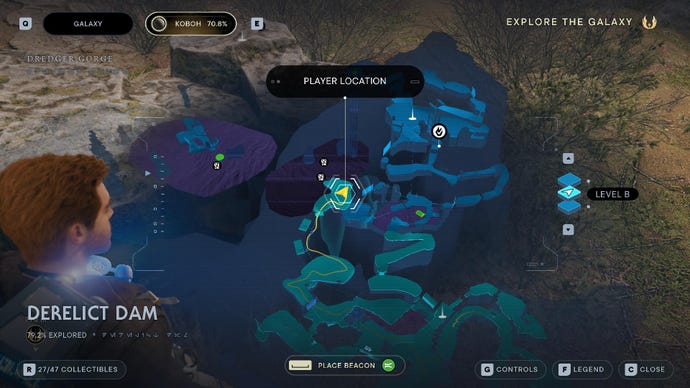
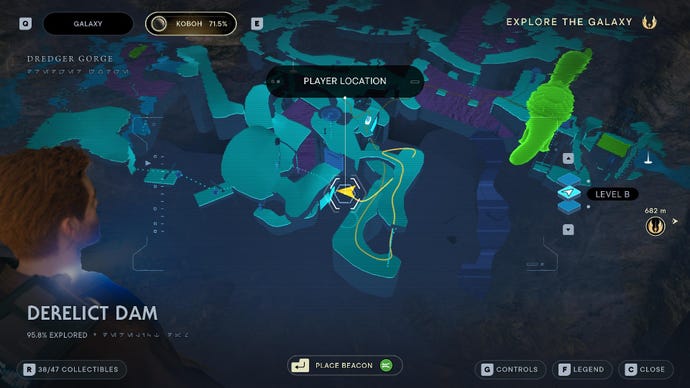
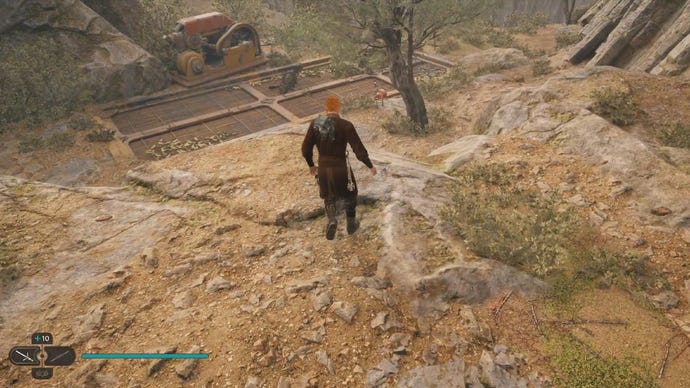
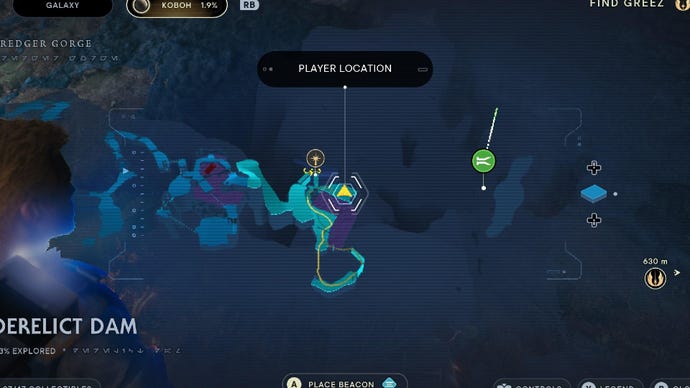
Derelict Dam collectibles
Derelict Dam, just beyond Gorge Crash Site, is the first very large region you’ll find on Koboh. It has a whopping 47 collectibles:
Derelict Dam Chests:


Chest #2 (Light Metals weapon materials):Follow the main path from the Derelict Dam Meditation Point. The chest is to the left, right in front of you.


Chest #3 (Anodized Metal BD-1 materials):InsideVashtan Wolfe’s lair, on the upper ledge.


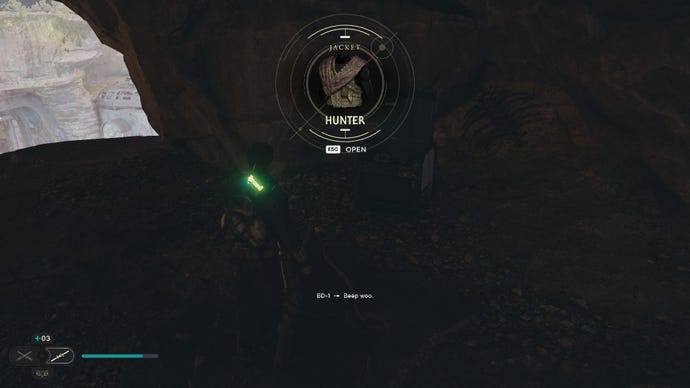
Chest #4 (Tactical jacket):Enter the cave on the left beyond the dam, and keep going until you drop down a hole where the chest lies waiting.


Chest #5 (Mullet hair):Climb to the top of the dam, use the poles and then the platforms in the tar lake on the right to reach the ledge with the chest.

Chest #6 (Scrapyard head):Beyond the Trontoshell (the giant bird), clear the enemies, then push the cube so you can reach the wall-run segment up to the ledge with the chest.


Chest #7 (Two-tone metal weapon materials):A red chest that requires the Electro-Dart ability. Come back to Vashtan Wolfe’s lair and hit the electrical conduit on the wall with a dart to open the chest.

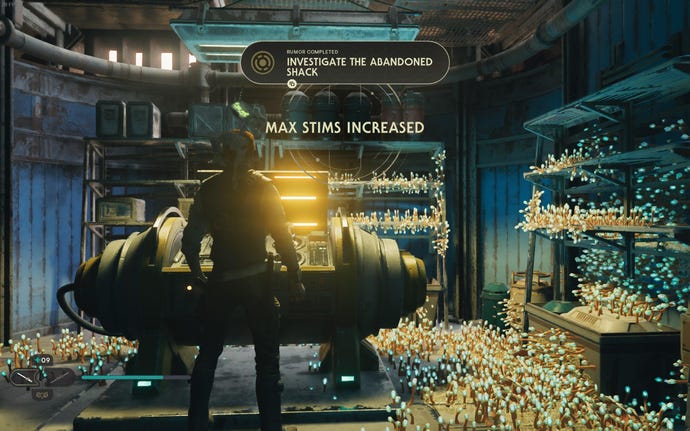
Stim Canister:In the Gorocco Matriarch arena, which requires you to use Force Lift on the large gate atop the elevator next to the Derelict Dam Workbench.
Derelict Dam Essences:

Skill Point Essence #1:Beyond the mud lake below the Meditation Point, just after the curved wall-run section.

Health Essence:Just beyond the Gorocco arena across the rickety bridge from the Meditation Point.

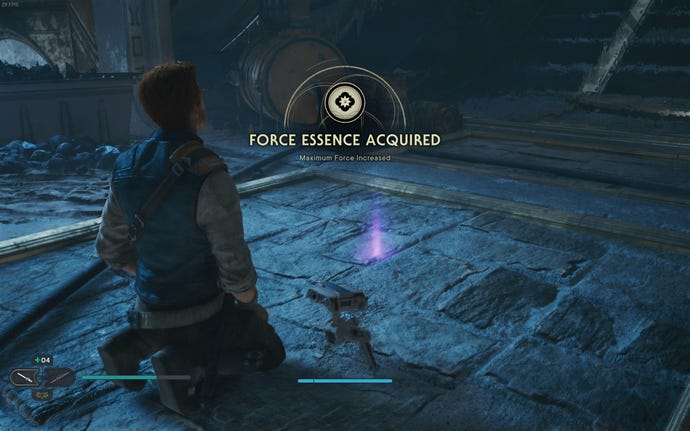
Force Essence:At the top of the elevator next to the Workbench. Use a Roller Mine to blow open the wall on the lower ledge beside the Workbench, then follow the path up and across the bridge.

Upgrade Essence #2:Beyond the Gorocco Matriarch arena, up the floating grapple points, just beyond the next Gorocco. Requires Force Lift to break open the gate leading to the arena, and also requires you to be able to launch yourself off floating grapple points.

New Perk Slot:Use Force Lift on the strangely pommel-shaped elevator near the Trontoshell, then follow the puzzle to the very end. Requires Force Lift and Koboh Grinding upgrade for BD-1.
Derelict Dam Databanks:


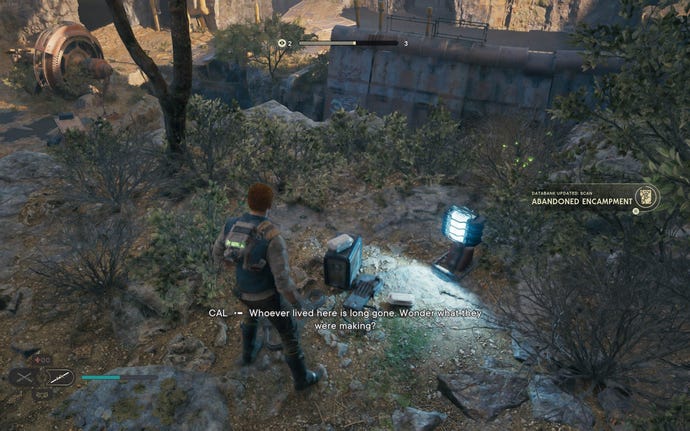
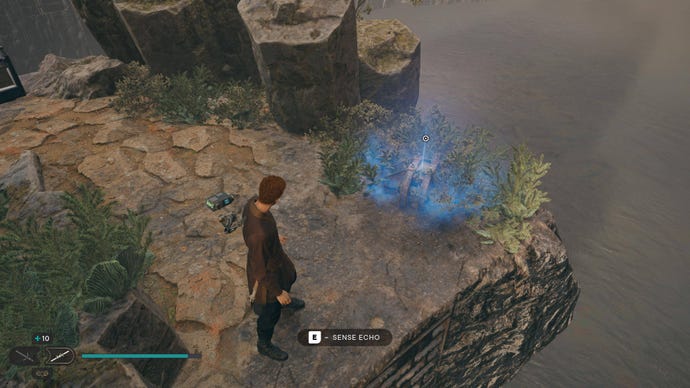
Force Echo (Murdered Prospector):A short way into the Derelict Dam, down the snaking ledges, propped up against a tree.


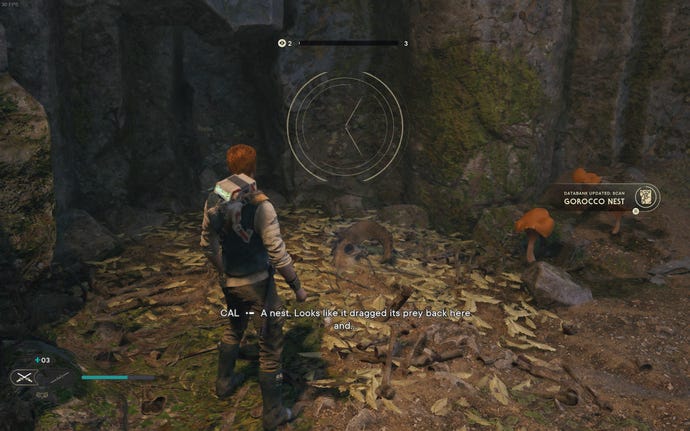
Databank (Gorocco Nest):After the Gorocco fight across the rickety bridge from the Meditation Point, Force Pull the side path and head down it.

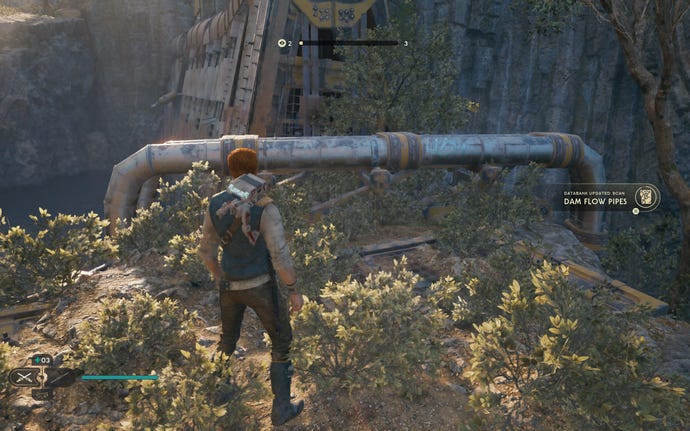
Databank (Dam Flow Pipes):From the elevator/workbench side, hop across the gap to near the dam itself, and scan the pipes on the right.

Databank (Crumbling Dam Wall):Scan the dam itself where the tar is leaking through.

Databank (Dead Bedlam Raider):On the ledge beside the Workbench, wall-run across the gap and scan the dead body.
Force Echo (A Desperate Escape):In the cave after the first couple of Roller Mines to the left behind the dam.
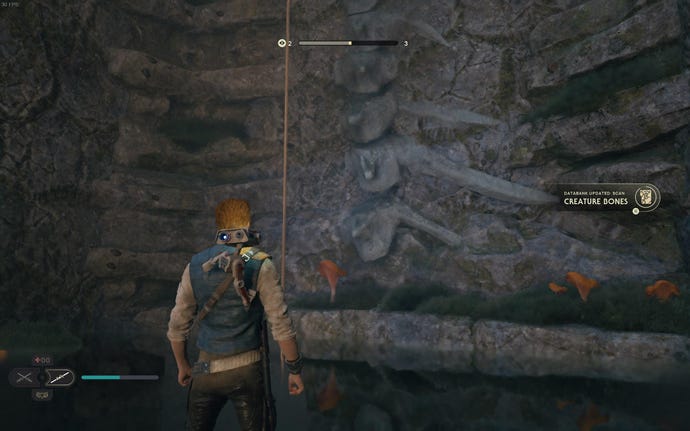
Databank (Creature Bones):At the top of the elevator next to the Workbench. Use a Roller Mine to blow open the wall on the lower ledge beside the Workbench, then follow the path up. Found while climbing the rope.

Force Echo (The Dredger Run):In the bog beyond the dam, next to the Mullet hair chest. Use the platforms in the bog to reach the ledge.
Derelict Dam Force Tears:

Force Tear (Fractured Agility):In front of the top of the elevator between the Roller Mine cave and the dam. To reach the top for the first time, free the giant bird in Forest Array, then reach the end of Boiling Bluff and ride the bird across the map.
Derelict Dam Treasures:

Priorite Shard #1:On the ledge below the Murdered Prospector near the start of the region. Hop off the edge to find it.

Priorite Shard #2:Drop down to the ledge beside the Derelict Dam Workbench.

Priorite Shard #3:Head to Vashtan Wolfe’s lair and inspect the left brazier in front of the door.

Priorite Shard #4:Climb to the top of the dam itself, then use the poles to reach the central ledge on the surface of the lake.


Priorite Shard #6:Beyond the Gorocco Matriarch arena,. up the floating grapple points, just beyond the next Gorocco. Requires Force Lift to break open the gate leading to the arena, and also requires you to be able to launch yourself off floating grapple points.

Priorite Shard #7:Up the elevator from the Workbench, turn left and cross the bridge, then turn right and drop off the rigth side onto a pillar with the shard.

Priorite Shard #8:Destroy the scavenger droid at the top of the elevator nearest the Meditation Point. To reach the top for the first time, free the giant bird in Forest Array, then reach the end of Boiling Bluff and ride the bird across the map.

Priorite Shard #9:Destroy the dam, and then wade underneath the dam and turn right to find a well-hidden Priorite Shard.

Priorite Shard #10:Use Force Slam on the weird pommel-shaped elevator near the giant beast, turn right at the end after the droideka, and climb the walls up to the top ledge.
Derelict Dam Seed Pods:
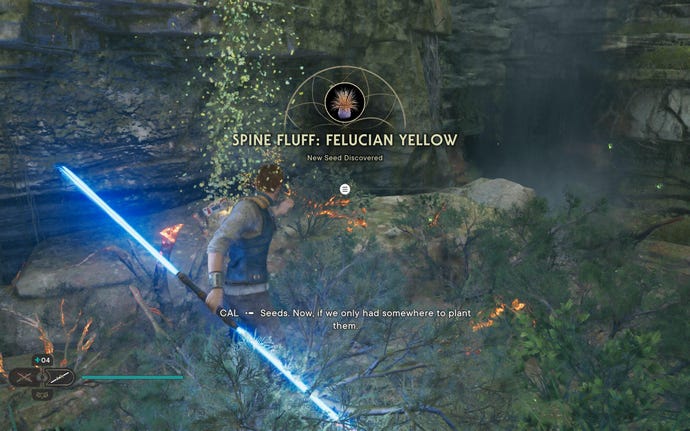
Cactus Ball (Felucian Yellow):Continue past the brown barrel next to the bog below the Meditation Point, and into the alcove ahead. Kill the enemies there, and slash the glowing plant.

Cactus Ball:Head downwards before the Meditation Point, reach the end of the bog where the animal skull is, and look towards the cliff edge for the plant.

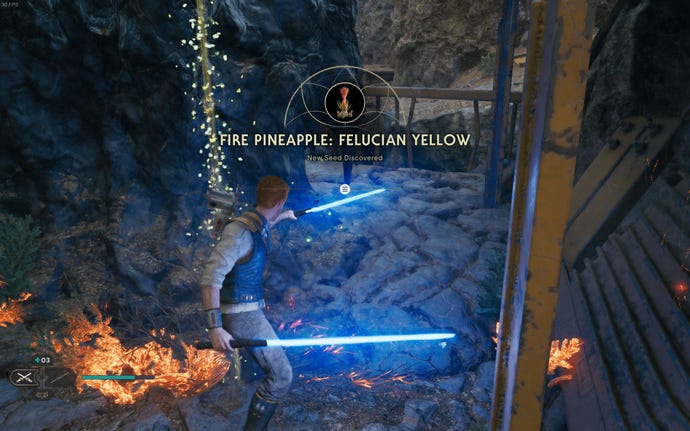
Fire Pineapple (Felucian Yellow):Slash the glowing plant beneath the platform that connects the Meditation Point area to the dam area.

Cactus Ball:Slash the glowing plant near the Dead Bedlam Raider on the ledge below the Workbench.
Cactus Ball:Slash the glowing plant on the path sloping down from the Workbench.


Fire Pineapple:At the base of the Trontoshell, slash the glowing plant up ahead (it’s right after the Trontoshell cutscene).

3x Fire Pineapple (Rare):Beyond the Gorocco Matriarch arena,. up the floating grapple points, just beyond the next Gorocco. Requires Force Lift to break open the gate leading to the arena, and also requires you to be able to launch yourself off floating grapple points.

Cactus Ball:Beneath the machinery that’s right next to the Workbench, on the ledge below.


Fire Pineapple (Alderaanian Blue):Use Force Lift on the strange pommel-shaped elevator near the Trontoshell, then immediately turn left at the top. Plant is at the end.

3x Fire Pineapple (Dathomirian Red):Scattered in front of you as you arrive at the top of the elevator nearest the Meditation Point. To reach the top for the first time, free the giant bird in Forest Array, then reach the end of Boiling Bluff and ride the bird across the map.
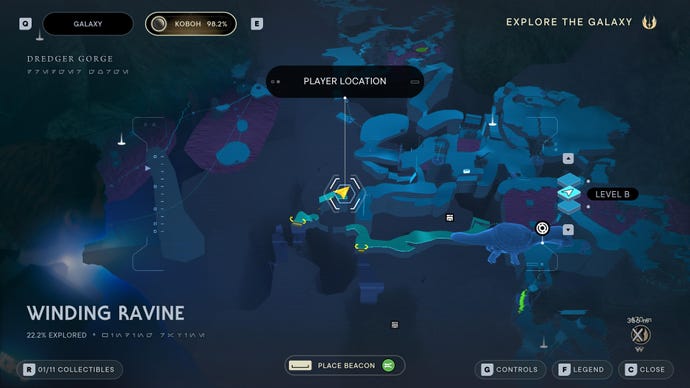
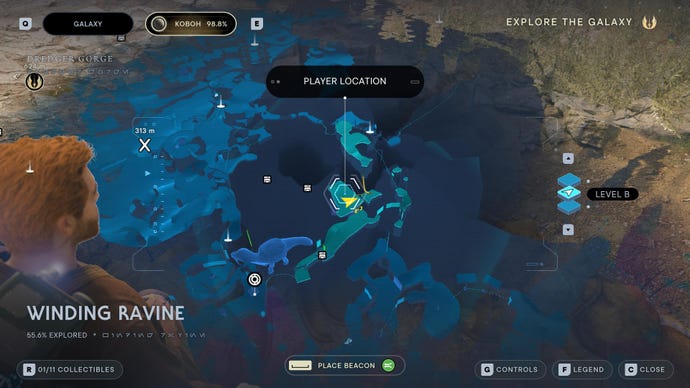
Winding Ravine collectibles
Here’s a region a lot of players may not know even exists at first. To get there, you need to approach the Trontoshell at the end of Derelict Dam, and “tame” it with the same button you use to call Nekkos to you. This will make the Trontoshell lower its head to you, and you can grab onto one of its horns which is covered in vines. It’ll then move you over to the beginning of the Winding Ravine region - an area with a total of 11 collectibles:
Winding Ravine Chests:

Chest #1 (Hunter lightsaber):Follow the right path when it splits, all the way until you use the glider. Then jump down to the larger ledge with all the Shiverpedes, and jump to the final ledge from there. You’ll see the chest next to the shortcut back down to the start of the region.

Chest #2 (Warm Metal weapon materials):Take the left path when it splits, use the cube to reach the upper ledge around the corner, and turn left halfway along the wall-run segment to reach the side passage with the chest.

Chest #3 (Goatee beard):Take the left path when it splits, use the cube to reach the upper ledge around the corner, reach the end, and push the second cube down. Then stack the two cubes atop each other and push them back to where you found the first cube. Use them to reach the ledge above and get the chest.
Winding Ravine Essences:

Skill Point Essence:Take the left path when it splits, use the cube to reach the upper ledge around the corner, reach the end, and push the second cube down. Use the first cube as a platform to bridge the gap below, so you can push the second cube up to the edge where the Essence is and reach the top.
Winding Ravine Treasures:
Priorite Shard #1:Take the right path when it splits, and wall-run ALL the way up.

Priorite Shard #2:Take the right path when it splits, emerge out into the wall-run section and use the rope to swing across. Then, turn around and use the rope again to reach the very top ledge back the way you came.
Winding Ravine Seed Pods:

5x Cactus Ball (Rare):Follow the right path when it splits, all the way until you use the glider. Then jump down to the larger ledge with all the Shiverpedes. There are five plants scattered about this ledge.
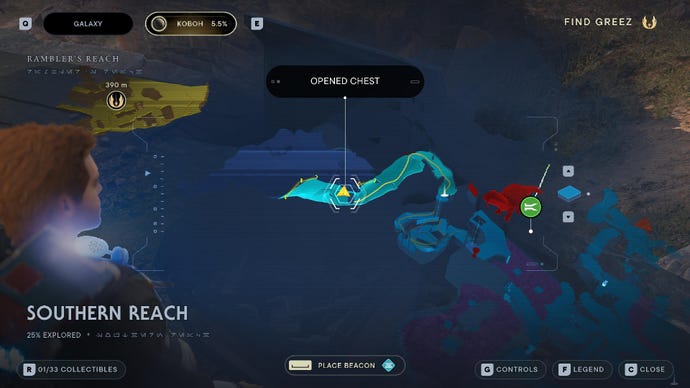
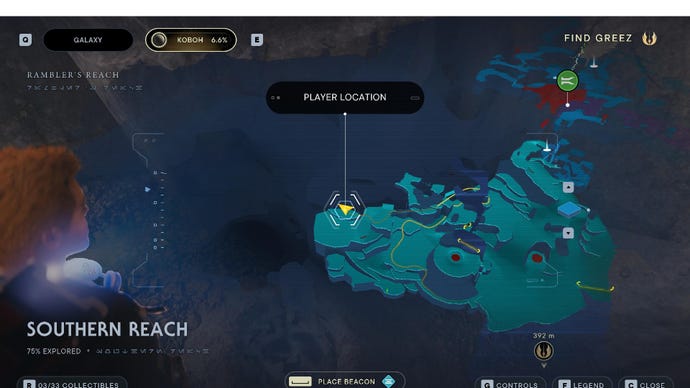
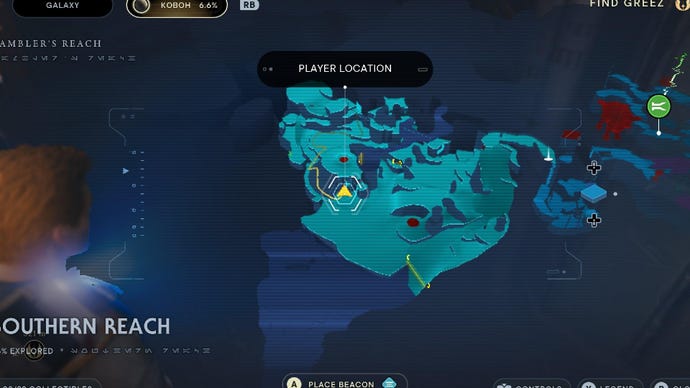
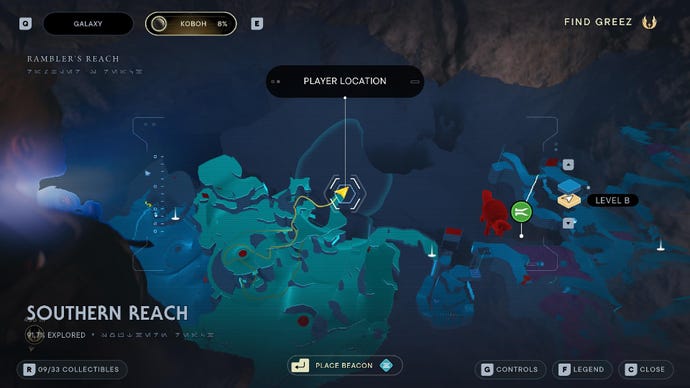
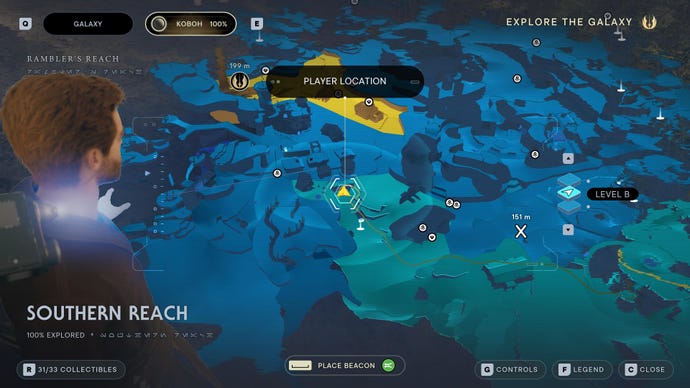
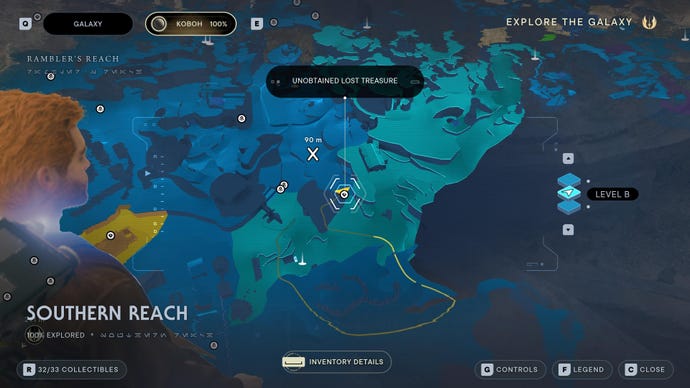
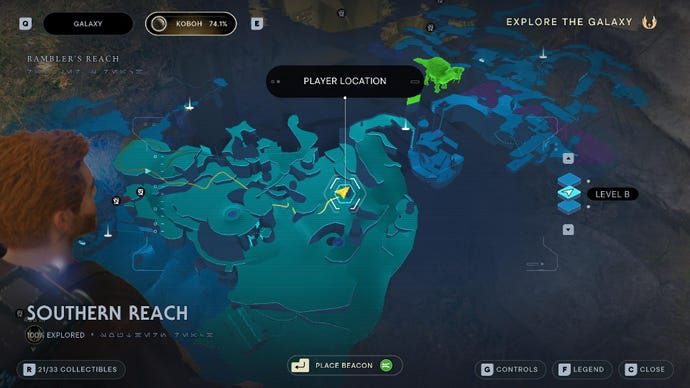
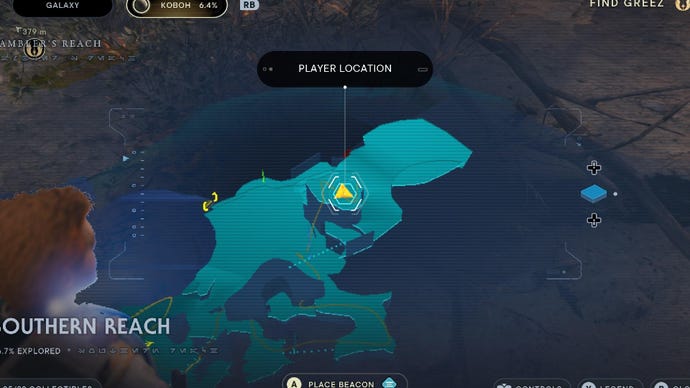
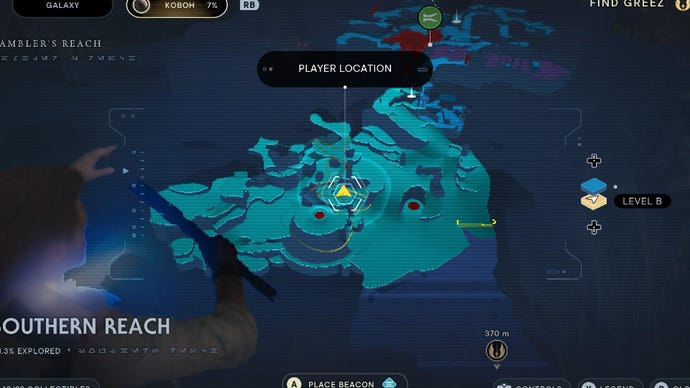
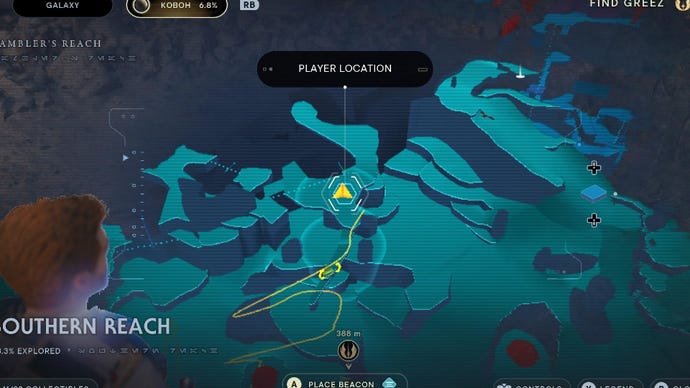
Southern Reach collectibles
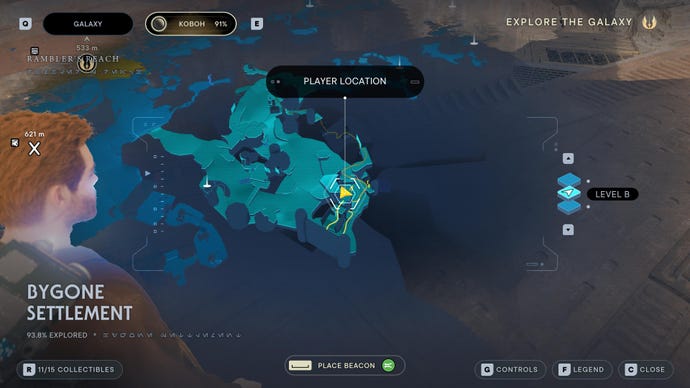
Beyond the massive Trontoshell creature lies Southern Reach, another sprawling area filled with a total of 33 collectibles, most of which are (unfortunately) plants:
Southern Reach Chests:
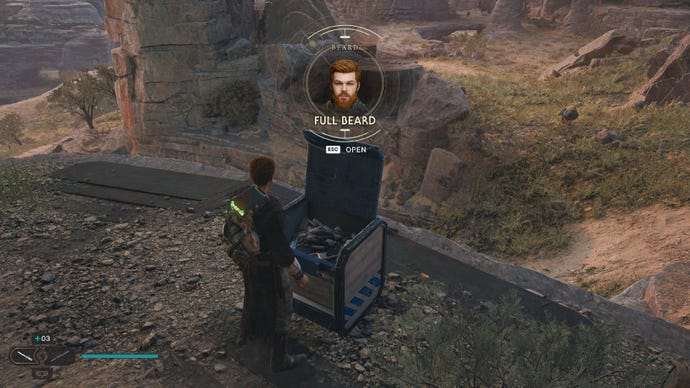
Chest #1 (Full Beard):On the upper ledge just behind where Mosey is first seen taking care of Brutus the Nekko.

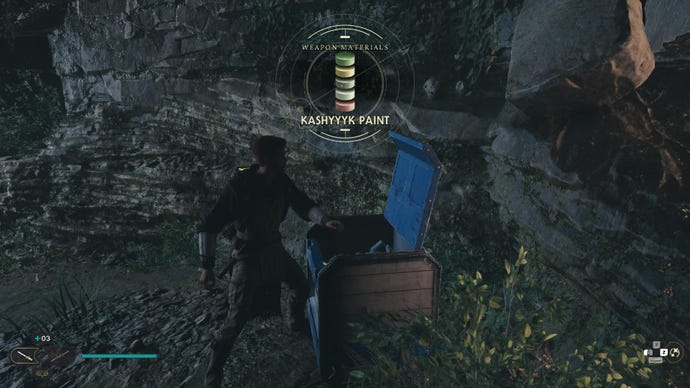
Chest #2 (Kashyyyk Paint weapon materials):Opposite Mosey and Brutus, past the two Gorgers, climb the vines to the top. Then swing across the poles, past the two Bramliks and the fnial pole, then check beneath the path you just came from.

Chest #3 (Quickdraw Blaster):Force Lift the gate in Hunter’s Quarry up the ledge, complete part of the puzzle so that the beam hits one of the town’s buildings, and then use BD-1’s Koboh Grinder spray to lead the beam’s energy into the marked house, to clear up all the Koboh matter inside and make the chest accessible.
Southern Reach Essences:


Skill Point Essence:Use the vine to swing over the Gorocco below, then move a little further on and look towards the cliff wall on your right for the essence.
Southern Reach Databanks:
Force Echo (Besotted):Use the vine to swing over the Gorocco below, and look towards the cliff edge.

Databank (Unusual Silo):Drop from the hanging vine to where you find the Gorocco, and follow the curved metal path around the silo.


Force Echo (Doma, Unbowed):Found on a dead body down the main path of Riverbed Watch.
Southern Reach Treasures:


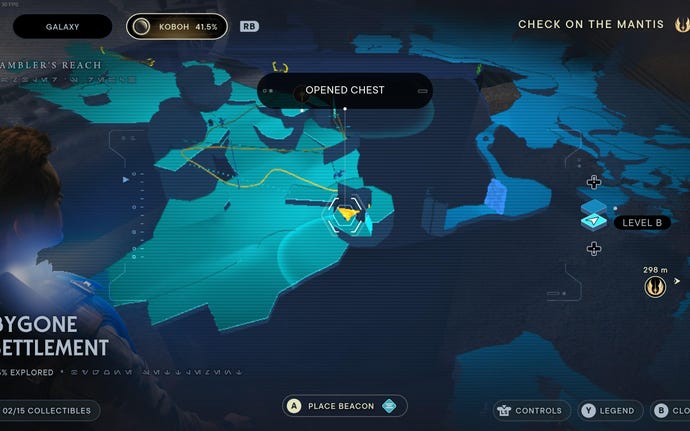
Priorite Shard #1:Opposite Mosey and Brutus, past the two Gorgers, climb the vines to the upper ledge.


Priorite Shard #2:On top of the giant circular silo building that you need to parkour up using the two parallel walls.

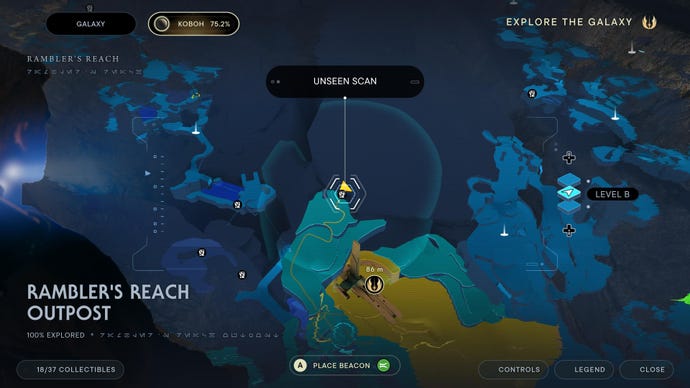
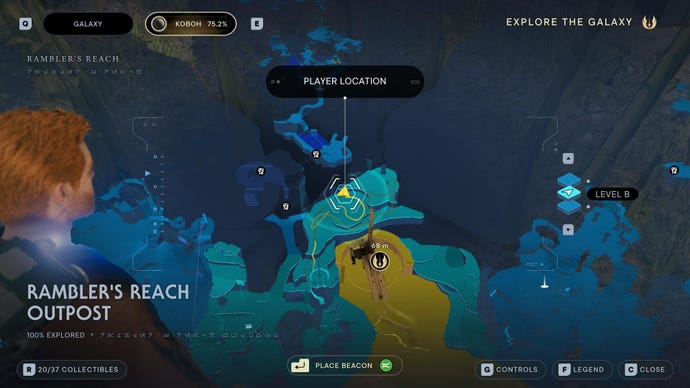
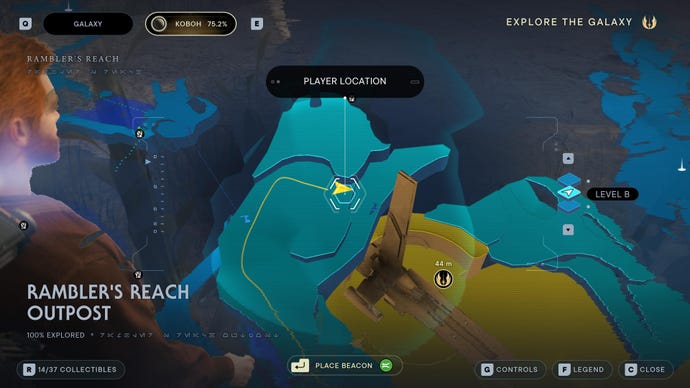
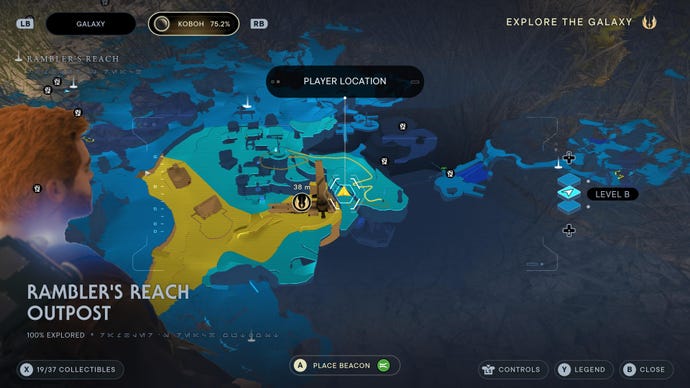
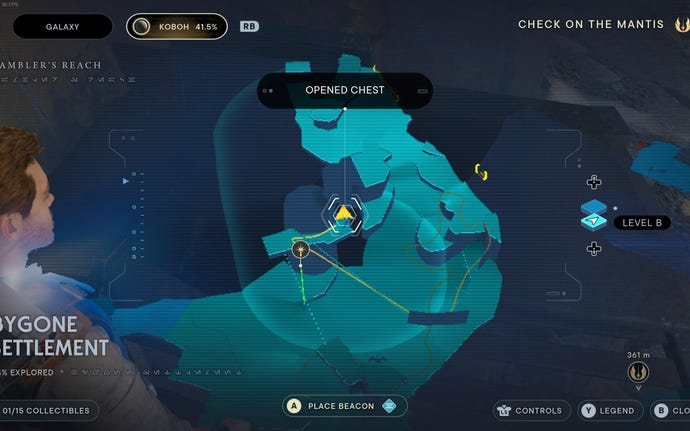
Priorite Shard #3:Follow the path onward from the top of the giant silo in Rambler’s Reach.


Priorite Shard #4:Use Force Lift on the centre of the small dam in the river, and look underneath.

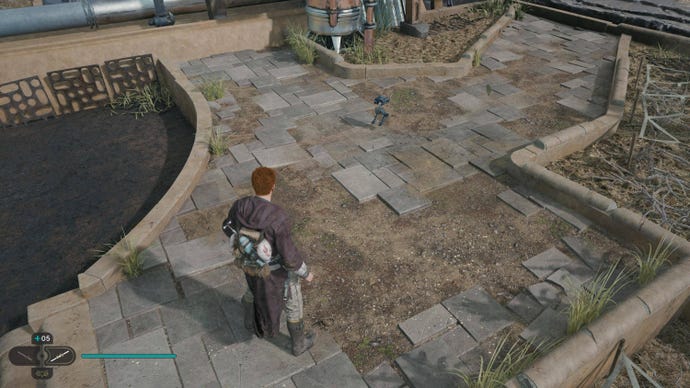
Priorite Shard #5:Force Pull the skull on the Rambler’s Reach Outpost entrance archway.

Priorite Shard #6:Use the glider in Hunter’s Quarry to reach the top of this cliff near the Rambler’s Ranch Outpost Meditation Point.
Southern Reach Seed Pods:

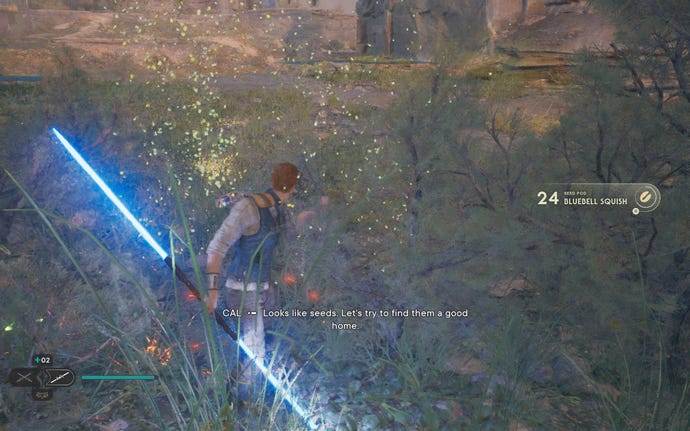
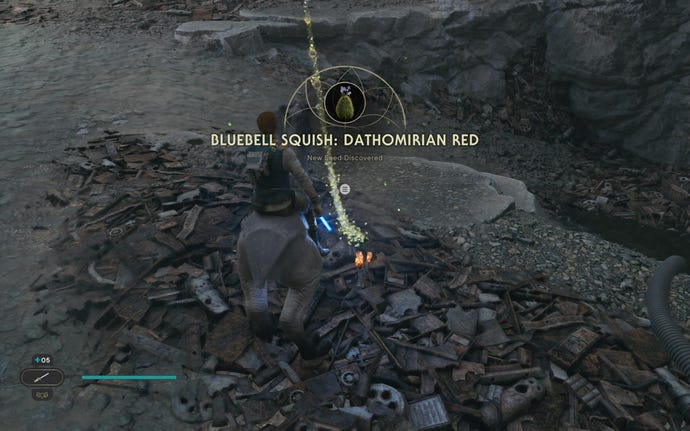
Bluebell Squish (Nabooan Green):On the path leading down the hill to Mosey after cutscene.

Cactus Ball:When you see Mosey, turn right and hug the right-hand side. Halfway between Mosey and the waterfall is a plant to cut.

Cactus Ball (Alderaanian Blue):On the left as you head down the hill path towards the bunker.
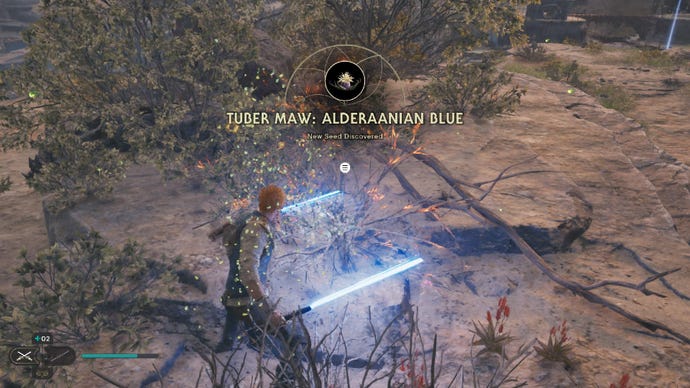
Tuber Maw (Alderaanian Blue):Swing over Gorocco using vine to reach the high ledge. The plant is on this ledge.
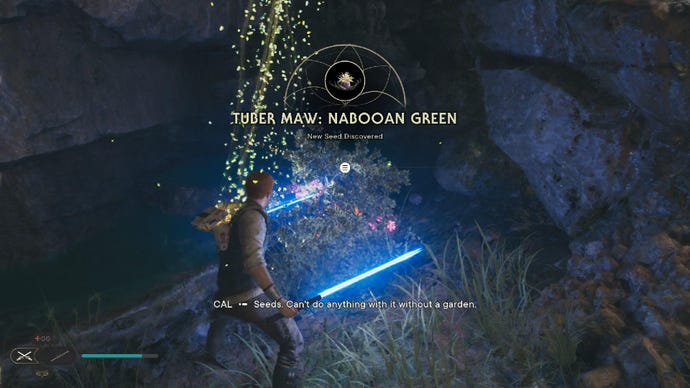
Tuber Maw (Nabooan Green):In the cave below the bridge next to the Datadisc Scav Droid, slash glowing plant in small alcove beneath the ledge leading to the tunnel.
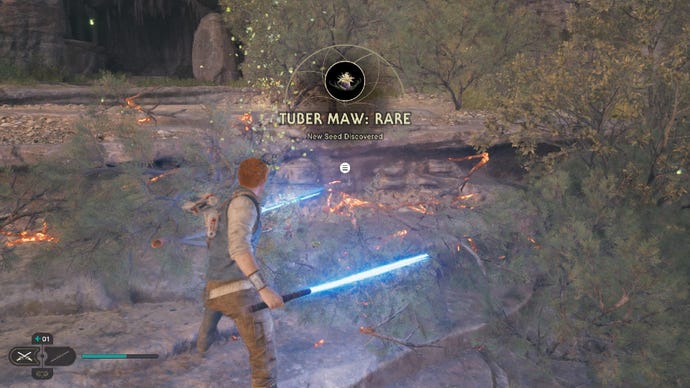
6x Tuber Maw (Rare):On grassy path between the two Priorite Shards.

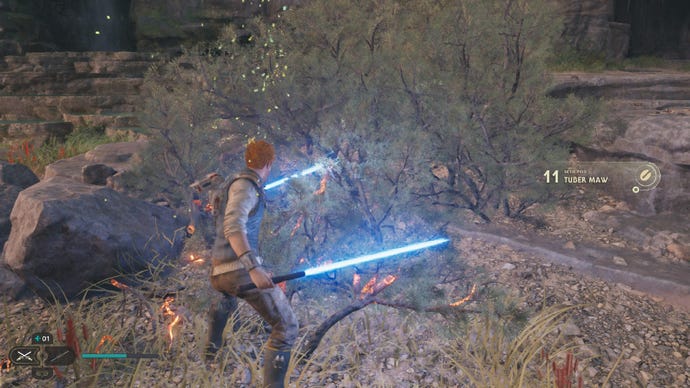
2x Tuber Maw:Two more plants near the cliff edge.


Tuber Maw:On the ledge with the two BX rifle droids, overlooking the Riverbed Watch Meditation Point.
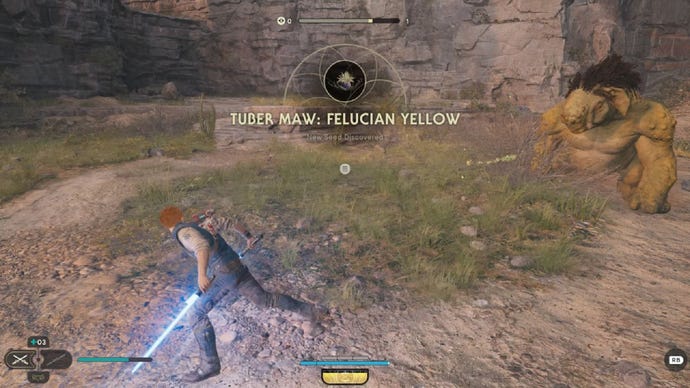
Tuber Maw (Felucian Yellow):Along the mountain, near the Gorocco.

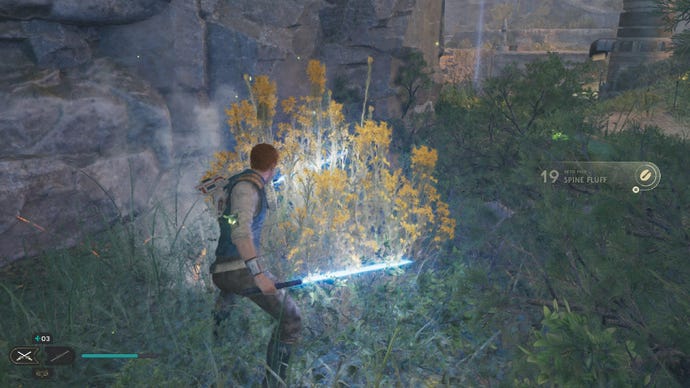
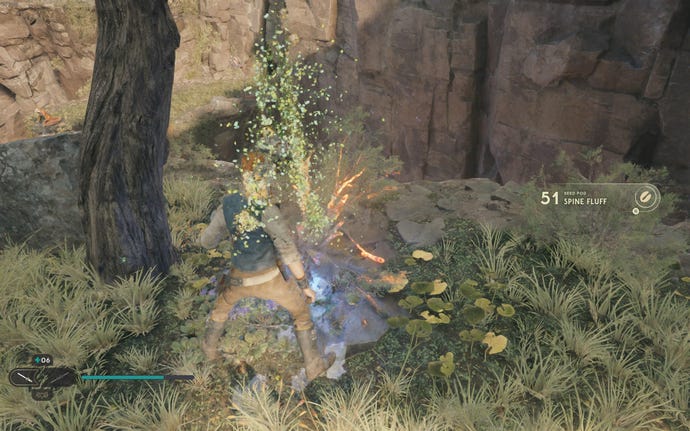
Spine Fluff:Near the border between Southern Reach and Riverbed Watch, hugging the rock near the gate to Rambler’s Reach Outpost.


Spine Fluff:Opposite the previous seed, in a corner between the slippery slope and the yellow dam structure.


Bluebell Squish:Turn left shortly after the Meditation Point and slash the plant on your left side.


Bluebell Squish:Just outside the Flooded Bunker.


Tuber Maw:Reach the top of the silo, and then climb up to the top ledge and slash the plant there.


Spine Fluff (Rare):Use the glider in Hunter’s Quarry to reach the top.
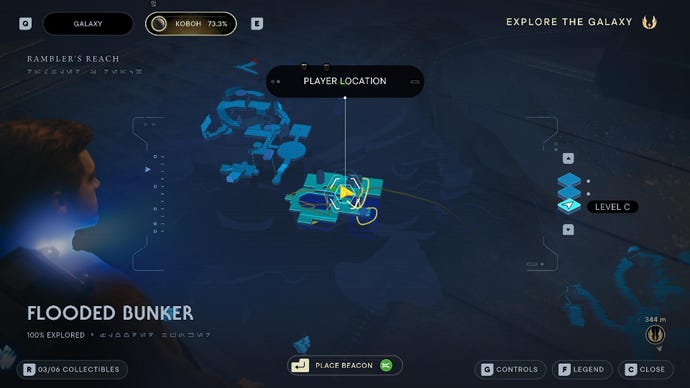
Flooded Bunker collectibles
Flooded Bunker Chests:
2x Chest (Coated Metal weapon/BD-1 materials):After following the underwater path and resurfacing, use Force Lift to lift up the circular pedestal in the water and reach the upper level.
Flooded Bunker Essences:

Health Essence:After following the underwater path and resurfacing, turn left into the next room and look behind the generator at the end.
Flooded Bunker Databanks:


Databank (Damage Assessment):Next to the pool, in the dark alcove bit.


Databank (Abandoned Water Filtration System):After following the underwater path, scan the control console in front of you when you resurface.
Flooded Bunker Treasures:

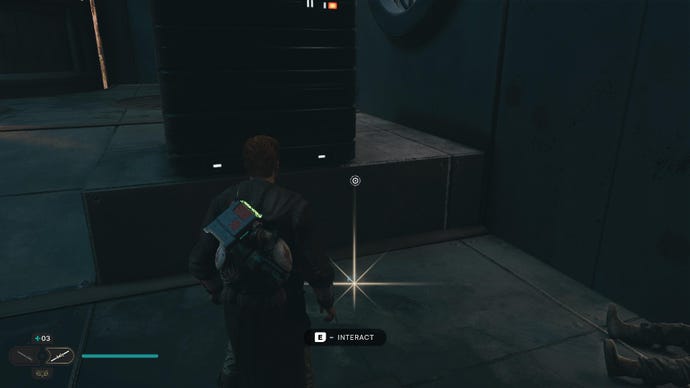
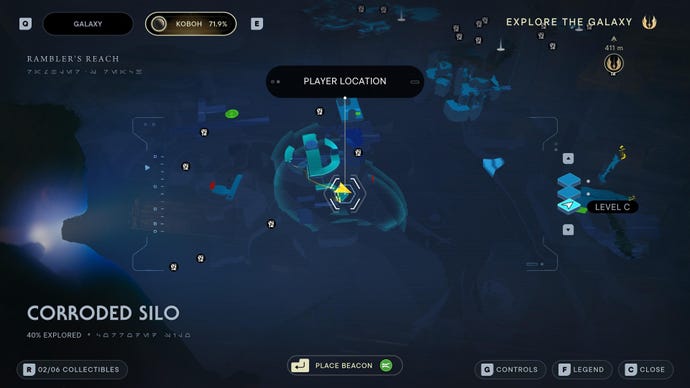
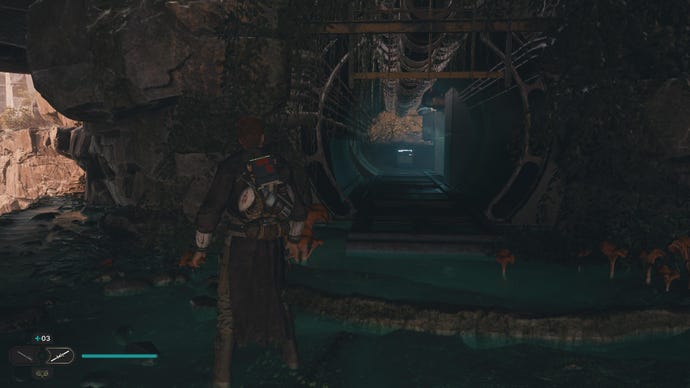
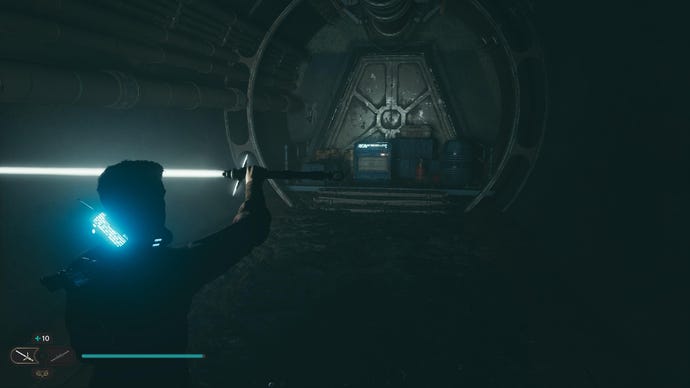
Corroded Silo collectibles
Corroded Silo is the name for the giant circular building in Southern Reach. You can drop down inside from the roof after getting the Force Lift ability. It has 6 collectibles:
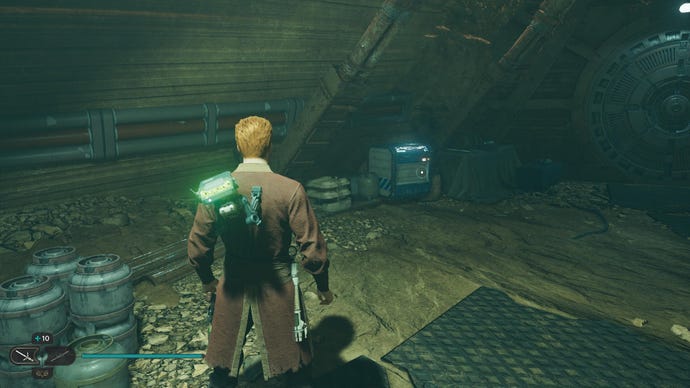
Corroded Silo Chests:
Chest #1 (Goatee and Mustache):Continue along the path from the top until you slide down the wall and jump onto a platform with a B1 droid. The chest is at the end.

Chest #2 (Bumpy Rubber weapon material):This chest requires you to Force Lift and then Force Slam it. Follow the main path down the silo, but stop before you reach the elevator. Head down on the lower platform with the patrolling B1 droid, then Force Push the wall at the end and collect the chest behind.

Chest #3 (Arakyd Heavy body):This chest requires you to Force Lift and then Force Slam it. Turn backwards once you’re on the platform with the elevator, and wall-run over to the climbing section to reach a higher ledge with the chest.
Corroded Silo Databanks:

Databank (Curiosity Sours):Drop down into Corroded Silo from the roof in Southern Reach. You need Force Lift to get inside. Follow the path onto the ledge with the two guards. There’s a glowing datapad on a crate to be scanned.


Databank (New Acquisitions):Continue along the path from the top until you slide down the wall and jump onto a platform with a B1 droid. Another datapad is on the floor of this ledge.
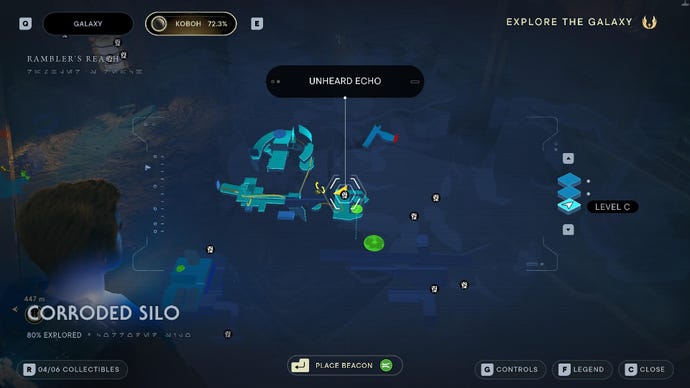

Force Echo (Whispered Words):At the end of the silo, opposite the gate out into Riverbed Watch, use Force Slam on the wall to the right and reach the other side. To the left of the Meditation Chamber entrance is the Force Echo.
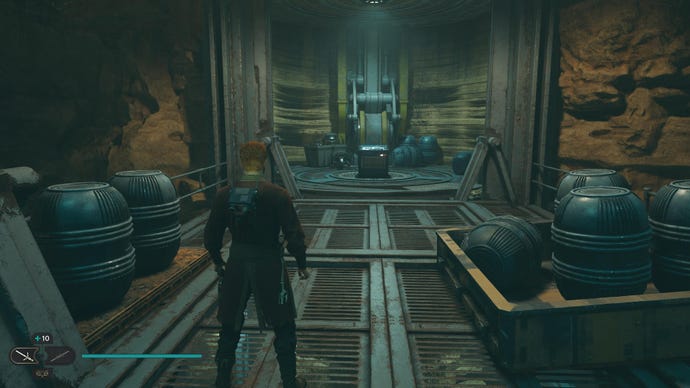
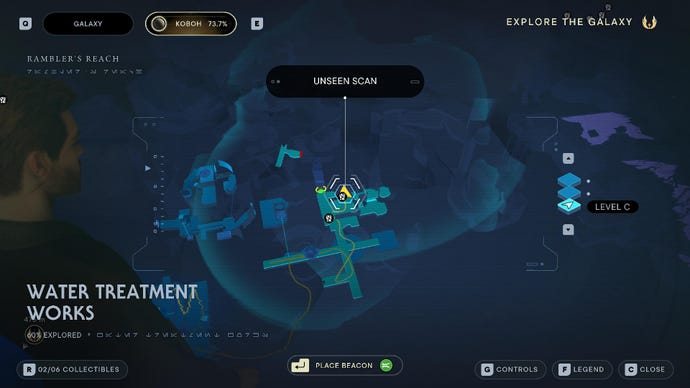
Water Treatment Works collectibles
Water Treatment Works is a series of tunnels underneath Southern Ranch. It won’t take long to explore, and only contains 6 collectibles:
Water Treatment Works Chests:

Chest #1 (Scrapper hair):At the end of the short tunnel in the cave below the bridge next to the Datadisc scavenger droid.

Chest #2 (Edgehawk Switch):At the end of the side path with the Rawka and Shiverpede.

Chest #3 (Edgehawk Grip):Once you reach the upper level, Force Push the rocks out of the way and look for the chest on the left.

Chest #4 (Edgehawk Emitter):Once you reach the upper level, look back above where you came and you’ll see a platform you can reach with the chest at the end.
Water Treatment Works Databanks:

Databank (Leaking Water Storage):Scan the big storage tank in the main room.


Force Echo (Lawful Good):Found on dead body after the wall-run section to the upper part of the main room.
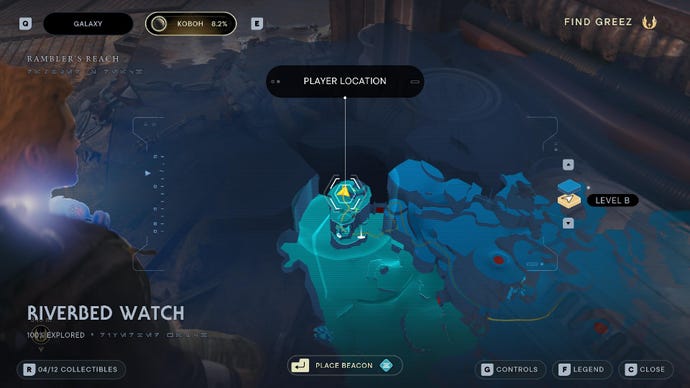
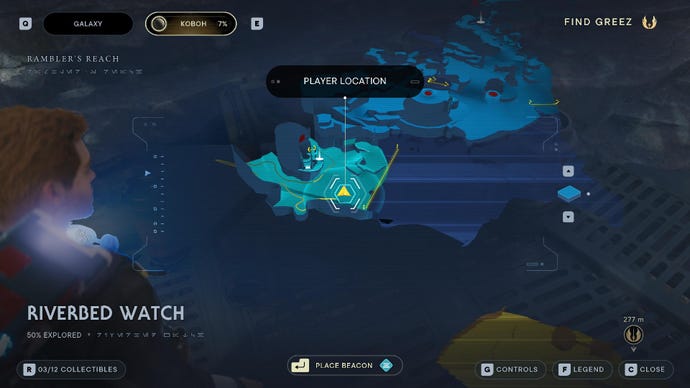
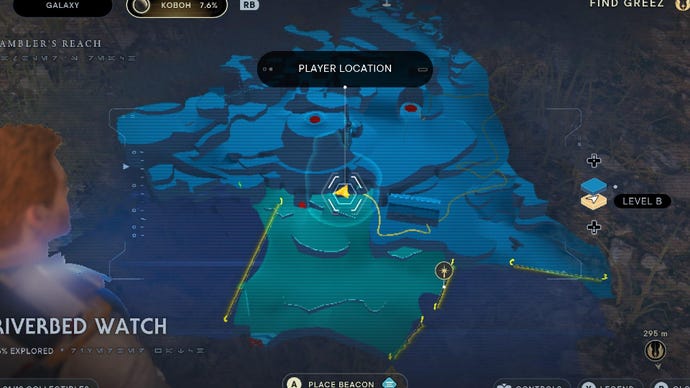
Riverbed Watch collectibles
Riverbed Watch is a relatively small section of Rambler’s Reach, with just 12 collectibles to find:
Riverbed Watch Chests:
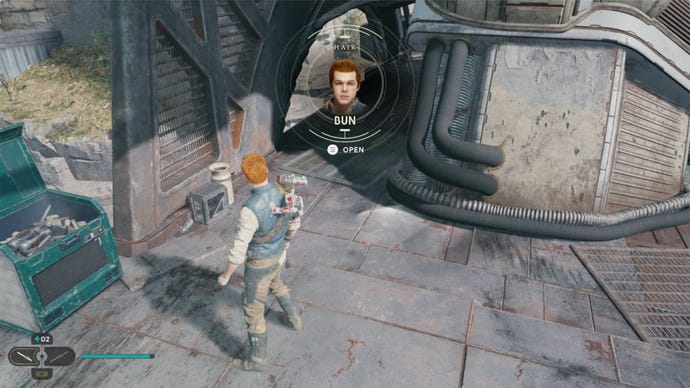
Chest (Bun hair):On the rooftop, almost directly above the Priorite Shard.
Riverbed Watch Essences:
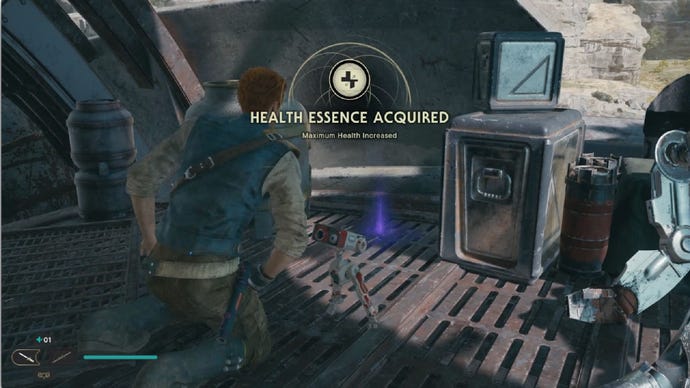
Health Essence:Inside the raider tower.
Riverbed Watch Databanks:

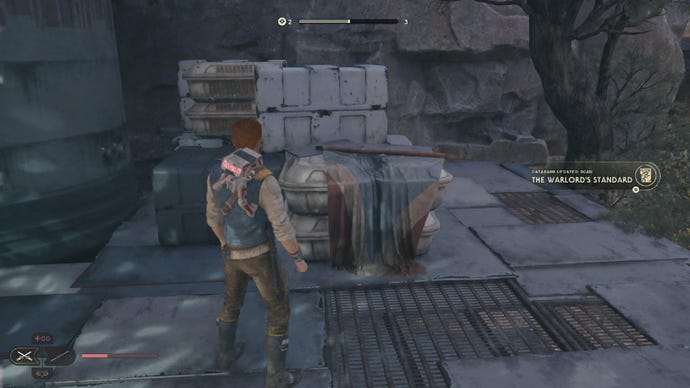
Databank (Warlord’s Standard):Scan the item to the side of the Riverbed Watch Meditation Point.

Force Echo (A Brokered Alliance):Above the Riverbed Watch Meditation Point, on the roof with all the B1 droids.
Riverbed Watch Treasures:


Priorite Shard #2:Around the back side of the building with all the B1 droids, on the roof of the Riverbed Watch Meditation Point building.
Riverbed Watch Seed Pods:
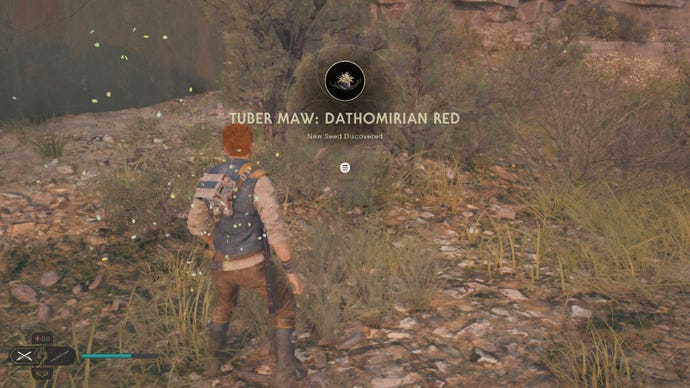
Tuber Maw (Dathomirian Red):Continue behind shield turret building and head to base of silo aup ahead. Plant is found in amongst the grass.

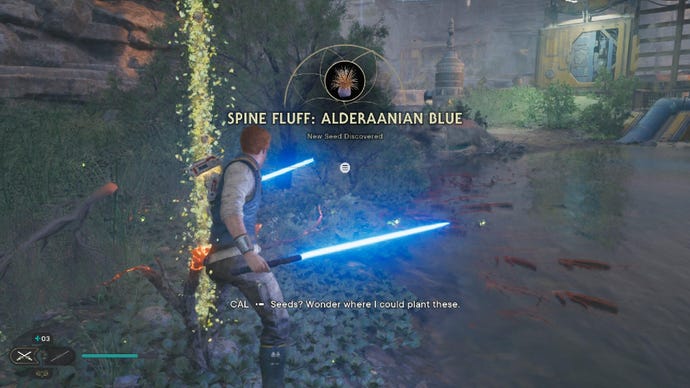
Spine Fluff (Alderaanian Blue):On the riverside path between the Riverbed Watch Meditation Point and the Rambler’s Reach Outpost Meditation Point.

2x Spine Fluff:Right next to the slippery slope next to the yellow dam.
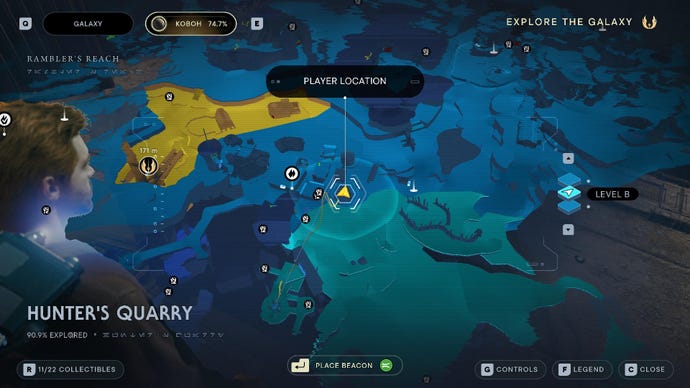
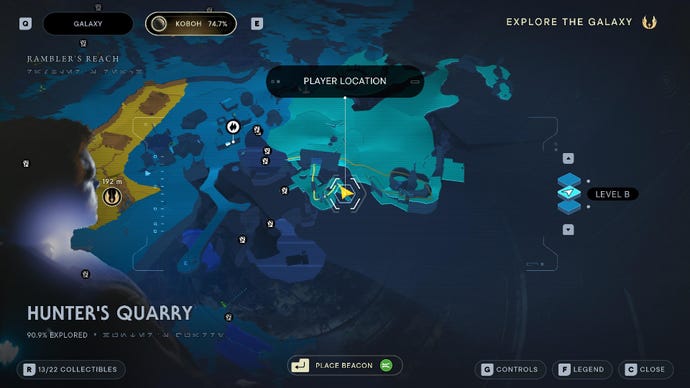
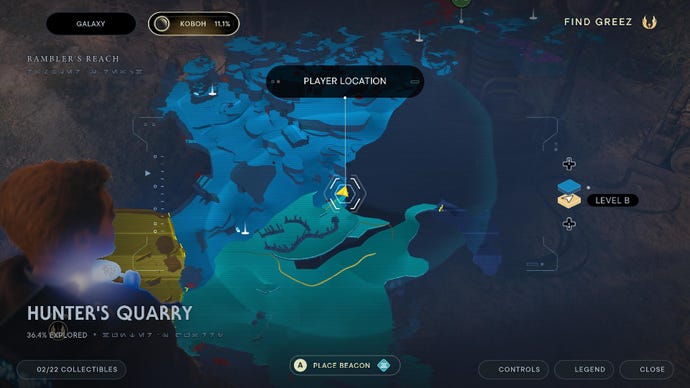
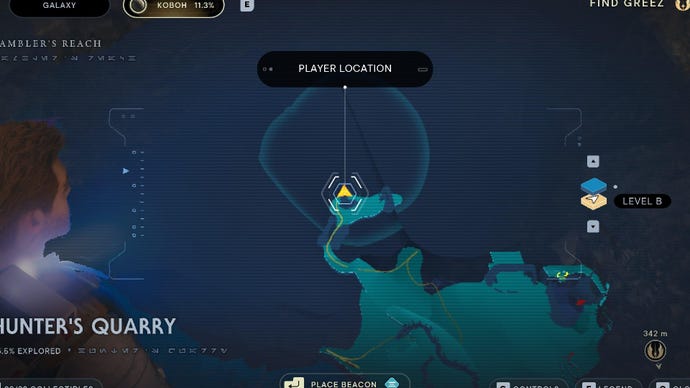
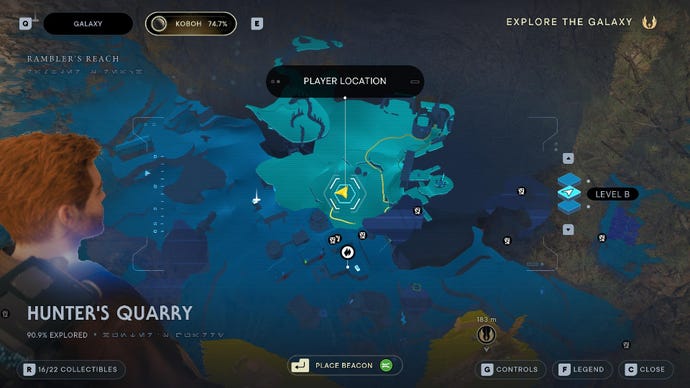
Hunter’s Quarry collectibles
Hunter’s Quarry is the area to your left as you approach the gate to Rambler’s Reach Outpost. While not as large as Southern Reach, it contains a few surprises, as weell as 22 collectibles in total:
Hunter’s Quarry Chests:


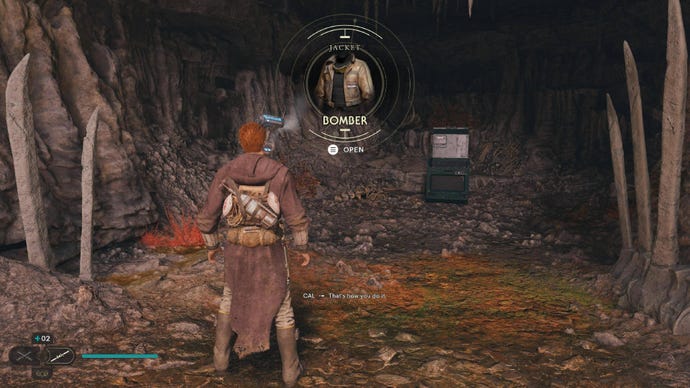
Chest #2 (Bomber Jacket):Up the slope in Hunter’s Quarry, past all the Gorgers.


Chest #3 (Light Metals BD-1 materials):At the back of the bunker where teh droids are fighting the Gorgers.
Hunter’s Quarry Essences:


Force Essence:There’s a breakable wall next to the Hunter’s Quarry building; use a Roller Mine from inside the building to break it.

Skill Point Essence:In the Koboh matter puzzle cave (requires you to Force Lift the gate on the far end of Hunter’s Quarry). Once you’re in, just pull the orb to you, and hold it while you walk through the matter to the essence.
Hunter’s Quarry Databanks:

Force Echo (Free Sample):On the edge of the platform where the Hunter Jacket chest is found, overlooking the Outpost Meditation Point.
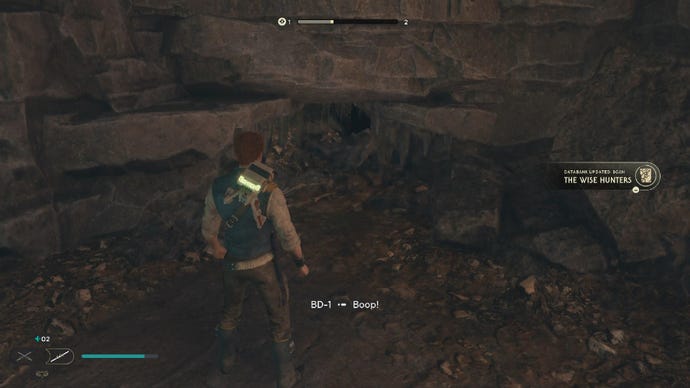
Databank (The Wise Hunters):Up the slope and past the Gorgers, look on the left side of the room.


Force Echo (A Task Too Far):At the back of the bunker where the droids are fighting the Gorgers.

Databank (A New Beginning):On the left immediately as you enter the bunker area where the droids are fighting the Gorgers.

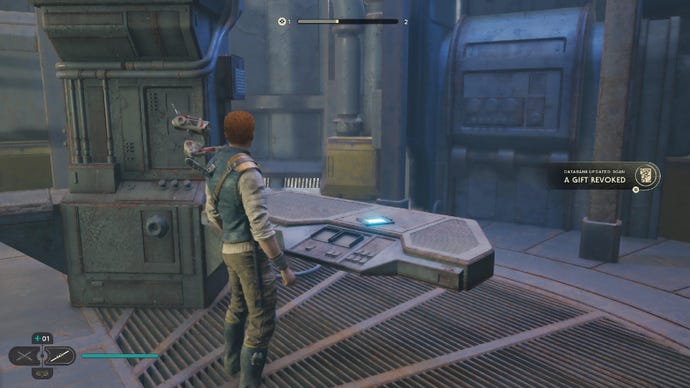
Databank (A Gift Revoked):On the table in the Hunter’s Quarry building, accessible from the roof.

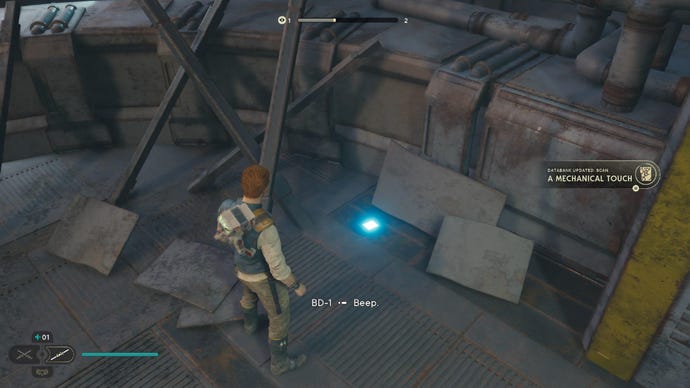
Databank (A Mechanical Touch):On the floor in the Hunter’s Quarry building, accessible from the roof.

Databank (The Koboh Emergence):Inside the Koboh matter puzzle cave (which requires Force Lift to get through the big gate). Datapad to scan is in the side room - you need to send the orb in there first.


Force Echo (An Honest Appraisal):In the Koboh matter puzzle cave (which requ ires Force Lift to get through the big gate). Just hold the orb and walk to where you first found it.
Hunter’s Quarry Treasures:


Priorite Shard:On the table in the Hunter’s Quarry building, accessible from the roof.


Datadisc:Grapple up to the cliff area in Rambler’s Reach Outpost, right on the border of Hunter’s Quarry near the edge of the map. Then follow the grapple balloons to the right and wall-run along to the top ledge. Requires the ability to launch from grapple points.
Hunter’s Quarry Seed Pods:


Cactus Ball (Dathomirian Red):On the grassy plains leading to the area where droids are fighting the Gorgers.

Pine Fern:A few steps into Hunter’s Quarry from the Koboh’d up building on the outskirts of the outpost.

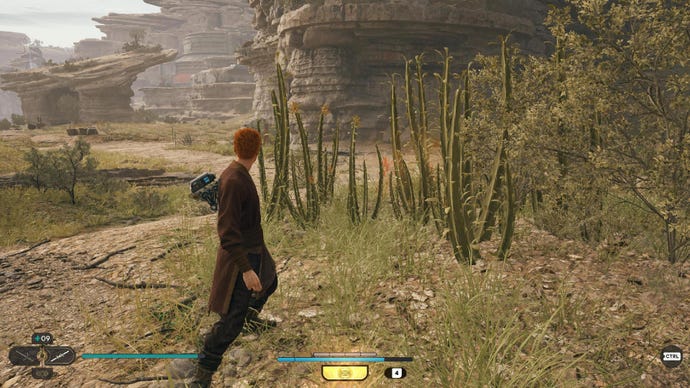
Cactus Ball:In the centre of the open area of Hunter’s Quarry.
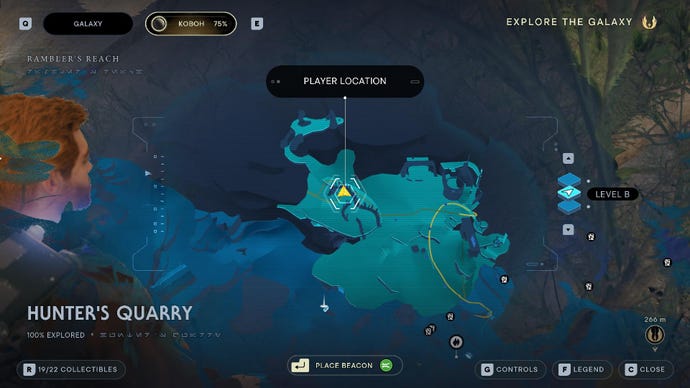
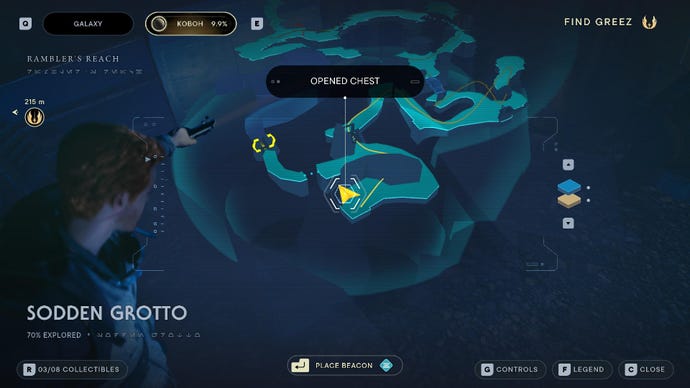
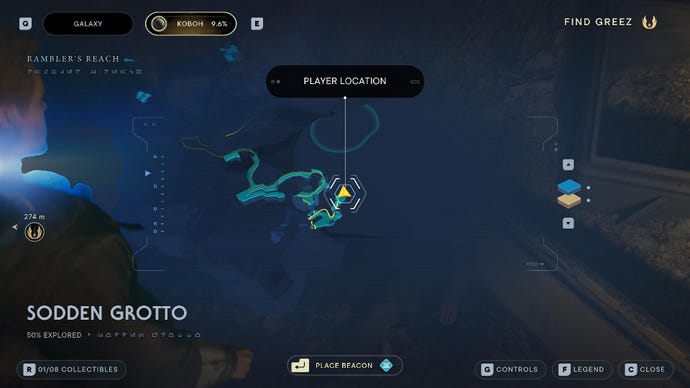
Sodden Grotto collectibles
SoddenGrottois directly beneath Hunter’s Quarry, and accessible only through the cave near the Rambler’s Reach Outpost Meditation Point. Other than one angry Rancor, there’s only a handful of things to find down here:
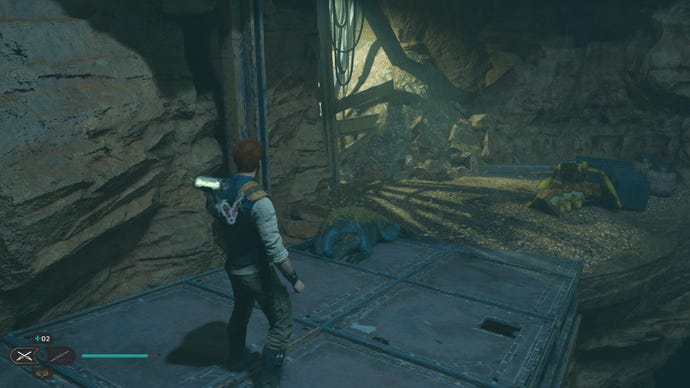
Sodden Grotto Chests:

Chest (Scrapyard legs):Take the left path from where the sassy scavenger droid moons you. Yes, really.
Sodden Grotto Essences:


New Perk (Shatter):Found in the Rancor room, towards the back.
Sodden Grotto Databanks:

Force Echo (Dead Researcher):On a corpse against the wall.

Databank (Dead Gorgers):Found just before squeezing through the gap to the scavenger droid.
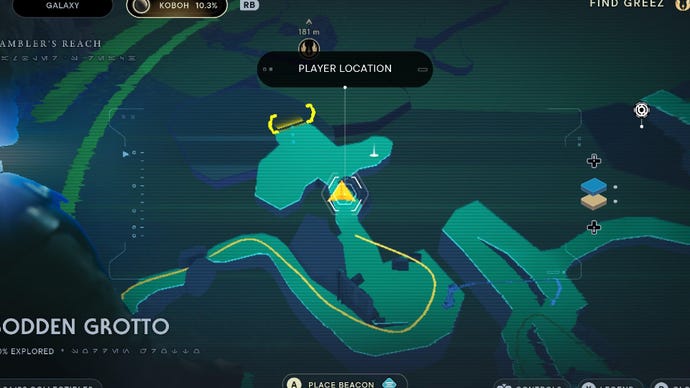
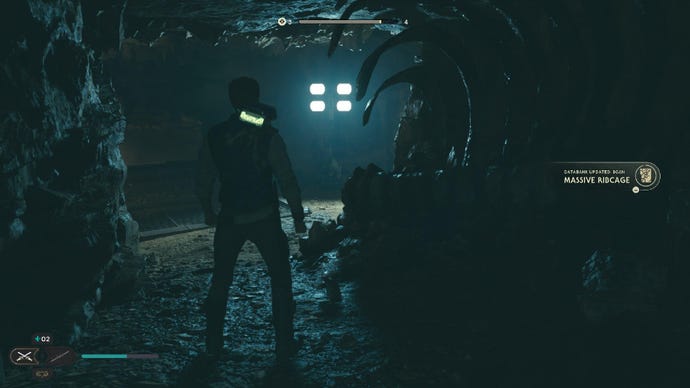
Databank (Massive Ribcage):Found on the main Sodden Grotto path, just before the Meditation Point.

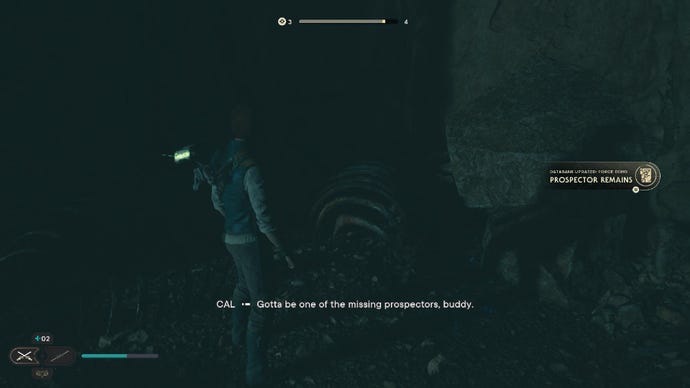
Force Echo (Prospector Remains):On the opposite side of the Sodden Grotto Meditation Point room.
Sodden Grotto Treasures:

Priorite Shard #1:Turn left after entering the Grotto, and drop down the ledge on the right.

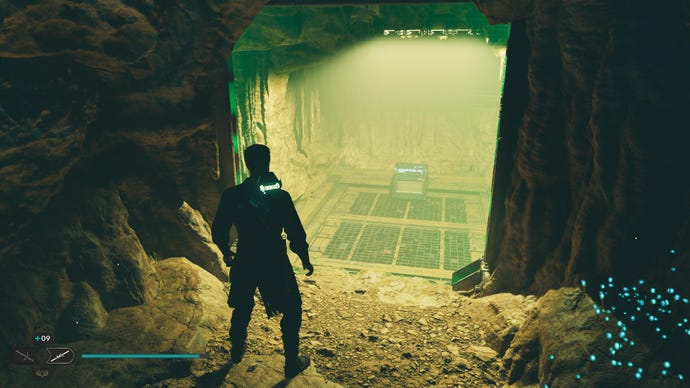
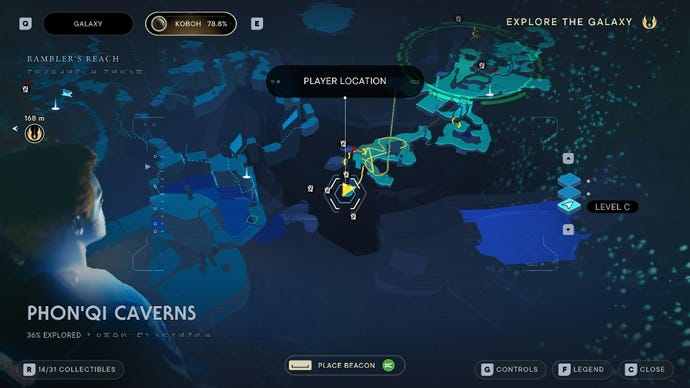
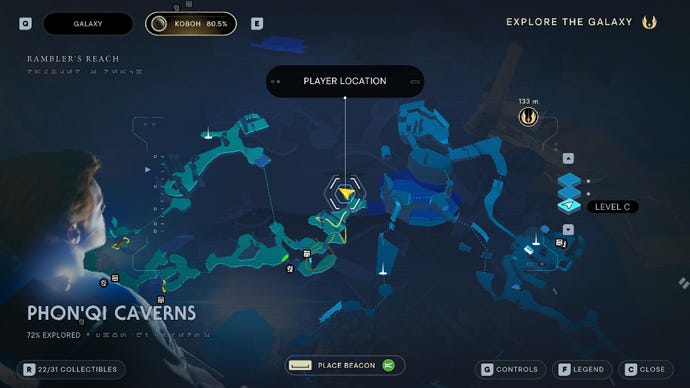
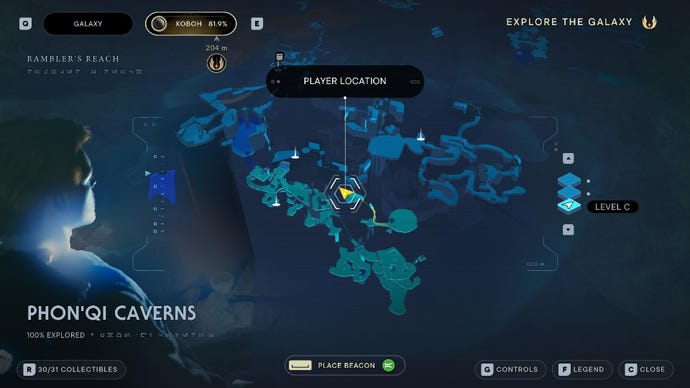
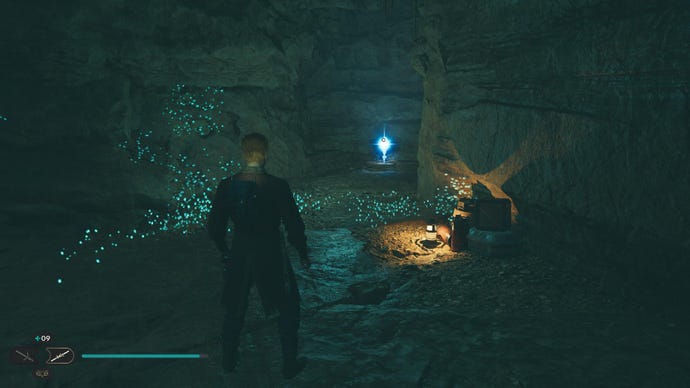
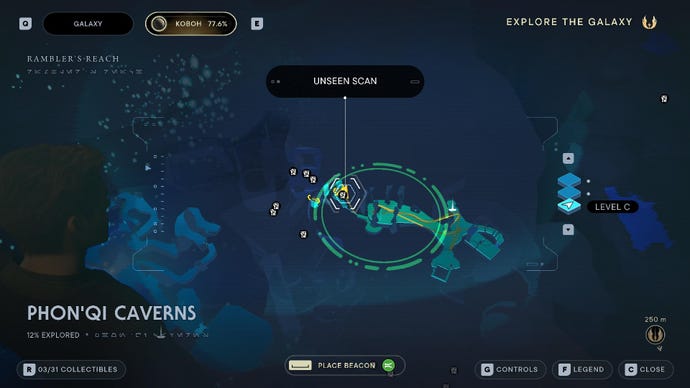
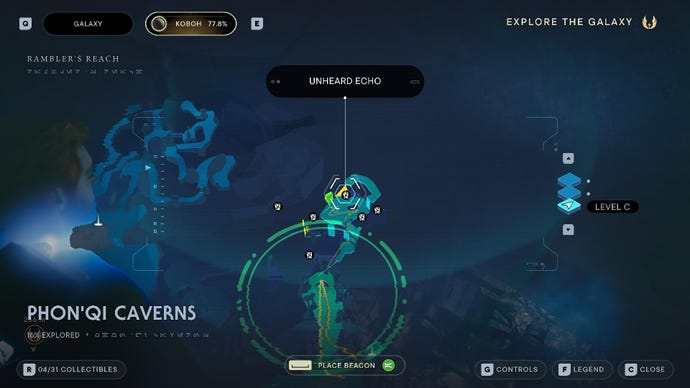
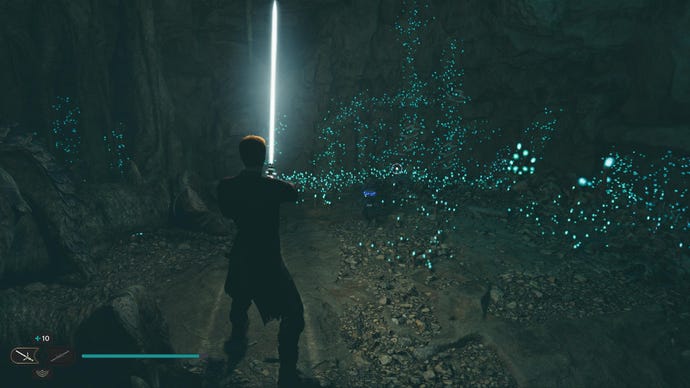
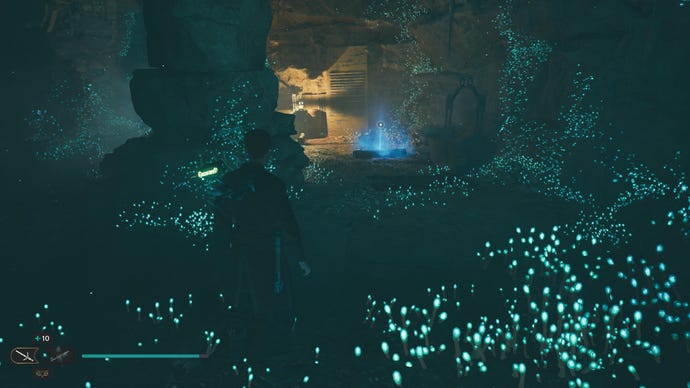
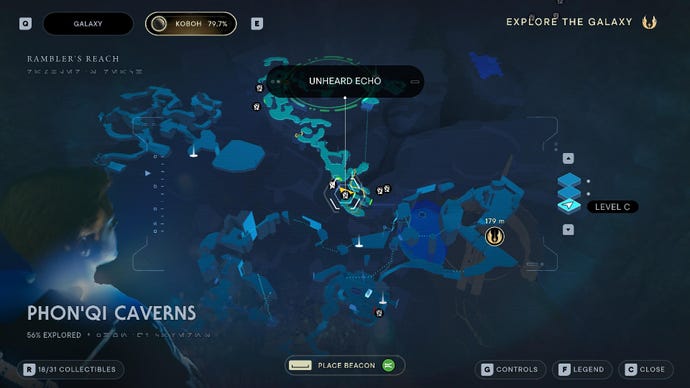
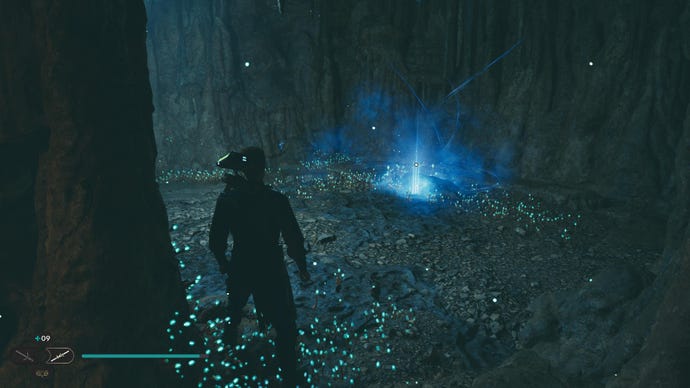
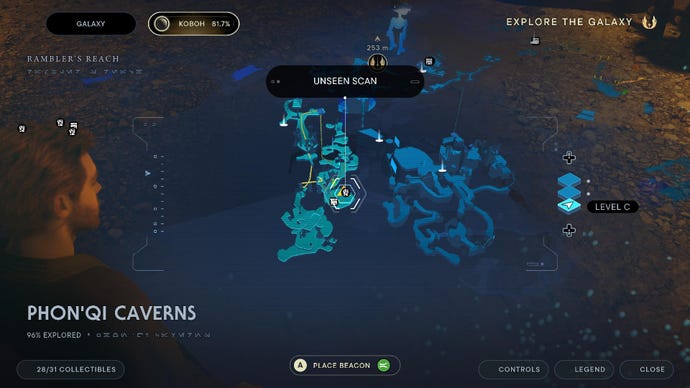
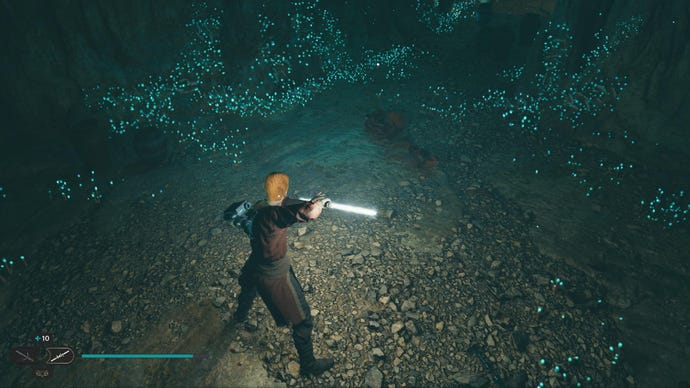
Phon’Qi Caverns collectibles
While technically part of Rambler’s Reach, the dangerous Phon’Qi Caverns are only accessible from Foothill Falls in Prospector’s Folly. There’s a total of 31 collectibles in these caverns:
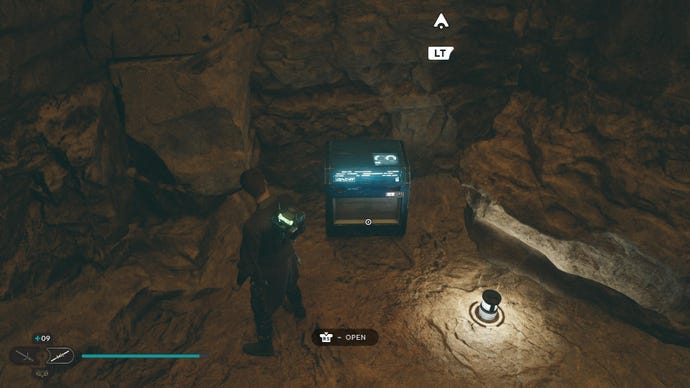
Phon’Qi Caverns Chests:

Chest #1 (Bomber material):Underneath the third ceiling turret, next to the flaming brazier.

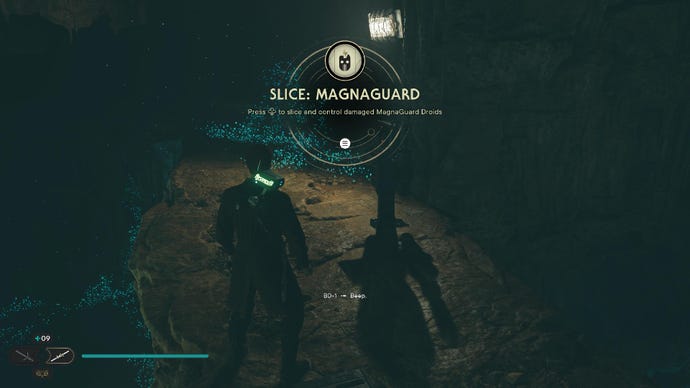
Ability (Slice Magnaguard):Jump up the wall opposite the green forcefield with the Skill Point Essence.


Ability (Chests on Holomap):After fighting the three bosses, climb up the wall in the next room and scan the terminal in the middle of the room.


Chest #3 (Duelist Pommel):Dive into the tiny circular pool where Skoova Stev is catching fish.


Chest #4 (Duelist Switch):Use acid ball on the door leading from the Rancor room, then grapple up twice.

Chest #5 (Duelist Emitter):Use acid ball on the very first door in the caverns, and then Force Slam down the two ceiling objects. One of the holes that appear in the ground leads to a chest.
Phon’Qi Caverns Essences:

Skill Point Essence #1:From the very first electrical door in the caverns, wall-run to the left until you reach the essence.

Skill Point Essence #2:Head through the green forcefield down the drop in front of the bottom part of the elevator.
Skill Point Essence #3:After fighting the three bosses, climb up the wall in the next room, turn left, and climb again. Slice the door, and then turn left once more.
Phon’Qi Caverns Databanks:
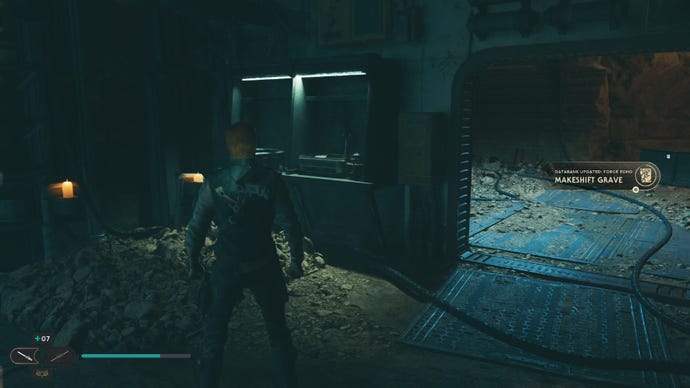
Force Echo (Makeshift Grave):Fly across from Foothill Falls and then head into basement of shack (entrance is near the group of Bedlam Raiders).


Force Echo (Abandoned Corpse):Squeeze through the gap from T-1N8 and turn left.


Force Echo (A Gen’dai Plots):Follow the path after going down the hole and grappling to the right. At the end of the next room is a droid corpse with an Echo.

Databank (Raider Depot):Drop down the hole in the room with the “A Gen’dai Plots” Force Echo, and destroy the turret. Scan the console below the turret.

Databank (Rancor Prey):Behind the Rancor.

Force Echo (A Cave Too Far):In the same room as the Rancor, near the opposite wall.


Databank (Dead Jedi):After being trapped between the two forcefields and dropped, head through the green forcefield above you.

Force Echo (A Fallen Knight):After being trapped between the two forcefields and dropped, head through the green forcefield above you, then throw one of the acid balls at the electric gate and look to the right for the Force Echo.

Force Echo (Rayvis’s Search):In the next room after fighting the three bosses.


Databank (Republic Control Room):After fighting the three bosses, climb up the wall in the next room and scan the terminal on the right.


Force Echo (As Above, So Below):Use acid ball on the door leading from the Rancor room.

Databank (Cave Turbolift Network):Use acid ball on the very first electrical door in the caverns, and scan the door inside.
Phon’Qi Caverns Treasures:


Datadisc #1:Behind the Rancor.

Datadisc #2:Where the magnaguard fights you.


Datadisc #3:One of the pots in front of the electric circular gate, behind which the raider with the double-bladed green lightsaber waits.


Datadisc #4:One of the pots on the edge of the drop right in front of the bottom part of the elevator.

Datadisc #5:One of the pots to the left of the electric circular gate, behind which the raider with the double-bladed green lightsaber waits.

Datadisc #6:After being trapped between the two forcefields and dropped, head through the green forcefield above you.
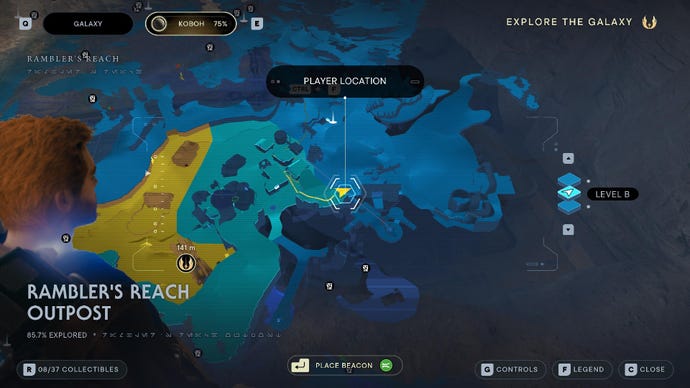
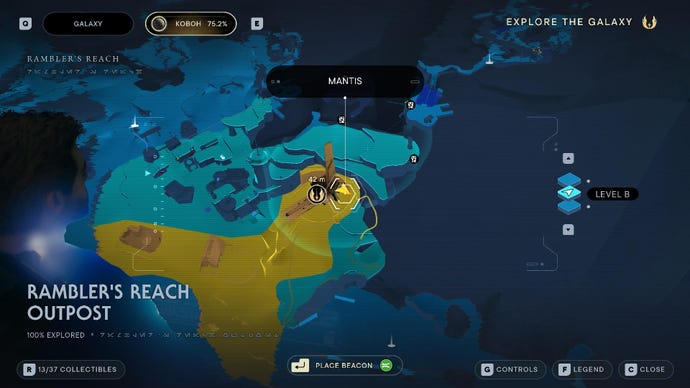
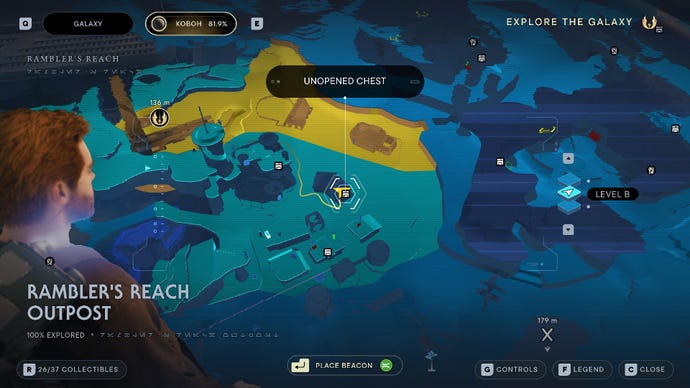
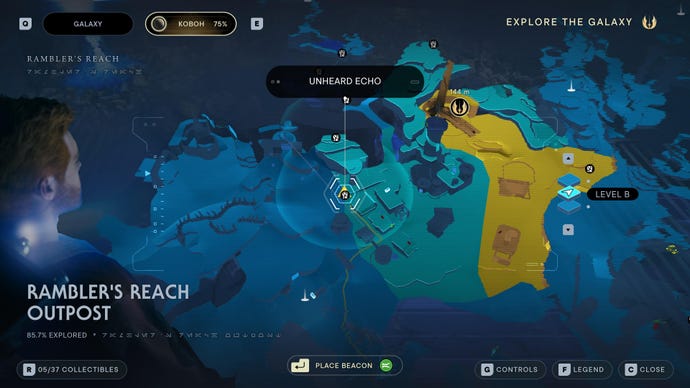
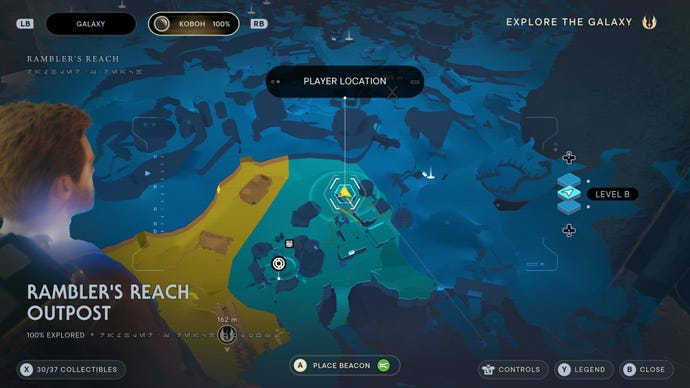
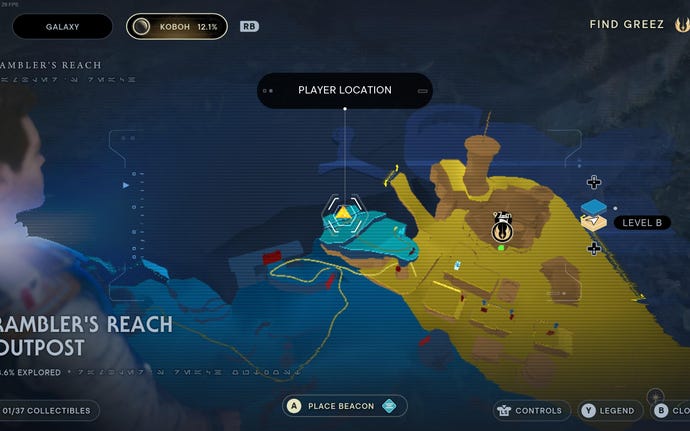
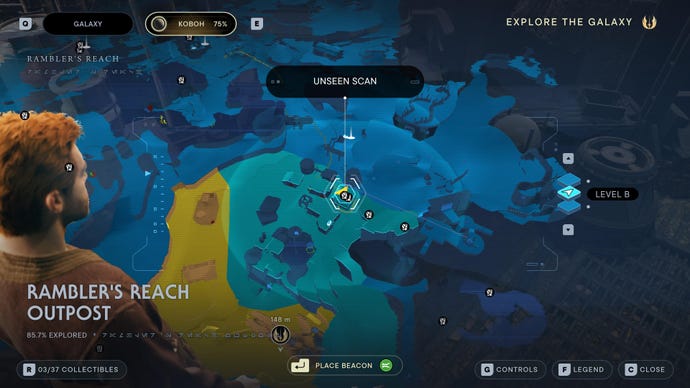
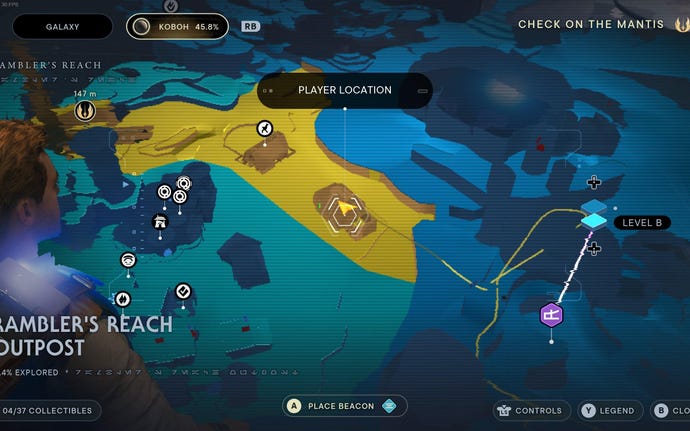
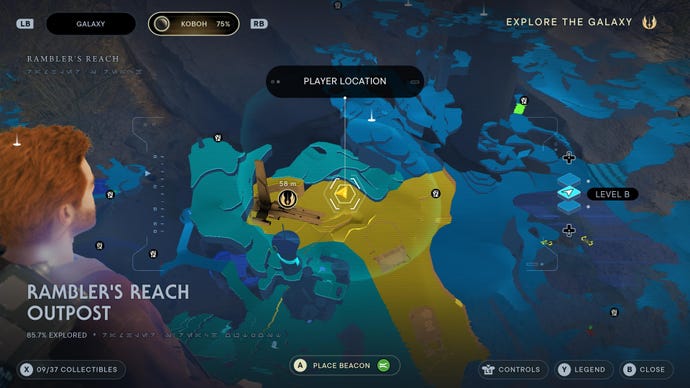
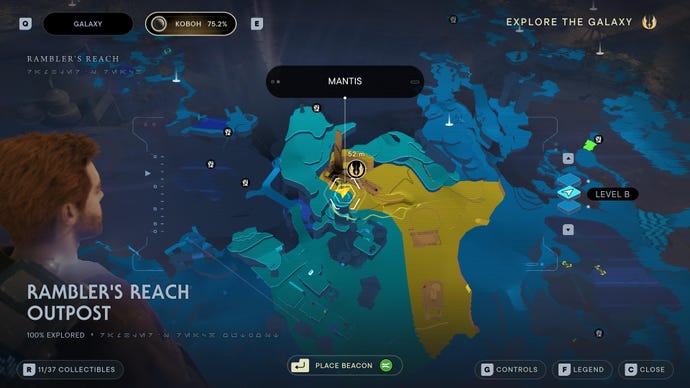
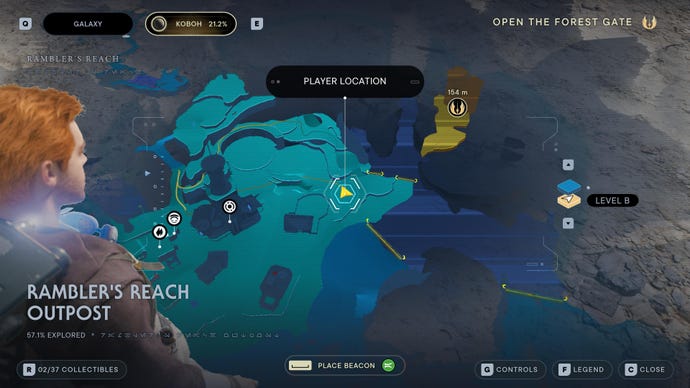
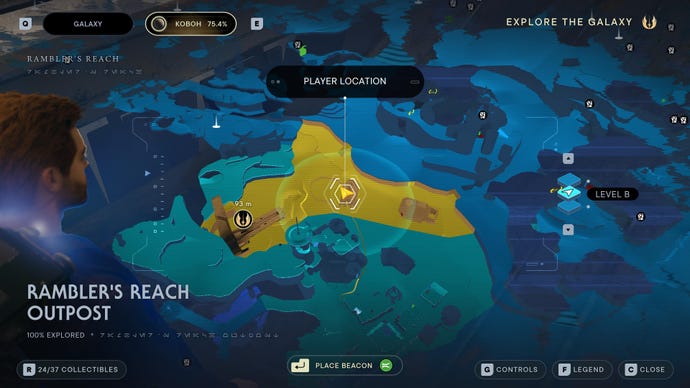
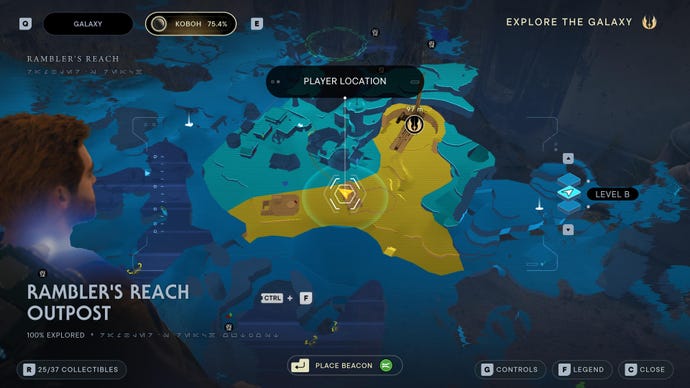
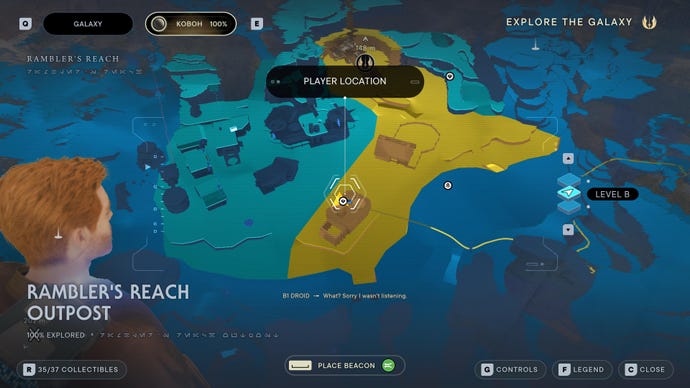
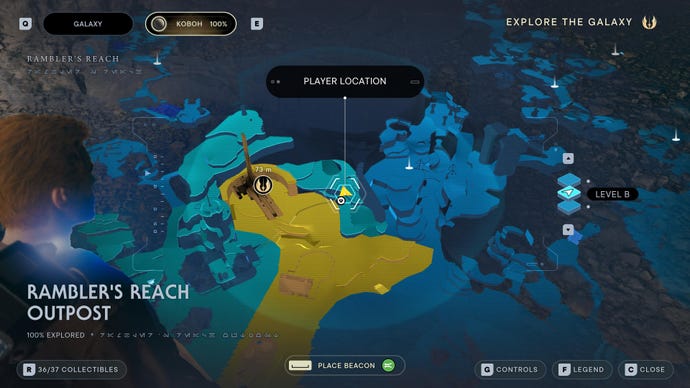
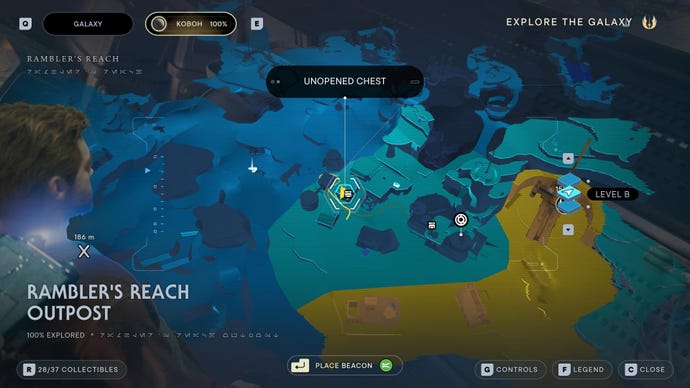
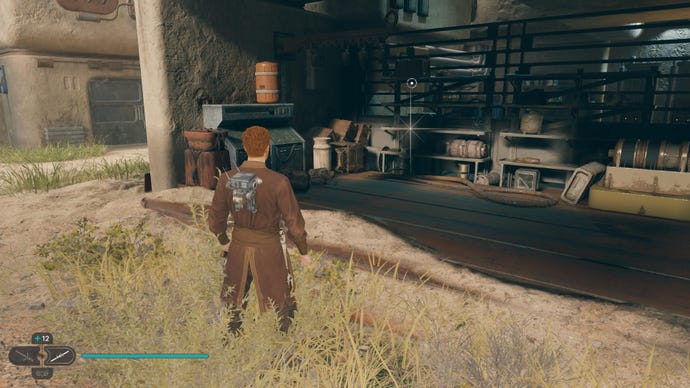
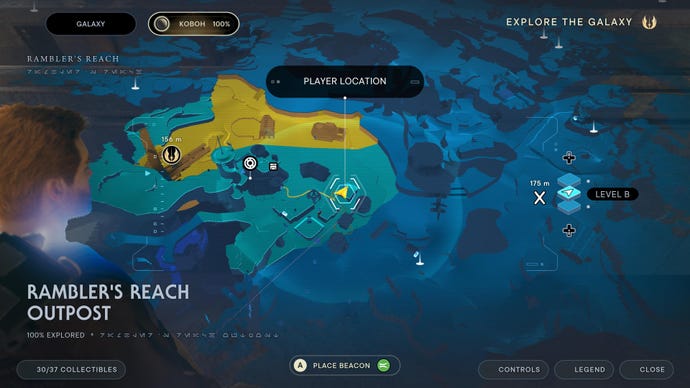
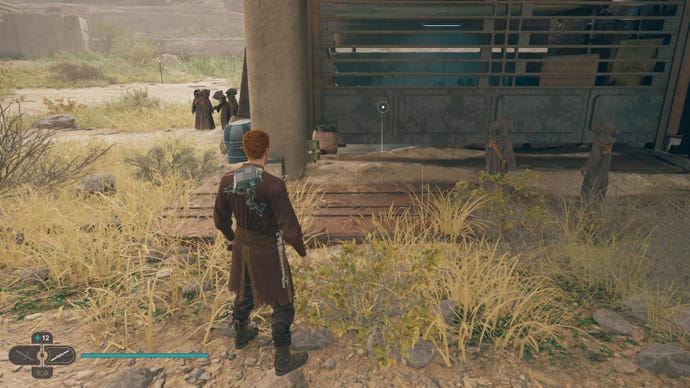
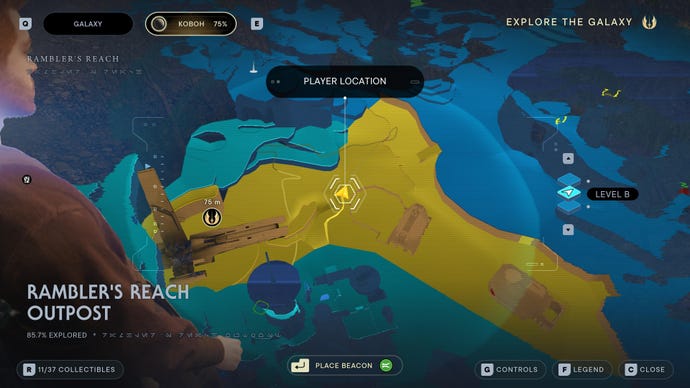
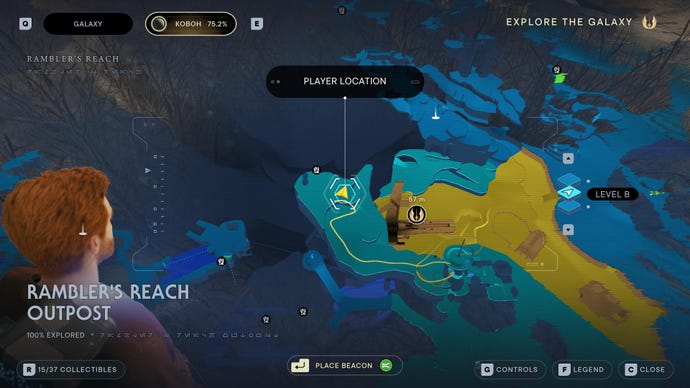
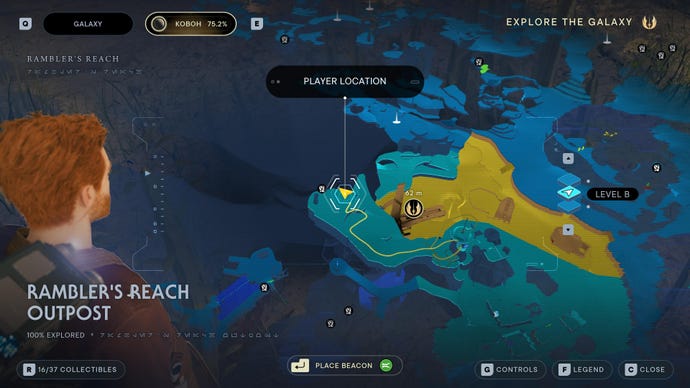
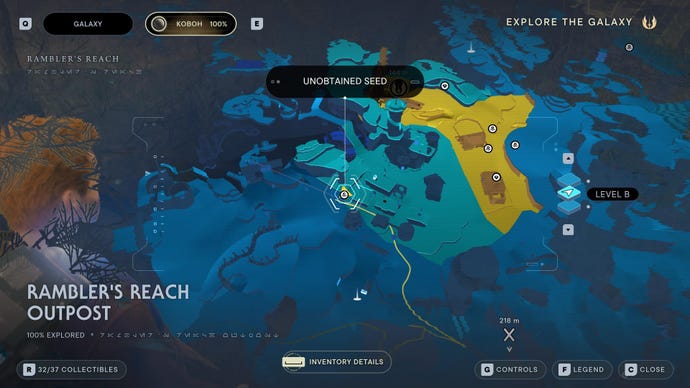
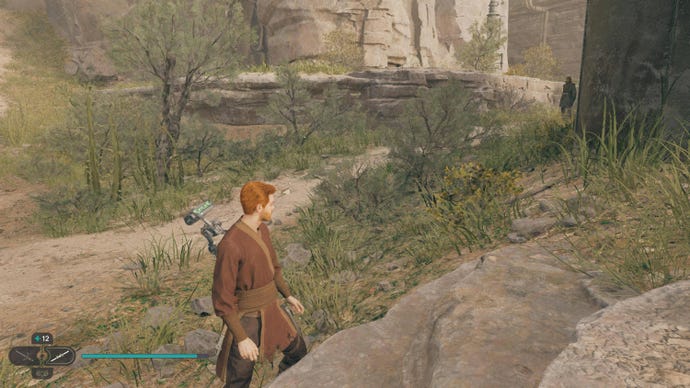
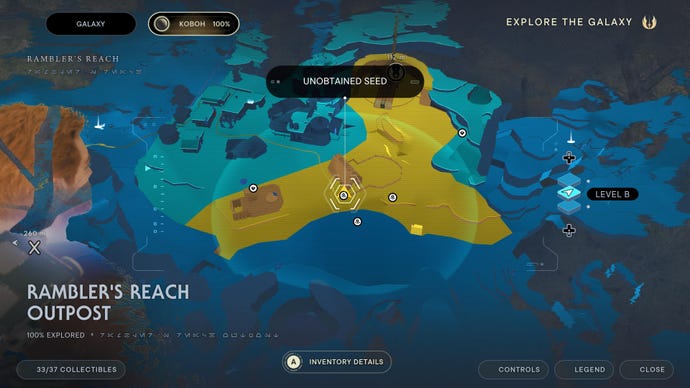
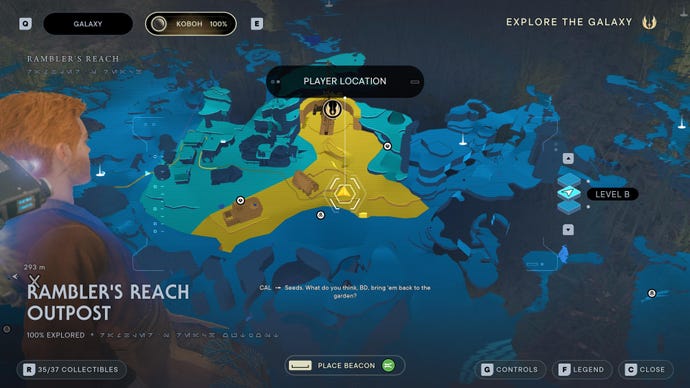
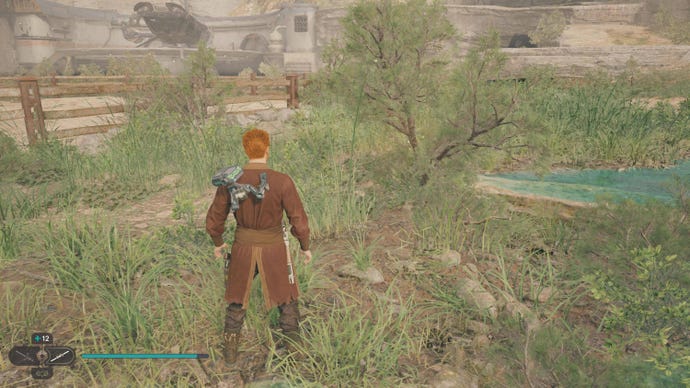
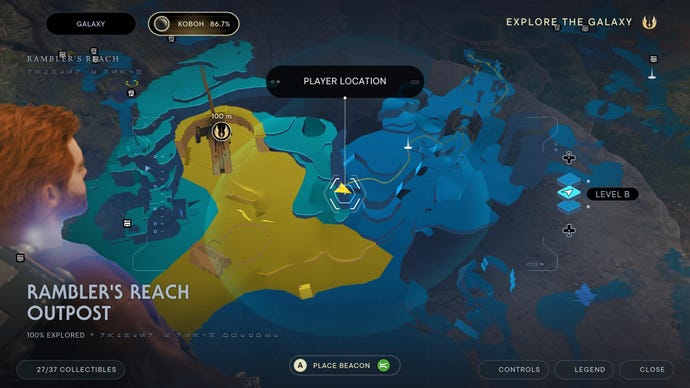
Rambler’s Reach Outpost collectibles
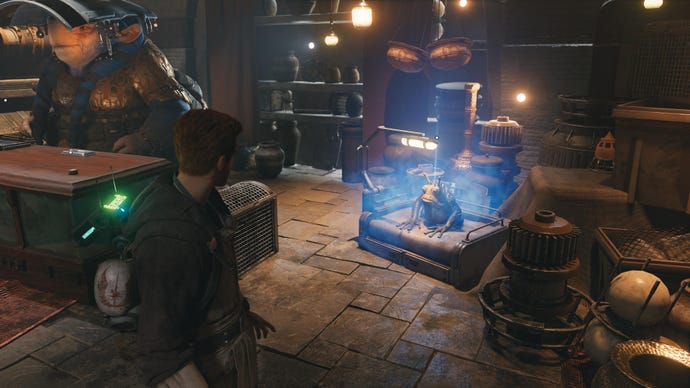
Home to Pyloon’s Saloon and most of the characters on Koboh, Rambler’s Reach Outpost has a startling number of hidden secrets, and you’ll need to lay all of them bare to find the whopping 37 collectibles in this region:
Rambler’s Reach Outpost Chests:

Chest #1 (Arakyd Heavy Barrel):This chest requires you to Force Lift and then Force Slam it. Found on the left ridge overlooking the Rambler’s Reach Outpost. Grapple onto the vines to reach it.


Chest #2 (Tactical Shirt):On the roof of the building.

Chest #3 (Rebel Paint BD-1 materials):This chest requires you to Force Lift and then Force Slam it. Found on the first ledge of the cliff that rises up behind Pyloon Saloon and around the Mantis. Use the garden and the vines to reach it.
Chest #4 (Bomber Pants):Use Force Lift on the middle door underneath the Mantis landing pad.


Chest #5 (Edgehawk Pommel):This chest requires you to Force Lift and then Force Slam it. Reach the highest level of the area behind the Mantis.
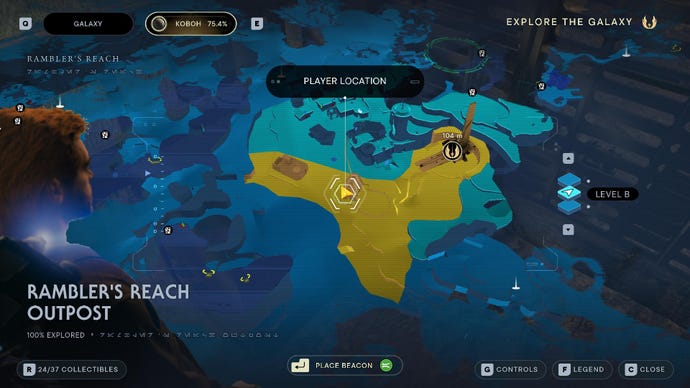

Chest #6 (Unique Metal BD-1 materials):Nekko super jump into the top floor of the stable, then Force Lift the grate in the floor and drop down for the chest.

Chest #7 (Duelist material):Inside T-1N8’s house - you need to rescue her from Phon’Qi Caverns and then speak to her outside the house to unlock it.


Ability: (Show plants on map):Plant one of every type of plant in the garden and let them fully grow. Then have BD-1 slice the terminal pictured.
Rambler’s Reach Outpost Essences:

Skill Point Essence #1:Talk to the person inside the closed off building with all the eye cameras, near the entrance to the outpost. After Jedi mind-tricking them, go down the staircase that opens in the floor.
Skill Point Essence #2:In the house after recruiting the jawas. Hit the conduit above with an electro-dart and then connect the cord in the roof to the section above the door to open it and reach the chest.
Rambler’s Reach Outpost Databanks:
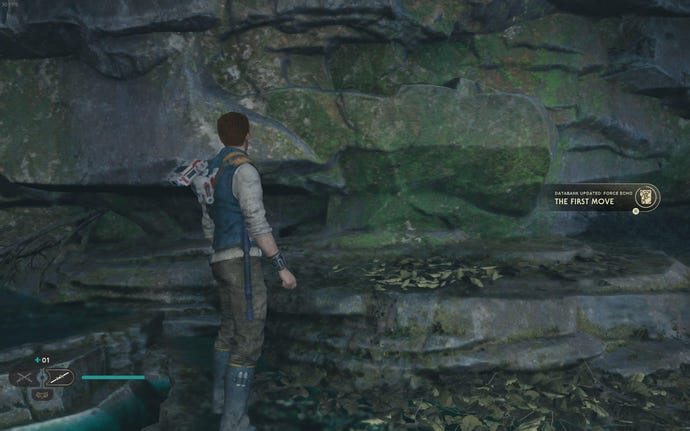
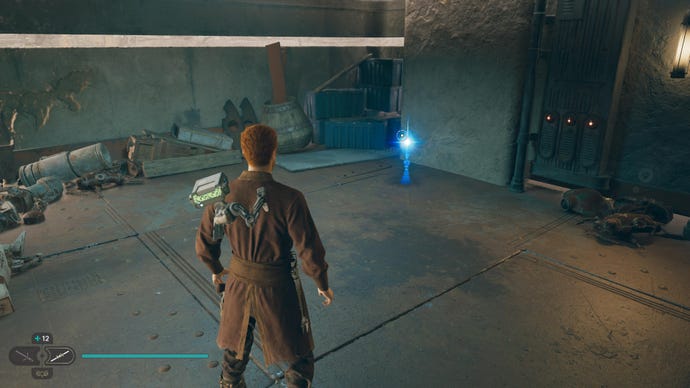
Force Echo (The First Move):On the left ridge overlooking the Rambler’s Reach Outpost. Use grapple and climb vines to reach it.

Databank (Obsession):Force Lift and then dash through the forcefield door of the building marked on the map.
Databank (Forever Curious):Force Lift and then dash through the forcefield door of the building marked on the map.
Force Echo (Soont Madas):Talk to the person inside the closed off building with all the eye cameras, near the entrance to the outpost. After jedi mind-tricking them, go down the staircase that opens in the floor.

Databank (Turgle’s Shiny Shell):Scan the shell on the edge of the river.
Databank (Relter Egg):Reach the highest level of the area behind the Mantis and scan the nest in the cave.

Databank (List of Grievances):Nekko super jump onto the roof of the building and drop down from there.


Force Echo (Mistakes):To the left of the blue door to Doma’s shop. Only available after reaching the end of the main story.


Force Echo (Leash):Underneath the Mantis. Only available after reaching the end of the main story.
Rambler’s Reach Outpost Force Tears:
Force Tear (Fractured History):Next to Doma’s Shop.

Force Tear (Fractured Duality):On top of the tallest building of the outpost, can climb up the vines from the garden.
Rambler’s Reach Outpost Treasures:


Priorite Shard #2:Nekko super jump onto the roof of the building and drop down from there.

Priorite Shard #3:Nekko super jump into top floor of the stable.

Priorite Shard #4:Force Lift the dung on the bottom floor of the stable.

Priorite Shard #5:Use the glider at the top of Untamed Downs to reach the very top of the building.

Rambler’s Reach Outpost Seed Pods:
Bluebell Squish (Felucian Yellow):On the edge of the stable fence.

Pine Fern:Reach the penultimate (in height) level of the area behind the Mantis and slash the plant at the map location.

Pine Fern (Dathomirian Red):Reach the penultimate (in height) level of the area behind the Mantis and slash the plant at the map location.
Pine Fern:Reach the penultimate (in height) level of the area behind the Mantis and slash the plant at the map location.
Pine Fern:Reach the highest level of the area behind the Mantis and slash the plant at the map location.
Pine Fern:Reach the highest level of the area behind the Mantis and slash the plant at the map location.
Pine Fern (Nabooan Green):In the garden atop Pyloon’s Saloon.
Pine Fern (Felucian Yellow):At the corner of the grey bunker-like building near the entrance to the Outpost.
Bluebell Squish:Just outside the stable fence.
Spine Fluff:A few metres from the stable fence.
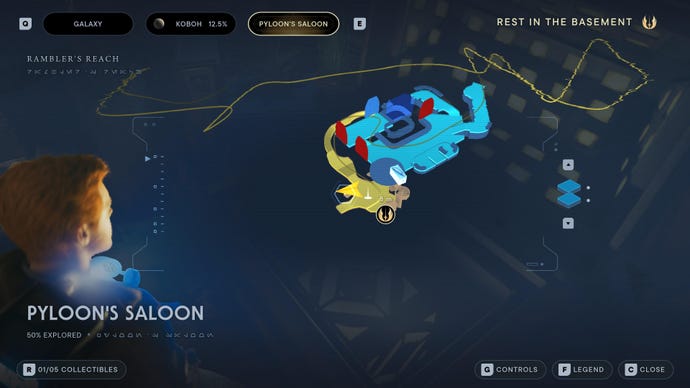
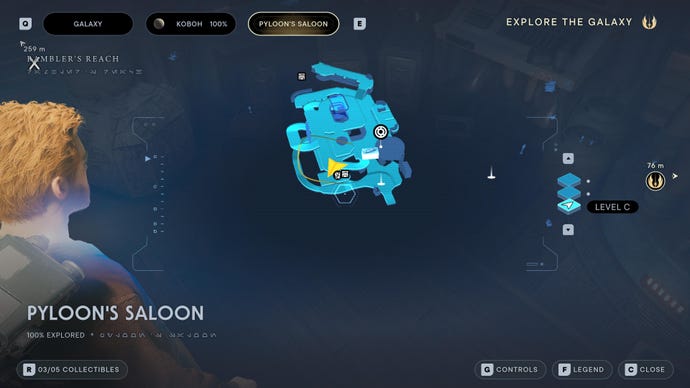
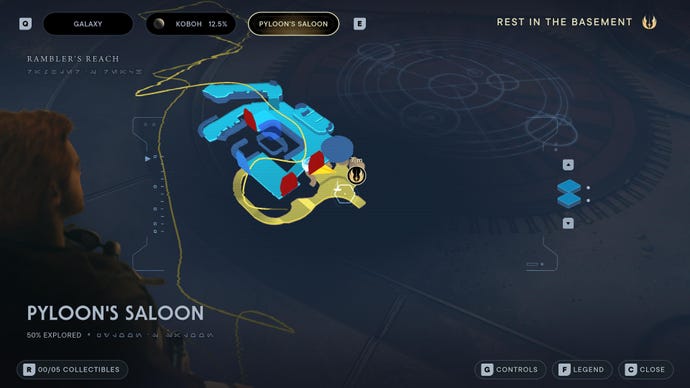
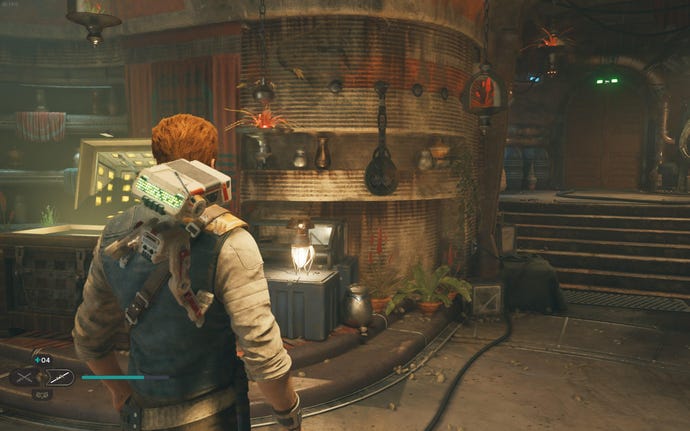
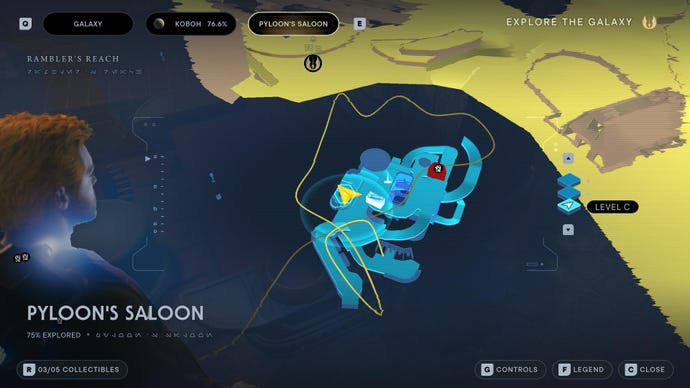
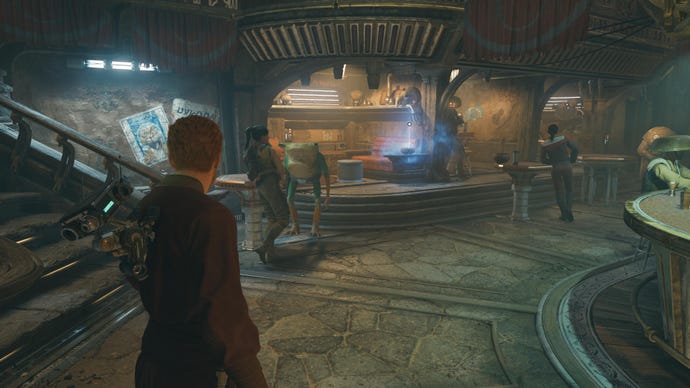
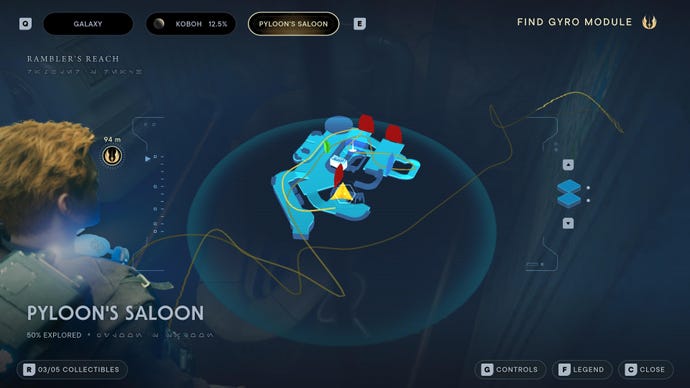
Pyloon’s Saloon collectibles
Your home away from home has just 5 collectibles to find:
Pyloon’s Saloon Chests:
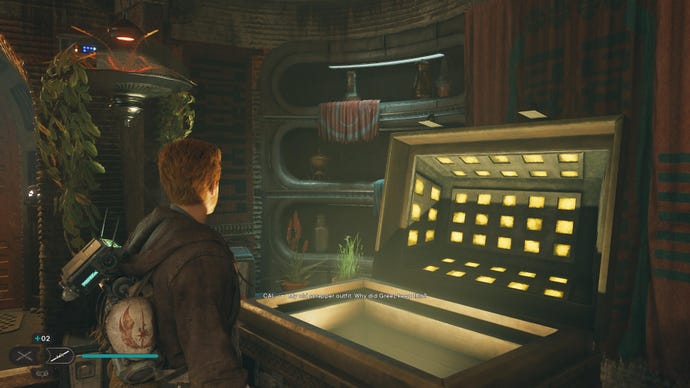
Chest #1 (Scrapper Outfit):Next to the Meditation Point.
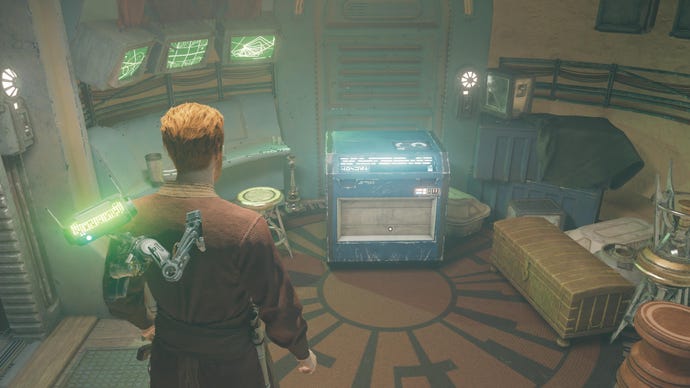
Chest #2 (Eerin Siinaa music track):Inside the back room, talk to Doran on ~7 occasions and he’ll unlock it for you.
Pyloon’s Saloon Databanks:
Databank (Hallikset):Next to the Meditation Point.
Force Echo (Angles):In the bar area of Pyloon’s Saloon. Only available after reaching the end of the main story.

Databank (Moran’s Possessions):Inside the back room, talk to Doran on ~7 occasions and he’ll unlock it for you.
Pyloon’s Saloon Treasures:

Priorite Shard:In the toilet in Pyloon’s Saloon.
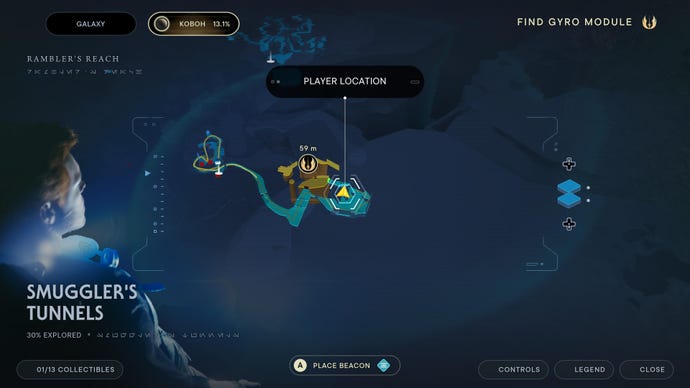
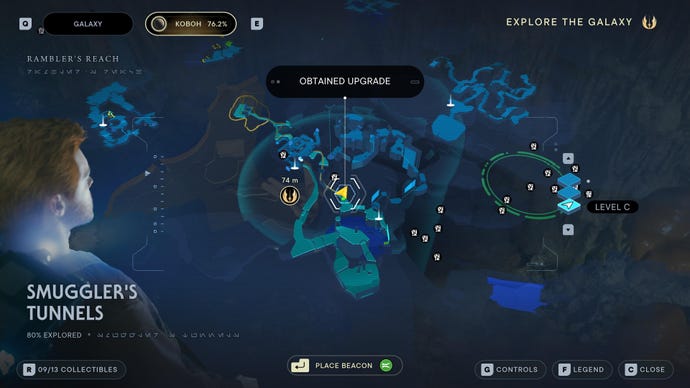
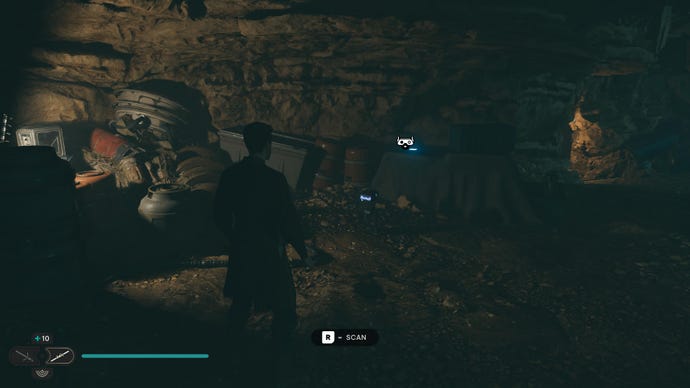
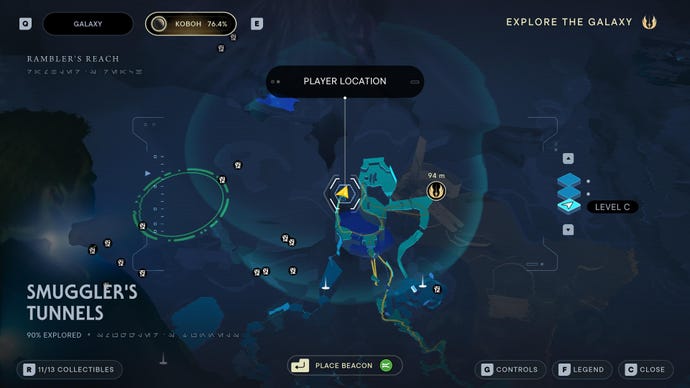
Smuggler’s Tunnels collectibles
The Smuggler’s Tunnels are connected to Pyloon’s Saloon and Phon’Qi Caverns, and you may need to approach them from both ends in order to pick up the 13 collectibles housed there:
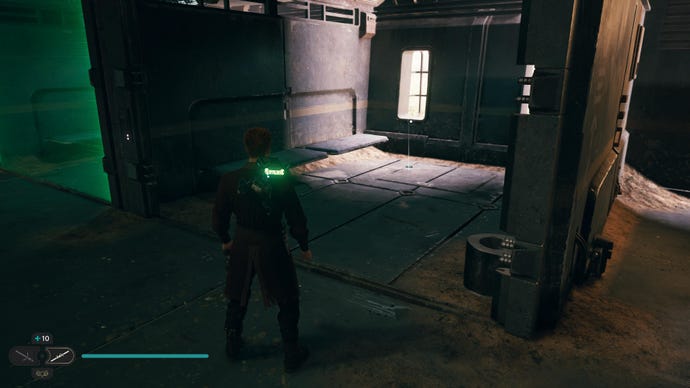
Smuggler’s Tunnels Chests:
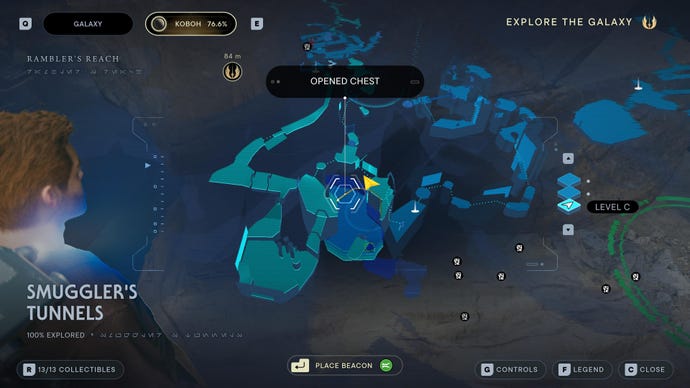

Chest (Tactical material):Dive underwater at the bottom of the tunnels.
Smuggler’s Tunnels Essences:
Skill Point Essence:Smuggler’s Tunnels, first danger room.

New Perk Slot:From the outpost side, follow the path until you emerge into a cavern with a green forcefield. Dash through first one then the other forcefield in front of you.
Smuggler’s Tunnels Databanks:


Databank (No Way Out):First room of Smuggler’s Tunnels.


Databank (List Of Grievances):Next to the green forcefield in the Outpost building (nekko super jump to get in).

Databank (Jailbreak Inventory):Follow the path through down the tunnel (from the outpost side) until you see light and defeat the Gorgers. Then look on the left for a datapad to scan.


Force Echo (Death In The Dark):From the outpost side, follow the path until you emerge into a cavern with a green forcefield. To your left is a body with the echo.


Databank (One Last Victory):From the outpost side, follow the path until you emerge into a cavern with a green forcefield. Dash through the forcefield and then turn left to reach the side platform.
Smuggler’s Tunnels Force Tears:
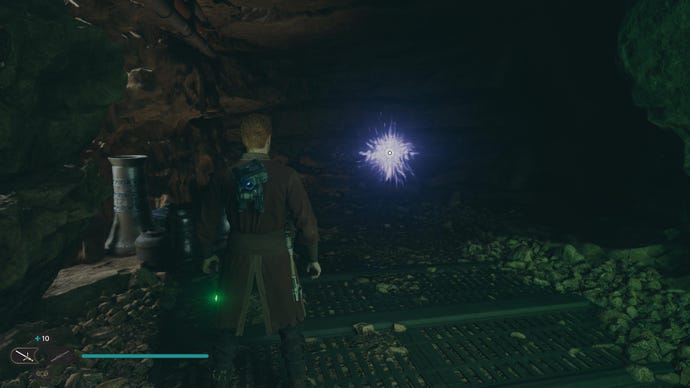
Force Tear (Fractured Momentum):Retrace your steps until you’re above the Collapsed Passage Meditation Point, then wall-run over to the green forcefield and dash through it.
Smuggler’s Tunnels Treasures:

Priorite Shard #1:Next to the green forcefield in the Outpost building (Nekko super jump to get in).

Priorite Shard #2:Down the Smuggler’s Tunnels from the outpost side (past the green forcefield), take the first left.

Priorite Shard #3:Follow the path through down the tunnel (from the outpost side) until you see light and defeat the Gorgers. Then look to the right.
Priorite Shard #4:From the outpost side, follow the path until you emerge into a cavern with a green forcefield. Dash through the forcefield and then turn left to reach the side platform.
Collapsed Passage collectibles
This tiny offshoot of Smuggler’s Tunnels contains just the 1 collectible:
Collapsed Passage Treasures:
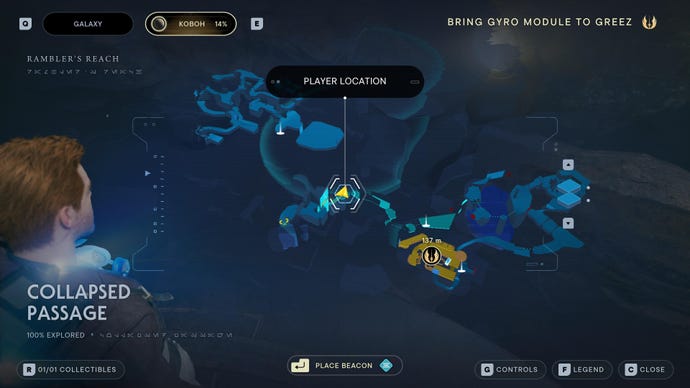
Datadisc:On a raised platform in the Collapsed Passage. Double back after the back-to-back wall-jumping section.
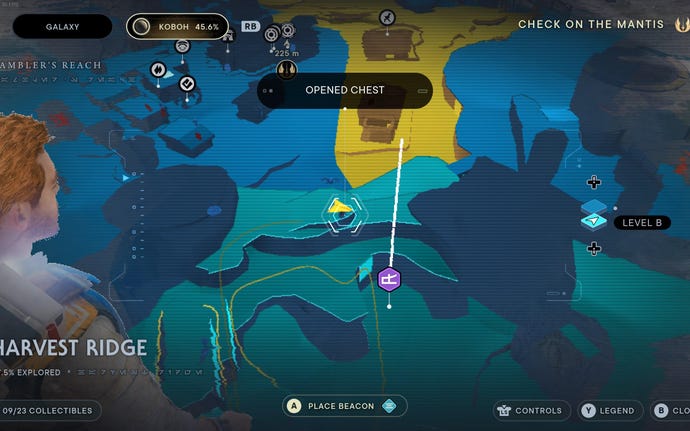
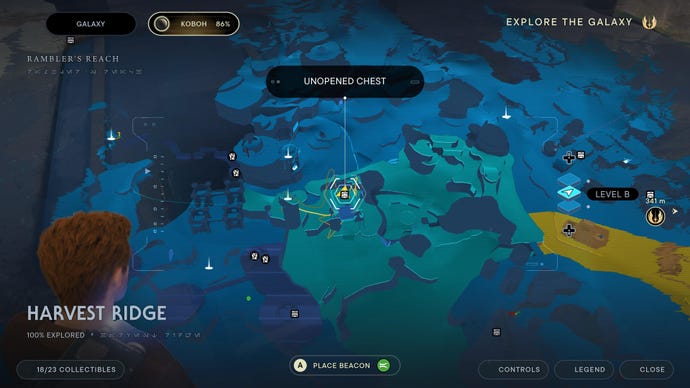
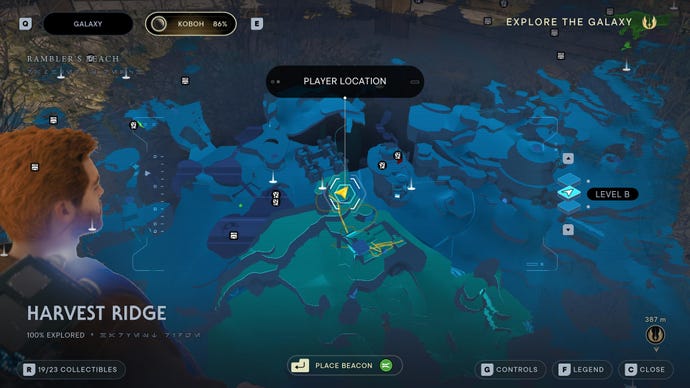
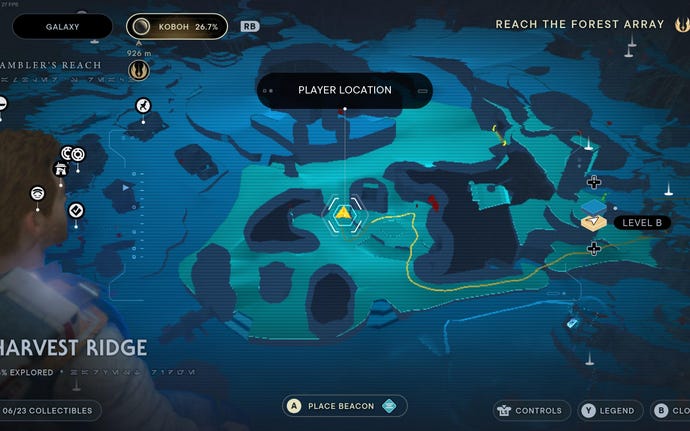
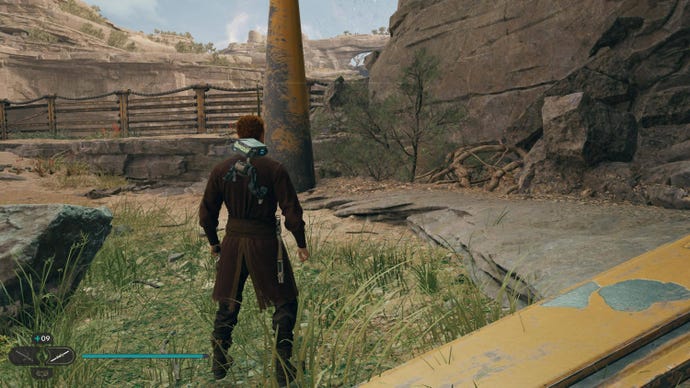
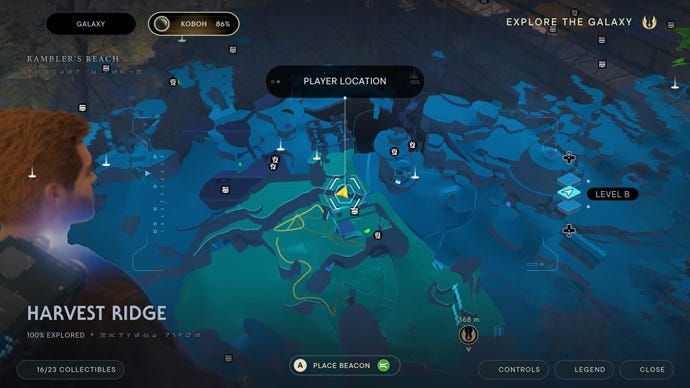
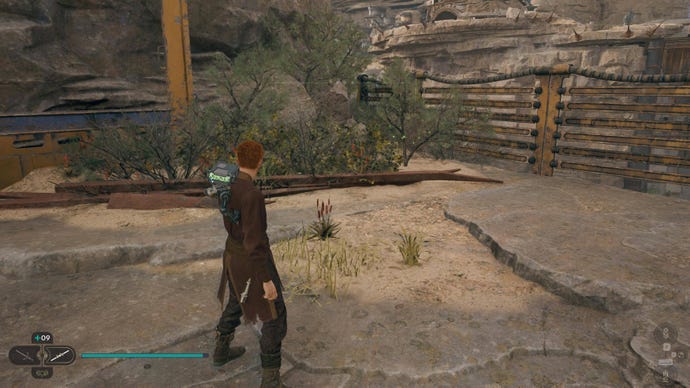
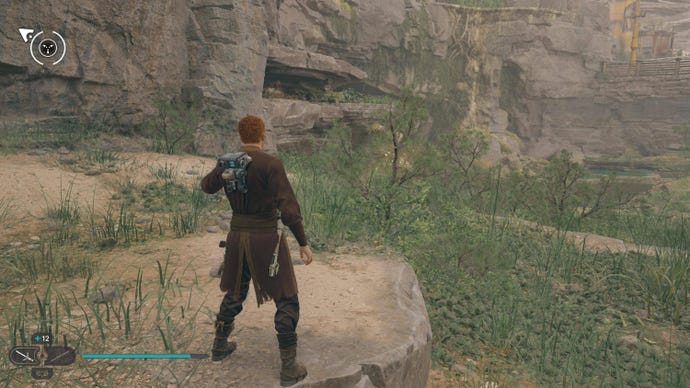
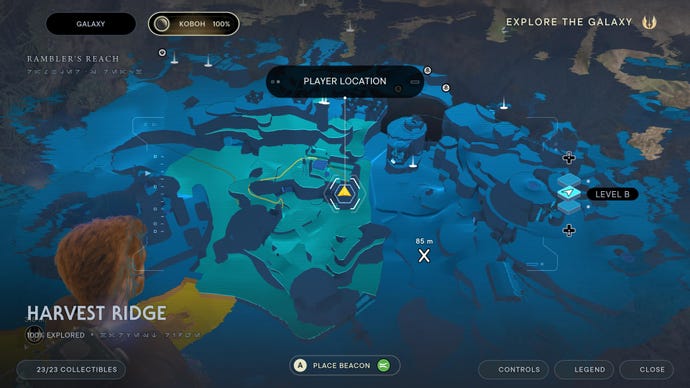
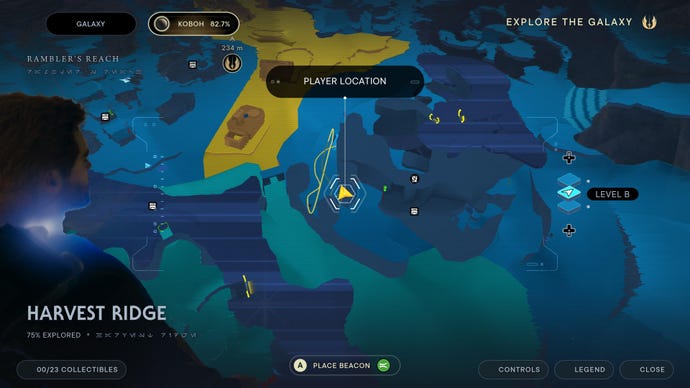
Harvest Ridge collectibles
Harvest Ridge lies on the other side of Riverbed Watch, in the dead centre of Rambler’s Reach. It’s a fairly chunky area, with a total of 23 collectibles to gather, most of them plants:
Harvest Ridge Chests:

Chest #1 (Wanderer Pants):Use Nekko mount to super jump up wall (marked purple), and then do both wall runs and pole swing across gap to get chest.
Chest #2 (Shortpaw’s Dance music track):From the Meditation Point, glide down onto the top of the barn.
Harvest Ridge Essences:

Harvest Ridge Databanks:


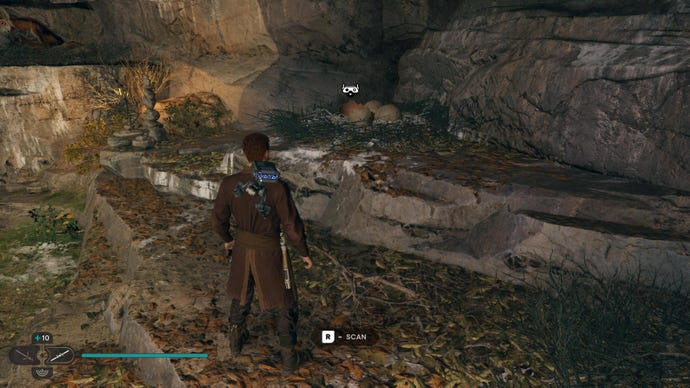
Force Echo (Home On The Range):Get up to the top part of Harvest Ridge (via Moldy Depths), then Nekko super jump to the next level and drop into the barn. Scan the eggs.
Harvest Ridge Treasures:

Priorite Shard:Use Nekko mount to super jump up wall (marked purple), and then do both wall runs but drop down instead of pole-swinging. Follow the path round to the left to find the Priorite.
Harvest Ridge Seed Pods:

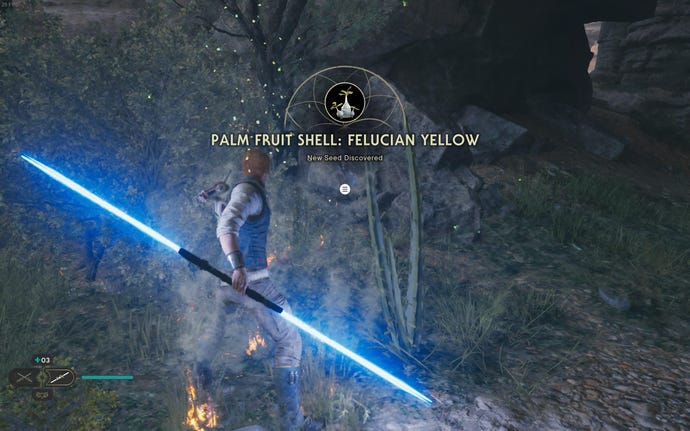
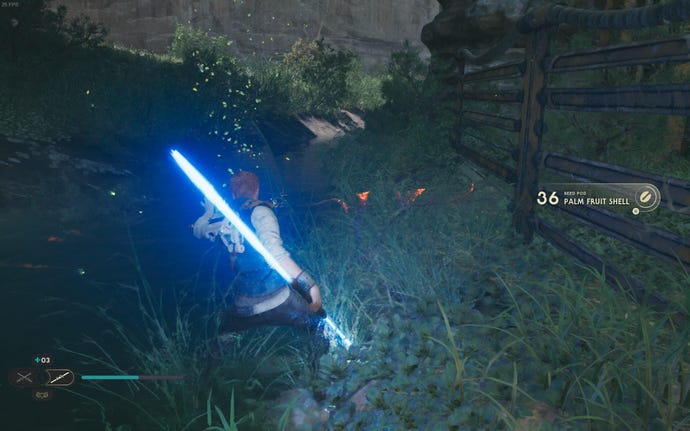
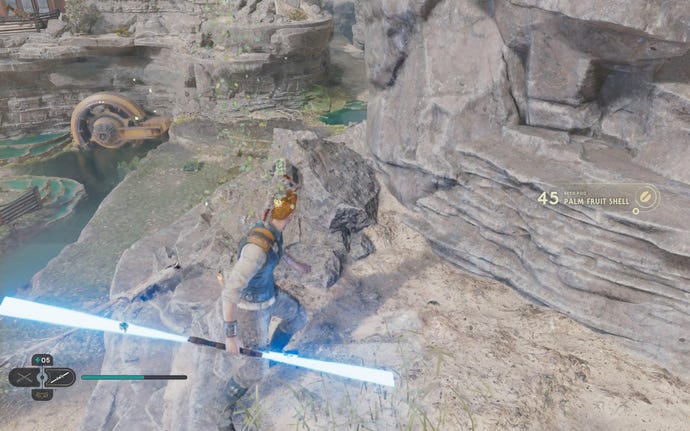
Palm Fruit Shell (Felucian Yellow):In tunnels near the slippery slope that leads back down into Riverbed Watch.

Bluebell Squish:Near the slippery slope.
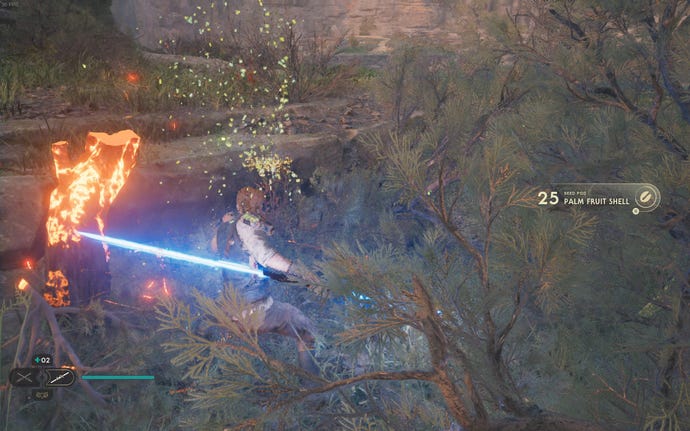
Palm Fruit Shell:Near the slippery slope.
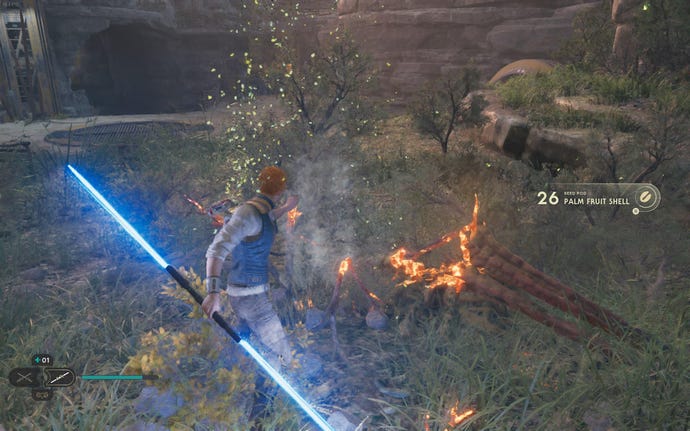
Palm Fruit Shell:Near the slippery slope.


Palm Fruit Shell:Use Nekko mount to super jump up wall, and then wall run across gap and turn left. Slash plant.

Palm Fruit Shell:Use Nekko mount to super jump up to vines in the middle, and then slash plant immediately on your right.

5x Palm Fruit Shell (inc. Rare):Use Nekko mount to super jump up wall, wall-run, then go all the way up to the top of the right-hand of the two walls that you jump between.

Bluebell Squish:Get up to the top part of Harvest Ridge (via Moldy Depths), then look to the left of where the droids and raider attack you, against the cliff wall.
Palm Fruit Shell (Dathomirian Red):Get up to the top part of Harvest Ridge (via Moldy Depths), then Nekko super jump to the next level and look in the back left corner for the plant.

Palm Fruit Shell:Near the border between Harvest Ridge and Untamed Downs.
Palm Fruit Shell:Reach the roof of the stable and drop down onto the plant-covered ledge to the side.
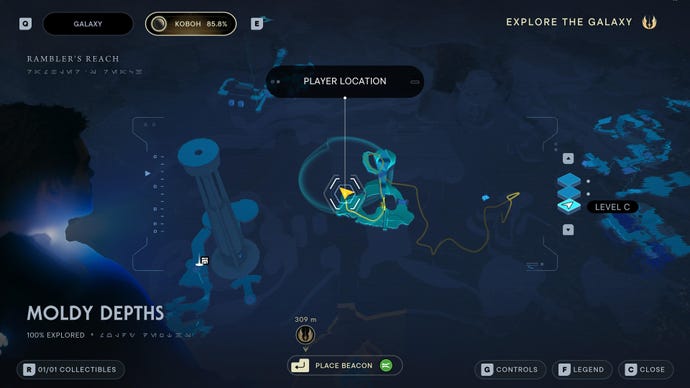
Moldy Depths collectibles
Moldy Depths are a tiny underground section beneath Harvest Ridge. They contain just 1 collectible:
Moldy Depths Treasures:

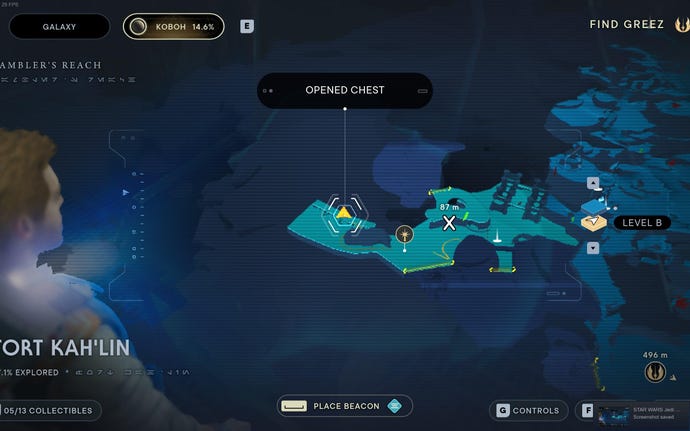
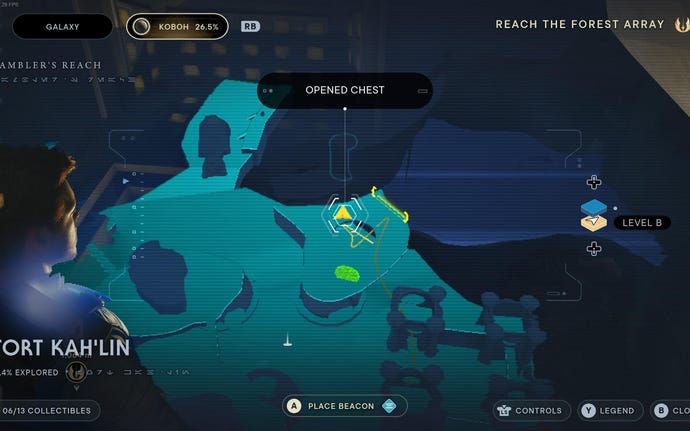
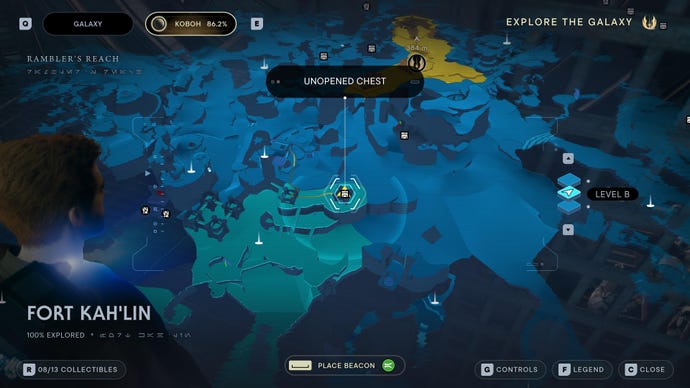
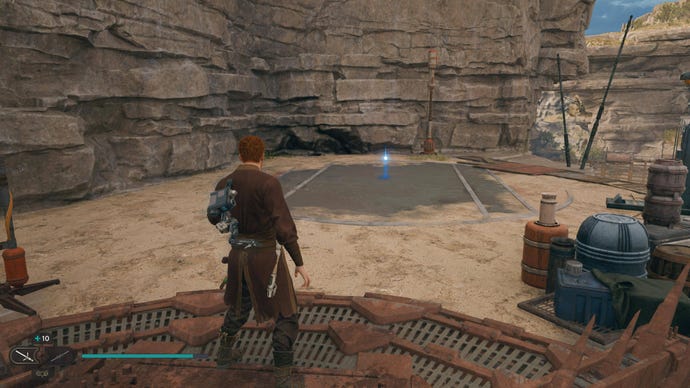
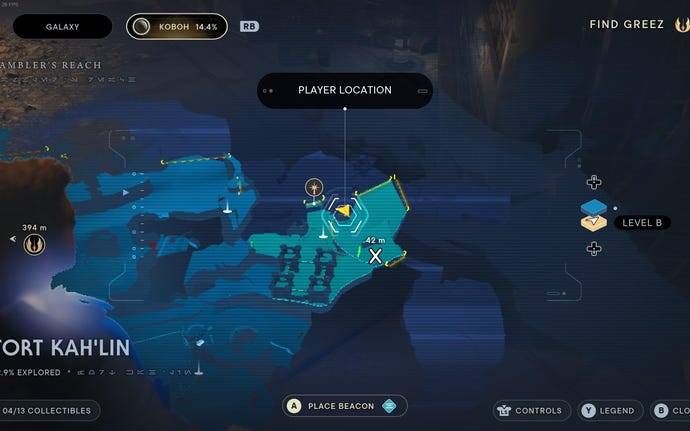
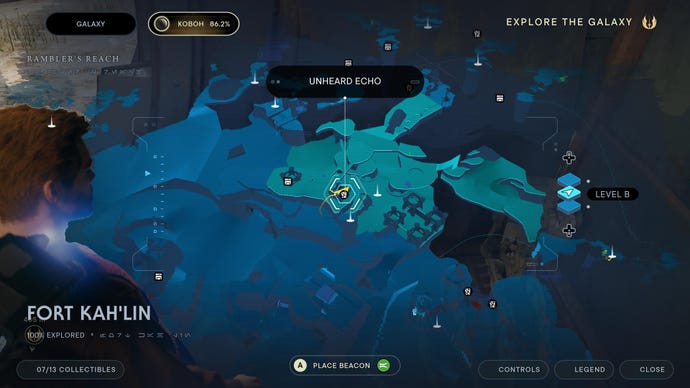
Fort Kah’lin collectibles
Fort Kah’lin is a haven for the Bedlam Raiders, and as such a dangerous place for Cal. You’ll need to do lots of fighting (including against the Spawn Of Oggdo, one of the most annoying bosses in the game) if you want to find all 13 collectibles:
Fort Kah’lin Chests:
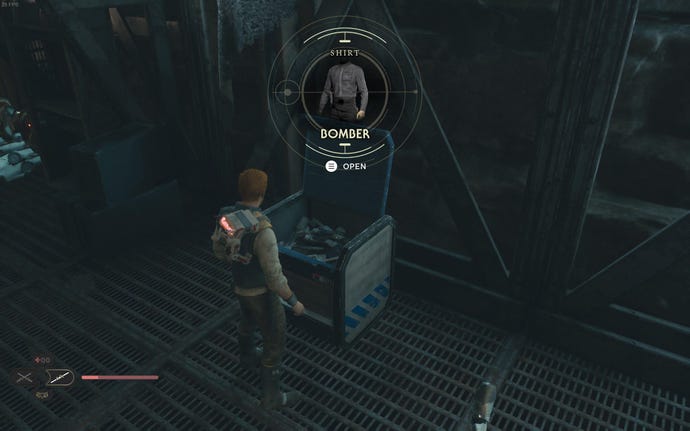
Chest #1 (Bomber Shirt):In room behind CIS tanker in Fort Kah’Lin.
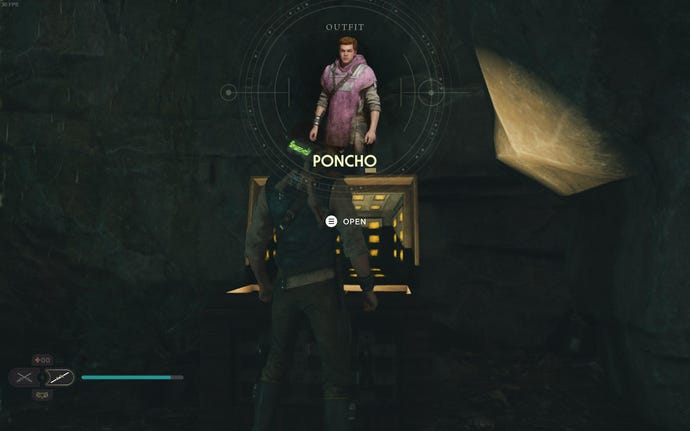
Chest #2 (Poncho Outfit):Defeat Spawn of Oggdo and loot chest in boss arena.

Fort Kah’lin Essences:

Skill Point Essence:Get onto the very top level of the fort, then head to the ledge above where you drop down into the Spawn Of Oggdo room.
Fort Kah’lin Databanks:

Databank (Past Signs of Life):In the room directly ahead of Fort Kah’Lin Meditation Point.

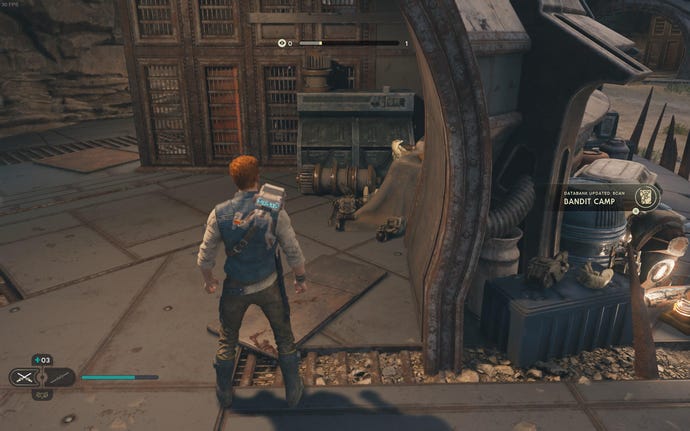
Databank (Bandit Camp):In room to the left of the Fort Kah’Lin Meditation Point.

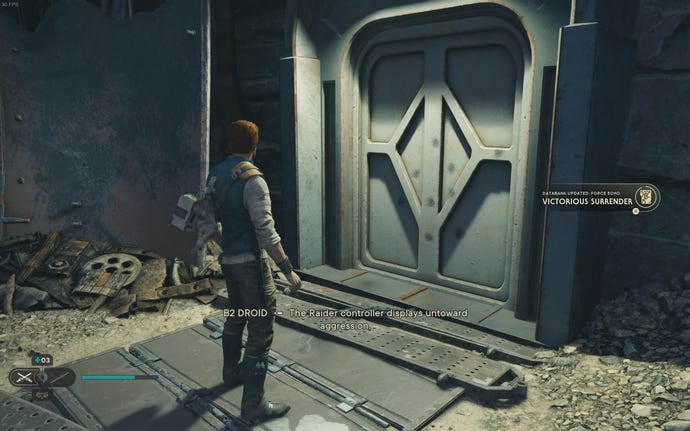
Force Echo (Victorious Surrender):Follow path to the left of Fort Kah’Lin Meditation Point until you reach a dead end.


Fort Kah’lin Treasures:

Priorite Shard:You can grab the glint that lures you into Spawn of Oggdo’s arena, on the grate that opens, after defeating the boss.
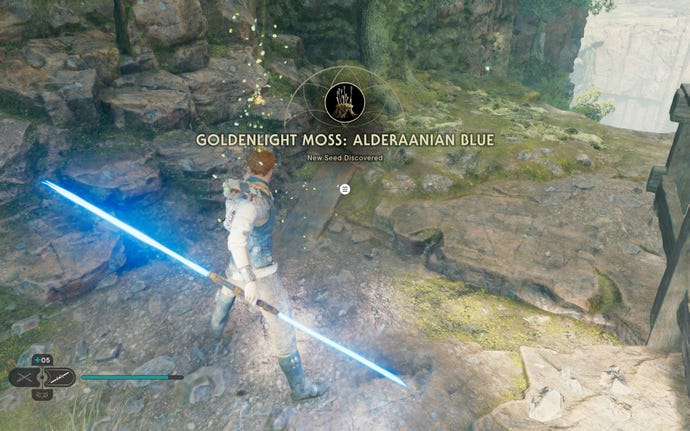
Fort Kah’lin Seed Pods:

Goldenlight Moss (Rare):From the roof of the Oggdo room, climb the vines to reach the grassy section beyond and slash the plant at the location marked on the map.


Goldenlight Moss:From the roof of the Oggdo room, climb the vines to reach the grassy section beyond and slash the plant at the location marked on the map.

Goldenlight Moss:From the roof of the Oggdo room, climb the vines to reach the grassy section beyond and slash the plant at the location marked on the map.
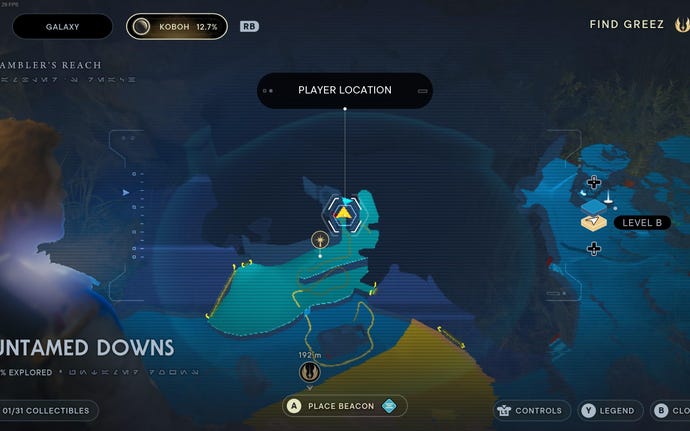
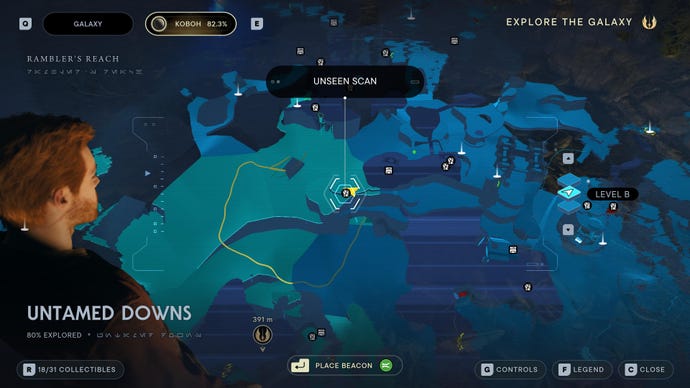
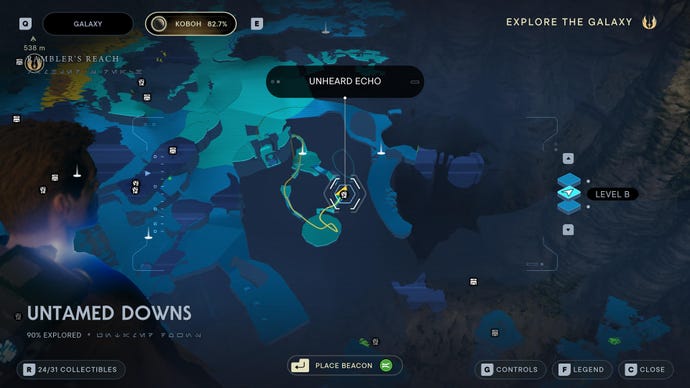
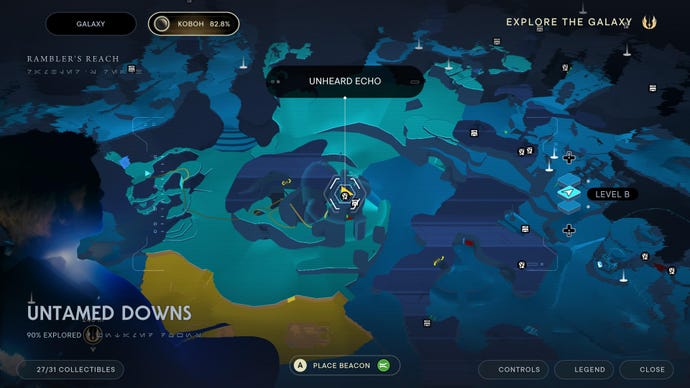
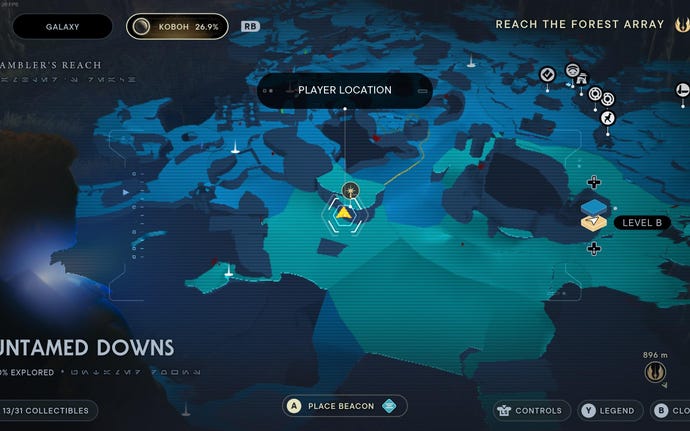
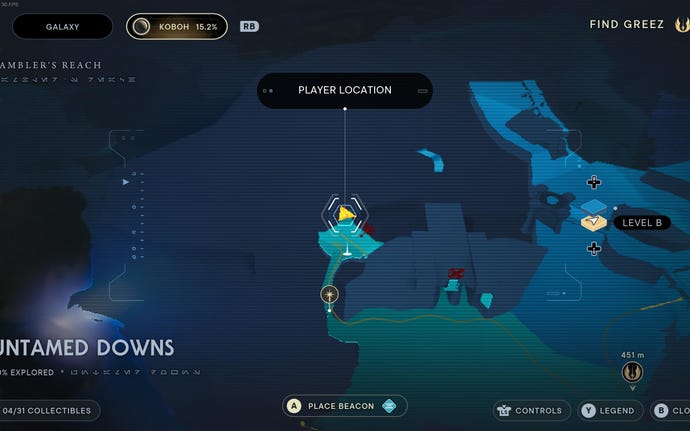
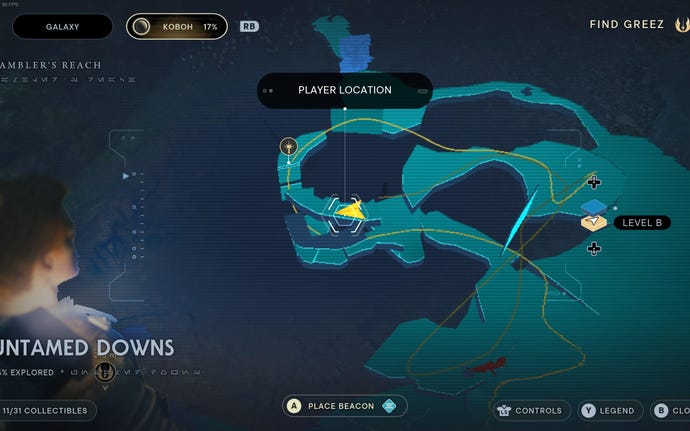
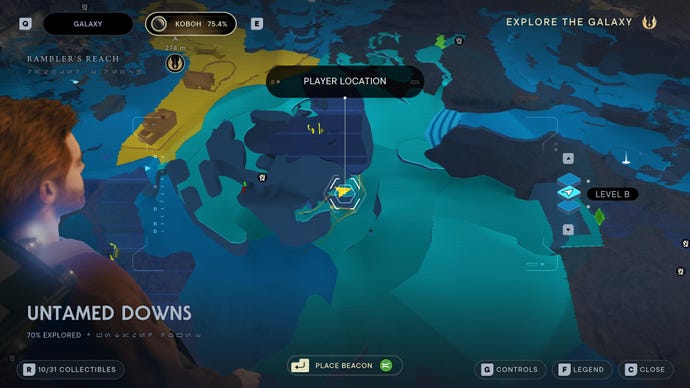
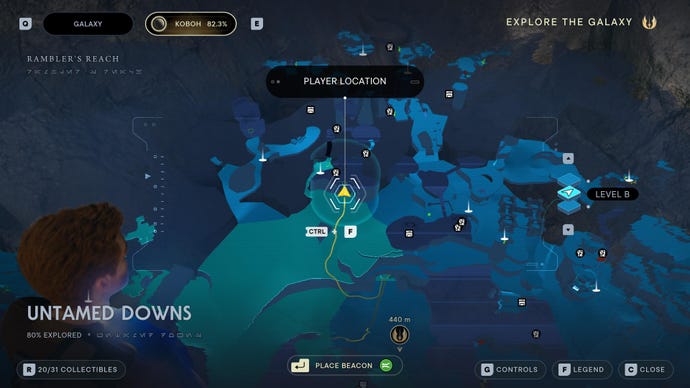
Untamed Downs collectibles
The Untamed Downs border both Harvest Ridge and Rambler’s Reach Outpost, and contain a wealth of Databank entries and a total of 31 collectibles:
Untamed Downs Chests:

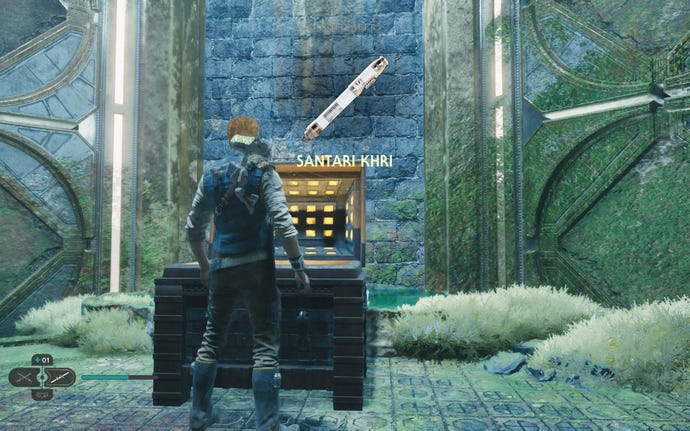
Chest #1 (Santari Khri lightsaber):In Untamed Downs cave, use a Roller Mine from previous bunker and guide it into cave to break wall.


Chest #2 (Geonosian Audio Sensors):In an Untamed Downs cave that you jump to reach, follow path to top and use vines on roof to get higher. Kill the Mogu and go past, then turn right and run across wall to find a chest.


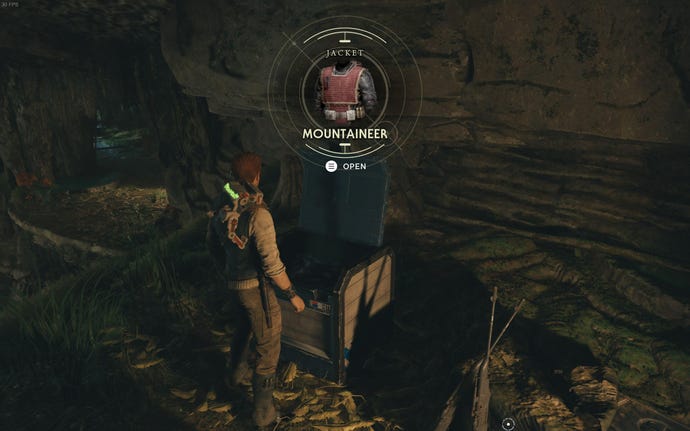
Chest #5 (Mountaineer Jacket):In Bilemaw Cave, jump onto pillar and climb vines. Then, follow path around and jump from ledge to second pillar. Mind control Garra to make them move off the chest.

Chest #6 (Swooper Legs):Shoot a dart through the grate round the right of the door to open it, then collect the chest inside.
Untamed Downs Essences:


Skill Point Essence #1:Past the green forcefield at the end of the bunker with all the mines, Force Lift the door on the right and head through, then turn left.


Skill Point Essence #2:Dash over the gap in front of the Untamed Downs Meditation Point and follow the path until you reach the arena with the 3 large beasts. Behind the waterfall is the essence.
Untamed Downs Databanks:

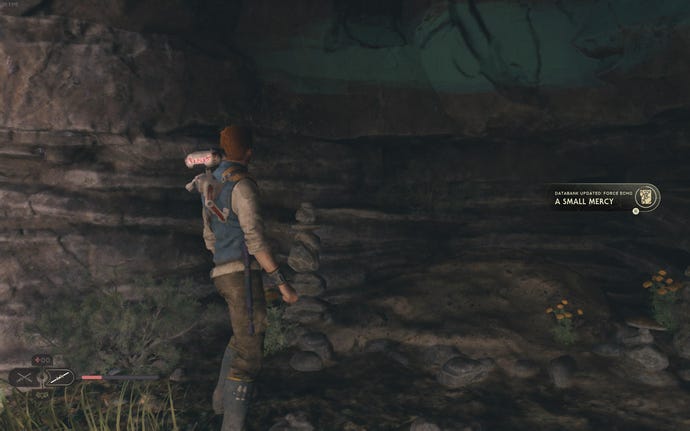
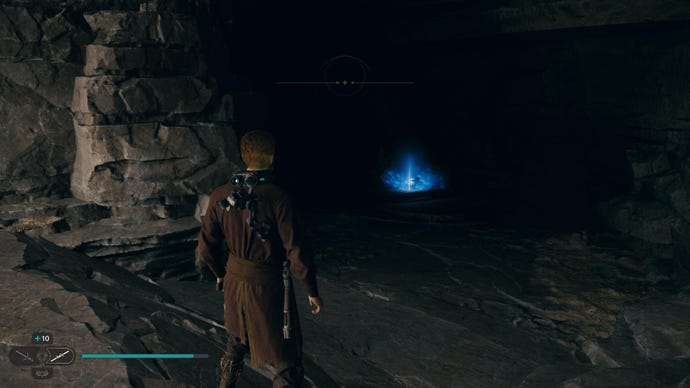
Force Echo (A Small Mercy):In alcove on the left as you re-enter Untamed Downs through the back of Fort Kah’Lin.


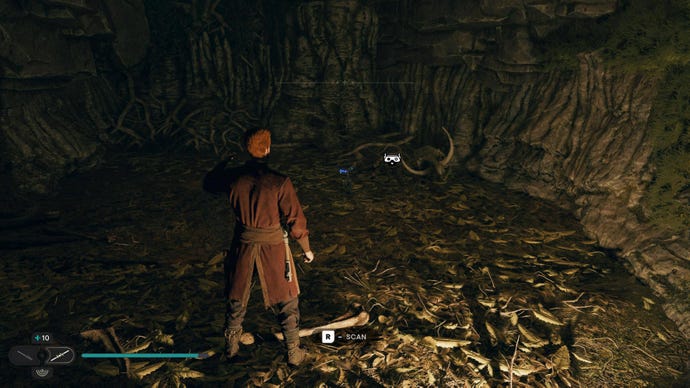
Databank (An Ecological Study):Ahead of Untamed Downs Meditation Point, down the ridge in the cave.


Force Echo (Shelter of Last Resort):In Untamed Downs cave, use a Roller Mine from previous bunker and guide it into cave to break wall.


Databank (Mogu Den):In the cave that you have to jump to reach in Untamed Downs, follow path around to find scan point.


Databank (The Deep Caverns):Past the green forcefield at the end of the bunker with all the mines, check behind the hanging box on the right-hand side.


Databank (Gift Of Fire):Past the green forcefield at the end of the bunker with all the mines, Force Lift the door on the right and head through, then turn left.

Databank (The Truth):Past the green forcefield at the end of the bunker with all the mines, Force Lift the door on the right and head through, then turn right.
Databank (Bilemaw Burrow):In the Bilemaw cave accessible from Harvest Ridge.


Databank (Warning Sign):Dash over the gap in front of the Untamed Downs Meditation Point and follow the path until you hit the sign.

Force Echo (The Feeding Grounds):Dash over the gap in front of the Untamed Downs Meditation Point and follow the path until you reach the arena with the 3 large beasts. After that, climb the wall and you’ll see the echo.
Force Echo (The Ties That Bind):From the cave on the edge of Untamed Downs, ride the glider to the central rock. Use the bar to swing to the top, then enter the cave.

Force Echo (Turgle Makes a Deal):In Bilemaw cave in Harvest Ridge, sits under Fort Kah’Lin. Climb vines on pillar and follow path around.
Untamed Downs Treasures:

Priorite Shard #1:In Untamed Downs Meditation Point cave, through the waterfall.
Priorite Shard #2:When entering Mogu room, turn right and hop across gap to ledge.

Priorite Shard #3:Use Nekko super jump to reach the green forcefield in the rock, then follow the path up and jump across to the high ledge with the priorite.


Priorite Shard #5:At the base of the two large archways in the cliff side, near Fort Kah’lin. Force Lift the stones on the ground.

Priorite Shard #6:Nekko super jump onto the ledge near the locked door in the centre.
Untamed Downs Seed Pods:


Spine Fluff:On the ledge just next to the Outpost river.


Bluebell Squish:In the middle of the large clearing outside Fort Kah’lin.
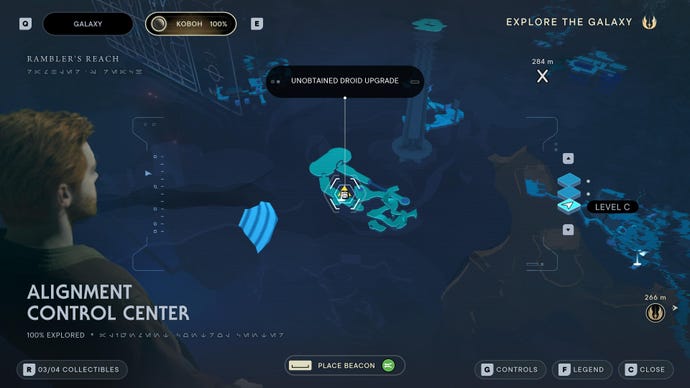
Alignment Control Center collectibles
The underground Alignment Control Center is accessible through the doorway in the central Untamed Downs rock as you approach from the Rambler’s Reach Outpost side. It contains 4 collectibles:
Alignment Control Center Chests:

Chest (Harmony Pommel):Cave that leads to Alignment Control Center elevator, near where you enter slide down wall and run across to find chest beneath the entrance.
Ability (Show Essences on map):Complete all six chambers plus get the Ambidexterity Perk in Devastated Settlement. Learn more with ourJedi: Survivor Alignment Control Center puzzleguide.
Alignment Control Center Databanks:

Force Echo (Patience):Only available after reaching the end of the main story. At end of oval room with waves of enemies adjoining Meditation Point room.
Alignment Control Center Treasures:


Datadisc:From the cave on the edge of Untamed Downs, ride the glider to the central rock. Then jump down the centre into the cave mouth below and find the corpse on the edge of another drop.
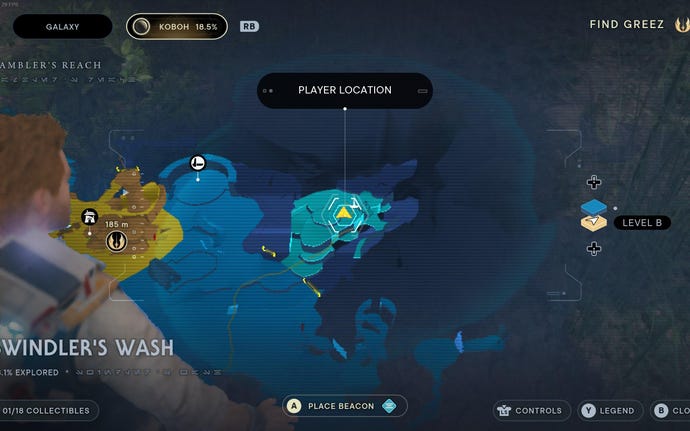
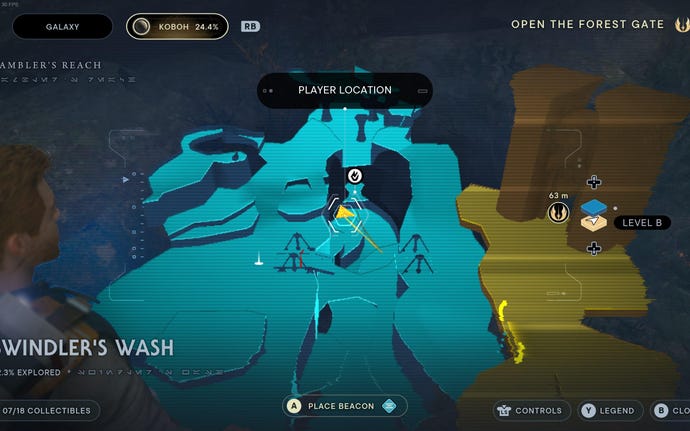
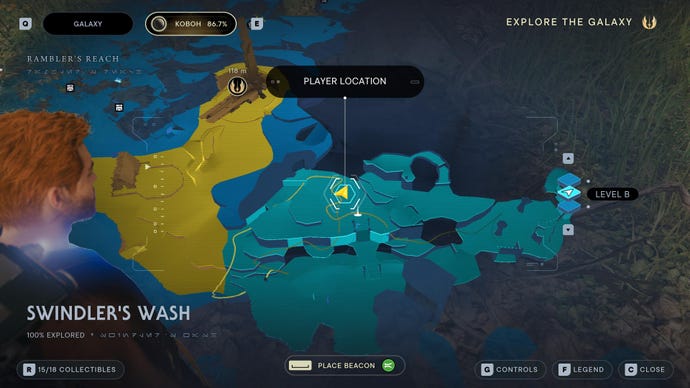
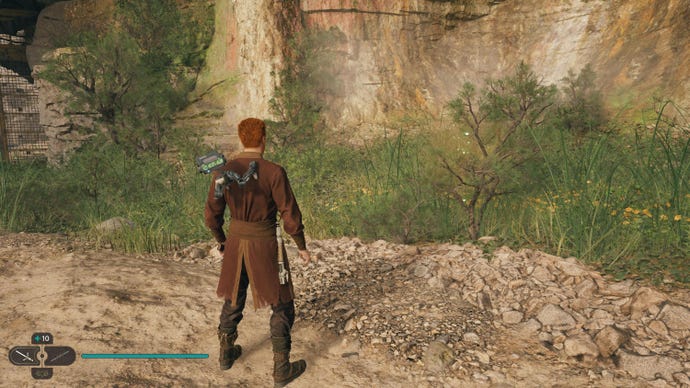
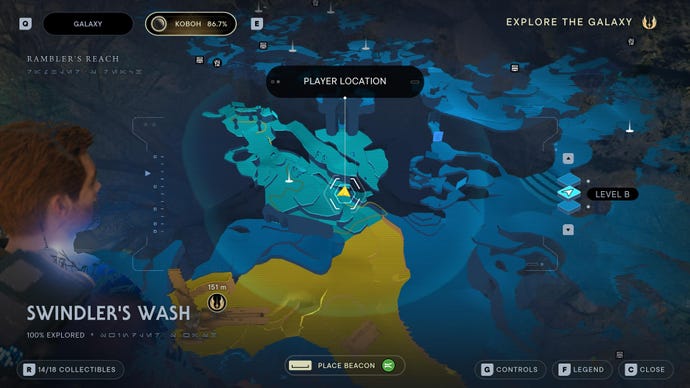
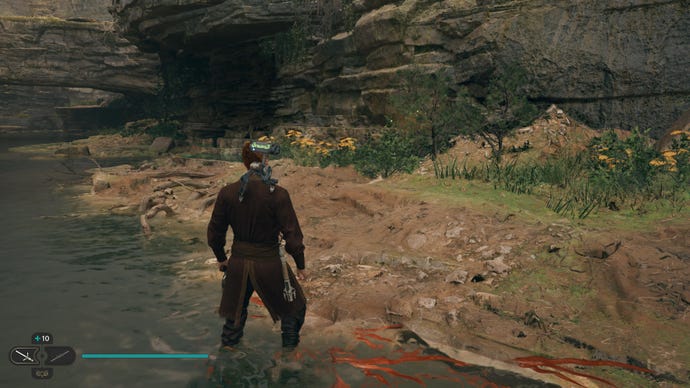
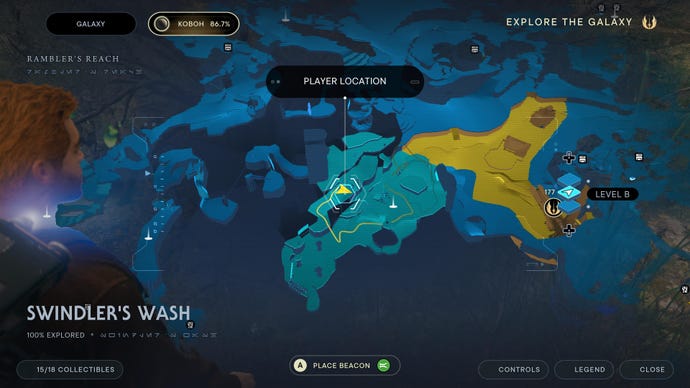
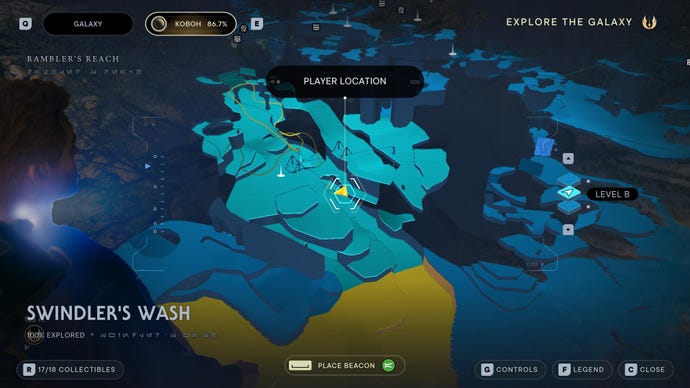
Swindler’s Wash collectibles
Swindler’s Wash is located just beyond Rambler’s Reach Outpost, and its rocky, watery terrain holds a total of 18 collectibles:
Swindler’s Wash Chests:


Chest #2 (Tactical Material):Climb up to Forest Gate, and then turn right to find chest overlooking Outpost.
Swindler’s Wash Essences:
Health Essence:Past Bilemaw, wall run to find small ledge and then turn back and wall run again, jumping up to higher wall run segment. Jump onto podium overlooking Bilemaw area.
Swindler’s Wash Force Tears:

Force Tear (Fractured Resolve):Behind the waterfall.
Swindler’s Wash Treasures:

Priorite Shard #1:On platform overlooking the Bilemaw, follow the path leading up between the Swindler’s Wash Meditation Point and Forest Gate.

Priorite Shard #2:Past the Bilemaw, wall run to find a small ledge leading to a Priorite Shard in an alcove.

Priorite Shard #3:Climb up to Forest Gate, and then turn right and head through the thick hanging vines to find shard.
Swindler’s Wash Seed Pods:
Goldenlight Moss (Nabooan Green):To the side of Swindler’s Wash Meditation Point.
Spine Fluff (Felucian Yellow):On the low path leading towards the Swindler’s Wash Force Tear, climb ledge on left side and slash glowing plant.
Goldenlight Moss:To the side of Swindler’s Wash Meditation Point.
Spine Fluff:On the right-hand side up against the cliff wall as you’re walking up the river.
Goldenlight Moss:Facing the Meditation Point from the far side of the broken bridge, look to the right and slash the plant a few steps from you.

Goldenlight Moss:Climb up onto the tall rock separating Swindler’s Wash from Rambler’s Reach Outpost, and slash the plant on the very edge.
Spine Fluff:On the right-hand side up against the cliff wall as you’re walking up the river, just before going under the rock bridge.


Chest #2 (Choppy Forward Hair):Zipline up and parkour around to the Geonosian Head Chest, and then turn back and leap across the gap near the second zipline and force pull a rope. Swing across and follow path around to find this chest.


Chest #4 (Geonosian Legs):Save the jawa beyond the path where you dash through the wind vent. Then use the object the jawa moves for you to get across to the ledge on the left. Inside is the chest.

Skill Point Essence:Save the jawa, then follow the path with the moving crates until you defeat the raiders attacking the jawa ship. Once the ship opens, go up into it and follow the path around and behind until you reach the roof.


Databank (Digger Crawler):Save the jawa, then follow the path with the moving crates until you defeat the raiders attacking the jawa ship. Then scan the ship.

Priorite Shard #2:Wall-run from the Meditation Point, follow the path to the top and then Dash through the vent to grip the opposite wall. Follow the path round to the place where you save the jawa, then Force Pull the wall in the room and squeeze through.

Priorite Shard #3:Save the jawa, then follow the path with the moving crates until you defeat the raiders attacking the jawa ship. Once the ship opens, go up into it and take the Priorite at the end

Priorite Shard #4:Squeeze through the gap opposite the jawa crawler.


Bluebell Squish:Near ridge out in the open.
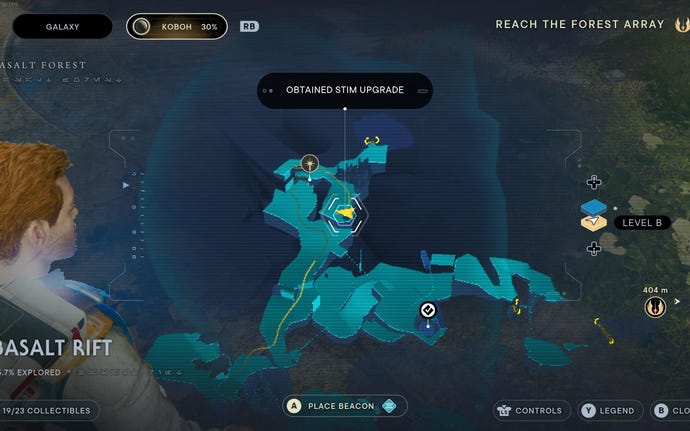
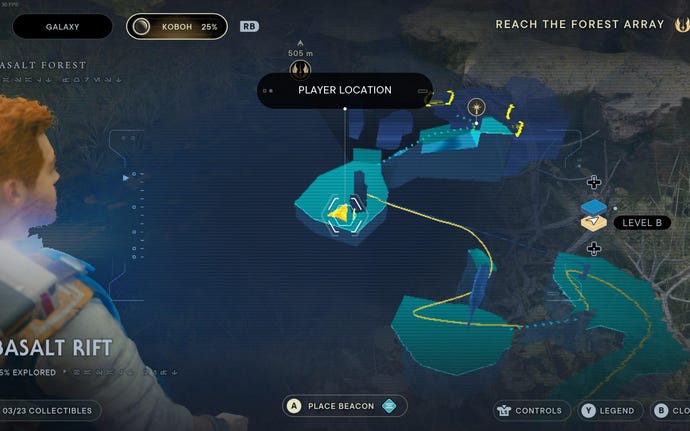
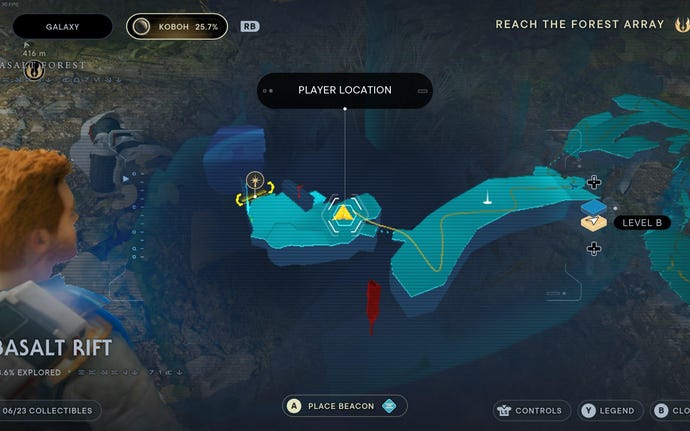
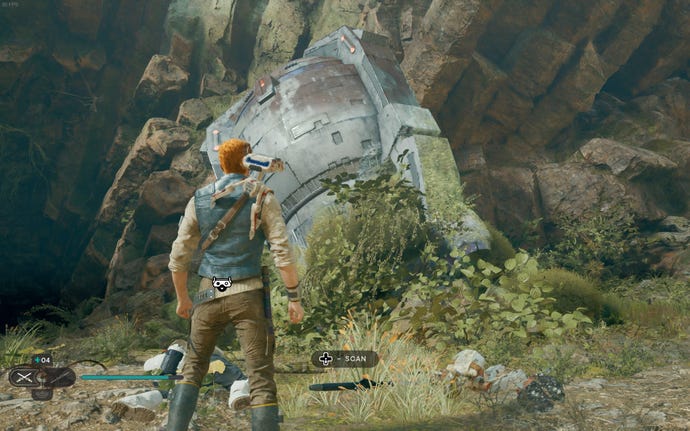
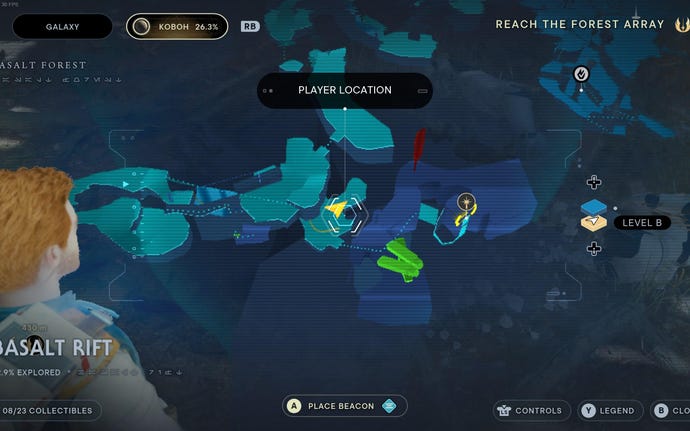
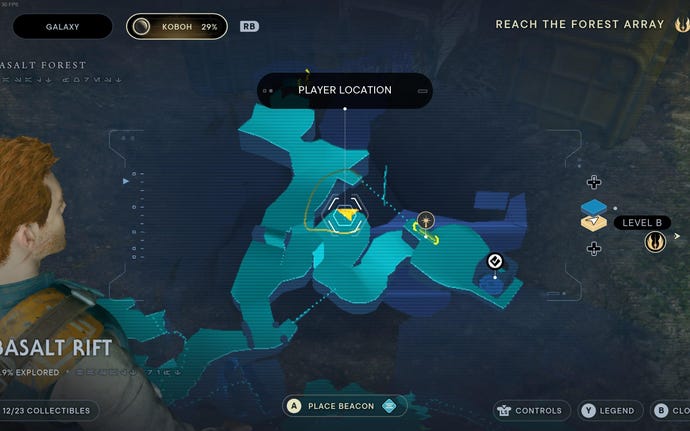
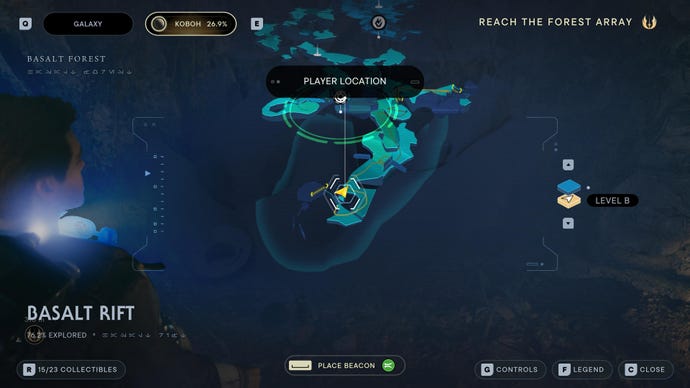
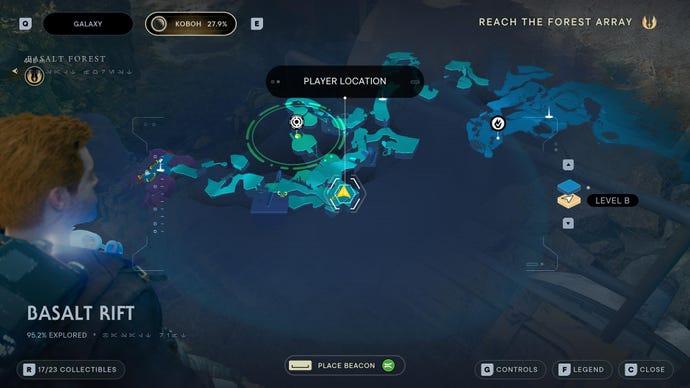
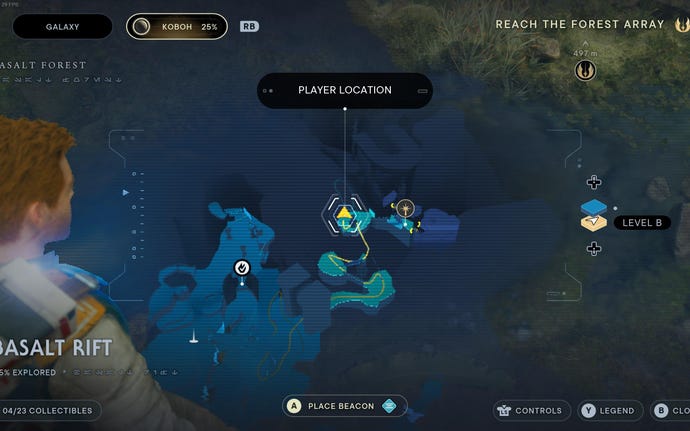
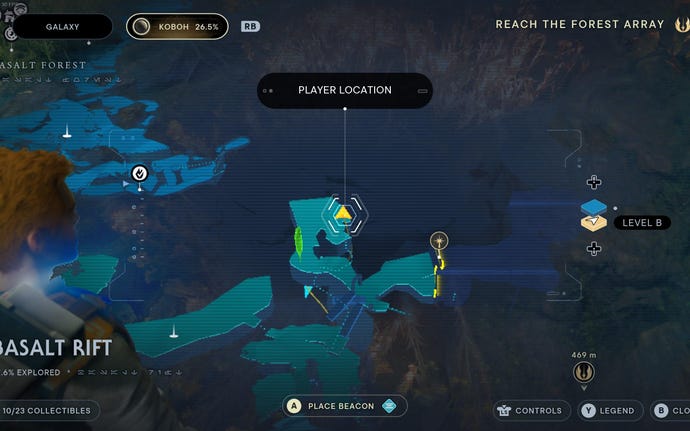
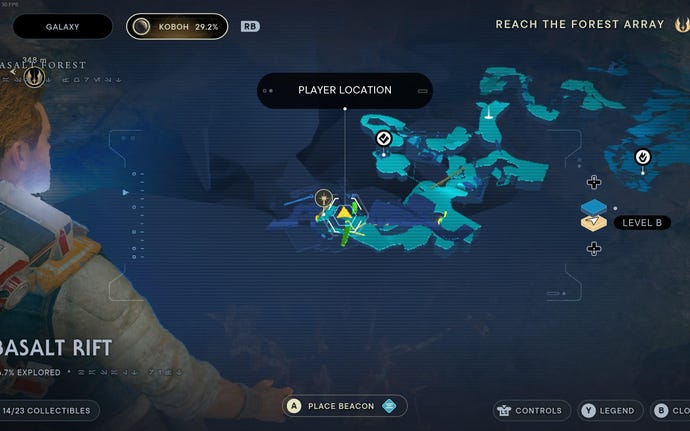
Basalt Rift collectibles
Connecting from Swindler’s Wash is Basalt Rift, the first region you’ll come across in Basalt Forest. It’s a fairly large place, filled with 23 collectibles:
Basalt Rift Chests:


Chest #1 (Hunter Pants):On the platform where Bilemaw fights stormtroopers, after slippery slope.


Chest #2 (Crew Cut Hair):Take low path (that goes beneath rope swing leading to Chamber of Reason) and fight through group of stormtroopers. Chest is to the side after beating them.


Chest #3 (Diligence Pommel):Take low path down to sleeping Bilemaw, and then turn back and look under the sloped rock that you used to get down.


Chest #4 (Hunter material):From the Meditation Point, jump over to where the droids are fighting the troopers. Jump off the far end and hook onto the hidden grapple point below to reach the chest.

Stim Canister:Wall-run up wall past Mogu and then turn right and follow path around to Stim chest.
Basalt Rift Databanks:

Databank (Basalt Pillars):Activate and use the zipline in Basalt Rift, and then scan the pillars that the zipline is attached to.
Databank (Drop Pod):On the platform where two Battle Droids fight a shield stormtrooper.


Databank (Bilemaw’s Revenge):On the platform where Bilemaw fights stormtroopers, after slippery slope.


Databank (Risk and Research):In Toa’s camp.

Databank (The Short Straw):Take low path (that goes beneath rope swing leading to Chamber of Reason) and fight through group of stormtroopers. Scan point is to the side after beating them.


Databank (Bilemaw Pools):Take low path down to sleeping Bilemaw, and turn left at the bottom to scan shallow pools.


Databank (Koboh Dust):Climb vines across and jump from the leaning bar to the ledge ahead, and scan the dust.
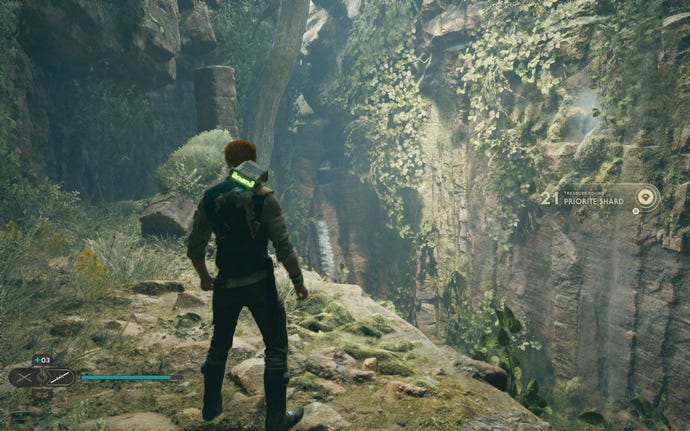
Basalt Rift Treasures:
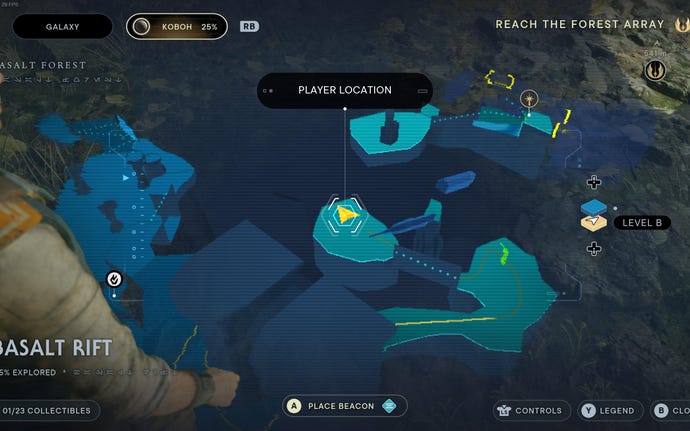
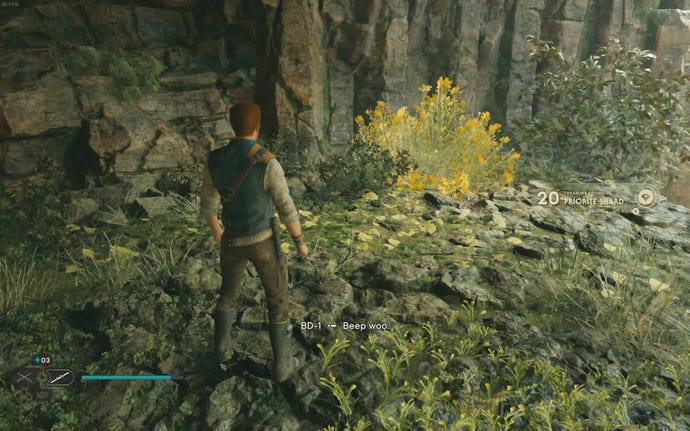
Priorite Shard #1:After passing through the Forest Gate, wall run across to where you cut the pillars with your lightsaber. The Priorite Shard is on this platform.
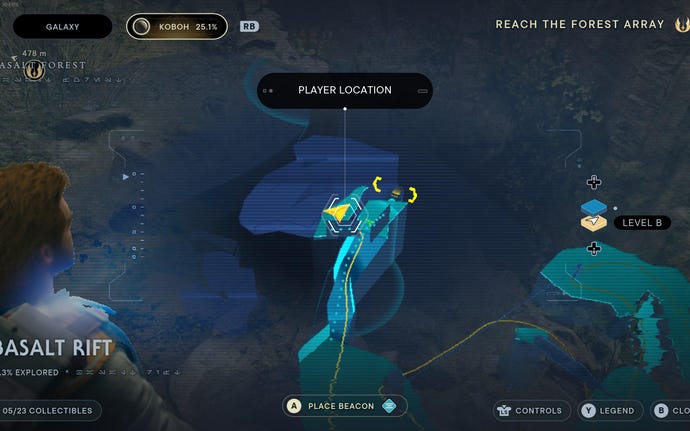
Priorite Shard #2:Wall run up slippery slope in Basalt Rift, and then turn back and wall run up higher sections to reach ledge overlooking the slope.
Priorite Shard #3 (Scav Droid):Take low path down to sleeping Bilemaw and turn right to find scav droid.

Datadisc #1:Above the sleeping Bilemaw, pull out the rocks and parkour up to the higher platform. Then start working your way through the weird swarm area. Just on the right after you first hang from the ceiling is a tiny cave area with the Datadisc.

Datadisc #2:Wall-run up to the platform above the Mogu.
Basalt Rift Seed Pods:

Goldenlight Moss (Dathomirian Red):Wall run across to where you cut the pillars with your lightsaber, and then slash glowing plant on the far side.
Goldenlight Moss:Zipline across in Basalt Rift, and then turn left and slash glowing plant.

Goldenlight Moss (Felucian Yellow):After climbing vine wall, turn right just before approaching Toa’s camp.
Goldenlight Moss Seed Pods:Take low path (that goes beneath rope swing leading to Chamber of Reason) and head down to the sleeping Bilemaw. Glowing plant is behind the Bilemaw.
Nekko Pools collectibles
Nekko Pools Chests:
Nekko Pools Databanks:

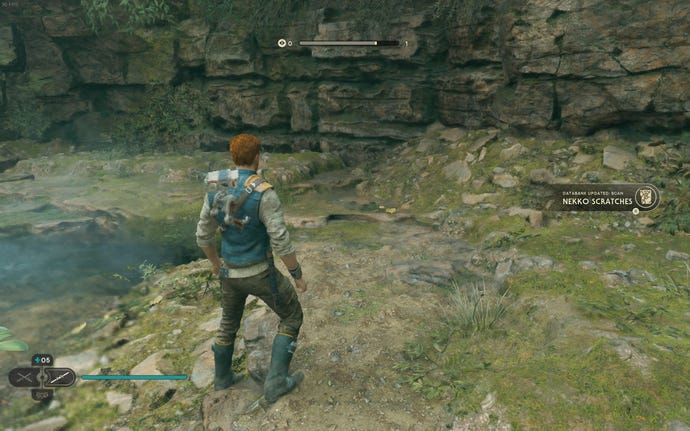
Databank (Nekko Scratches):From Nekko Pools Meditation Point, wall run up slippy slope and then climb vines around. Slide down second slippy slope, and head forward into clearing.
Nekko Pools Treasures:


Priorite Shard #1:Head into cave between the slippy slopes and follow path to end.


Priorite Shard #2:In cave at top of slippery slopes.
Nekko Pools Seed Pods:


Bluebell Squish (Alderaanian Blue):From Nekko Pools Meditation Point, wall run up slippy slope and then climb vines around. Slide down second slippy slope, and immediately turn right.


Bluebell Squish:From Nekko Pools Meditation Point, wall run up slippy slope and then climb vines around. Slide down second slippy slope, and head forward into clearing.
Bilemaw Den collectibles
Bilemaw Den is a tiny little sub-region which is accessible through the Forest Array (below). It contains just 3 collectibles:
Bilemaw Den Chests:


Chest (Tactical Material):Behind the tent on the cliff edge where you control the Bilemaw to defeat the stormtroopers.
Bilemaw Den Essences:
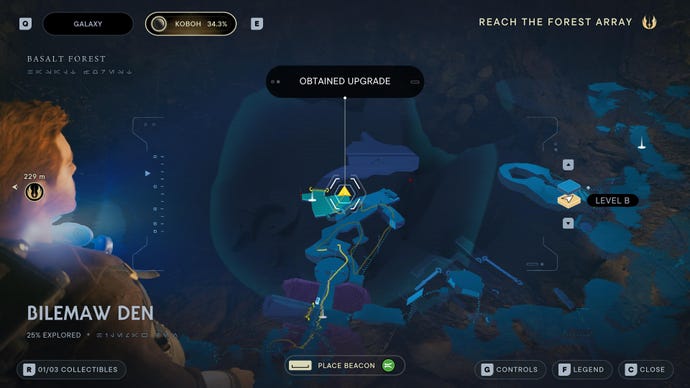
Ability (Confusion, Major Fauna):Opposite the stormtrooper sitting down in Forest Array, drop down the ledge and squeeze through the gap to reach Bilemaw Den. It’s right in front of you as you enter.
Bilemaw Den Seed Pods:

Goldenlight Moss:After passing through the stormtrooper/bilemaw camp, follow path around to the parkour section. Before parkour, head to left corner and slash plant.
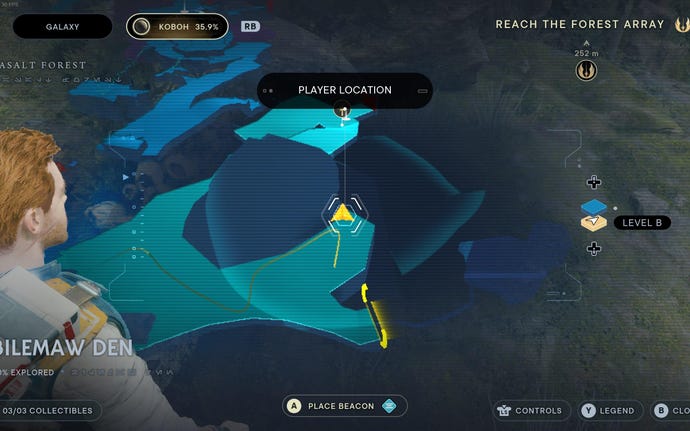
Rift Passage collectibles
Rift Passage is barely a region at all - more just a connection between two regions. You won’t be able to traverse it immediately, but it does contain 2 collectibles to check out:
Rift Passage Chests:
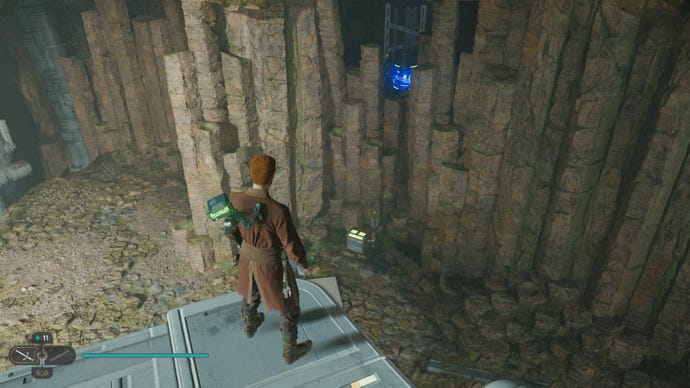
Chest (Kashyyyk Paint BD-1 materials):From the end of the long zipline, shoot a dart at the conduit above the chest down to your left, and then drop down and open the chest.
Rift Passage Treasures:
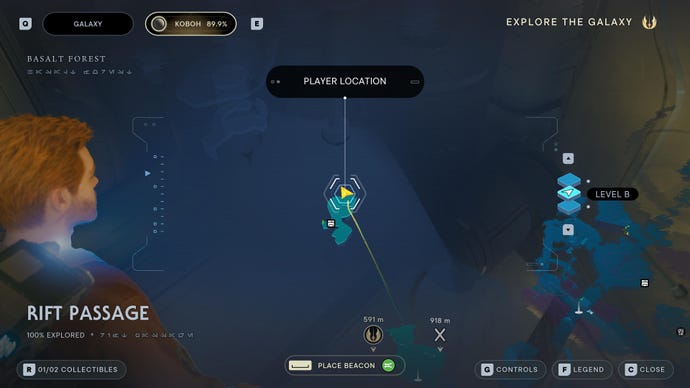
Datadisc:Take the long zipline and take the datadisc from atop the drum at the upper ledge on the other end.
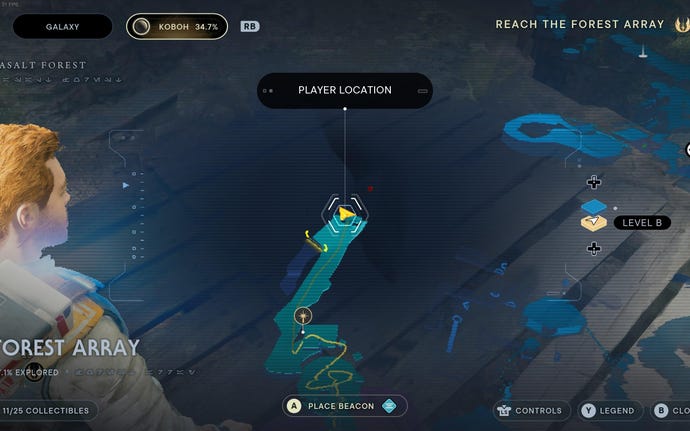
Forest Array collectibles
Forest Array is a major region that you’ll encounter in the main story through Koboh, and the abundance of dangerous Koboh matter in the region makes it tricky to explore. There are 25 collectibles:
Forest Array Chests:


Chest #1 (Hunter Shirt):Turn left at Forest Array Meditation Point, and jump into Koboh Dust to grapple to the climbing wall ahead. Climb to top and leap to the right to find chest.


Chest #3 (Diligence Switch):Follow the path upwards past the Mogu.


Chest #4 (Swooper Head):After unlocking the right path from the Meditation Point, follow the path upwards and then take a right turn down the large walkway, squeeze through the gap, and jump across to the ledge with the chest.


Chest #5 (Hunter Material):Free the birdy, then follow the laser path and climb up to where you couldn’t reach before because birdy knocked you off.


Chest #6 (Diligence Grip):After gliding down to the orb coupler and scout trooper in the Koboh Dust, follow the beam towards chest.
Forest Array Essences:


Skill Point Essence:Drop down to the right after beating Mogu and grapple over to the ledge. Climb across the ceiling to get to the essence.


Perk (Fortification):From the Swooper Head Chest, use the poles to reach the higher ledge.
Forest Array Databanks:


Databank (Koboh Barrier):Turn left from Forest Array Meditation Point and follow walkway to the blocked path.


Databank (Auxiliary Array Telescope):Scan the big structure ahead after defeating the Mogu.


Databank (Orb Amplifier):Climb up past the Mogu and slide down into the chamber (main path).


Databank (Central Rotational Apparatus):After gliding down to the orb coupler and scout trooper in the Koboh Dust.


Databank (Indomitable):Go through the door next to the Bilemaw Den Meditation Point, and enter the cylindrical area with the stormtroopers. Scan the shield resting against the wall.
Forest Array Treasures:


Datadisc #1:Push beam to left of Forest Array Meditation Point and then drop into Koboh Dust to grab Datadisc.


Datadisc #2:Drop into Koboh Dust on right side of Forest Array Meditation Point and make way through to cog.


Datadisc #3:After using Orb Amplifier to cut through Koboh Barrier, head to the right side of Forest Array Meditation Point and climb up to platforms above Koboh Dust. Swing across poles to reach platform with Datadisc.


Datadisc #4:After rotating the orb coupler to face back to the Forest Array Meditation Point, run down the path towards the Meditation Point to find the datadisc on the floor.


Datadisc #5:After gliding down into group of stormtroopers (after freeing the big bird), turn back and follow the walkway back the way you came.


Datadisc #6:After gliding down to group of stormtroopers, kill the Bilemaw and then wade into the Koboh Dust to get a datadisc.


Datadisc #7:Point central beam back towards Forest Array Meditation Point, then use Koboh Grinder to connect beam to koboh matter to the right of the stairs to make the Datadisc drop.


Datadisc #8:Drop into the Koboh Dust just to the right of the Workbench. Datadisc is on the edge of the cliff, on the corrugated metal plate on the floor.


Datadisc #9:At the base of the tree in the Koboh Dust to the right, just before the stairs that lead to the Rehabilitation Wing elevator. Hold the orb to repel the dust.


Datadisc #10:In the central circle with the orb/beam. Hold the orb to reach it.
Forest Array Seed Pods:
Goldenlight Moss (Alderaanian Blue):Take path right from Forest Array Meditation Point and take slope leading up to scout trooper sat down at a ledge. Plant is to the left of scout trooper.
Rehabilitation Wing collectibles
The Rehabilitation Wing is more of an arena than a region, and contains just the 2 collectibles:
Rehabilitation Wing Essences:
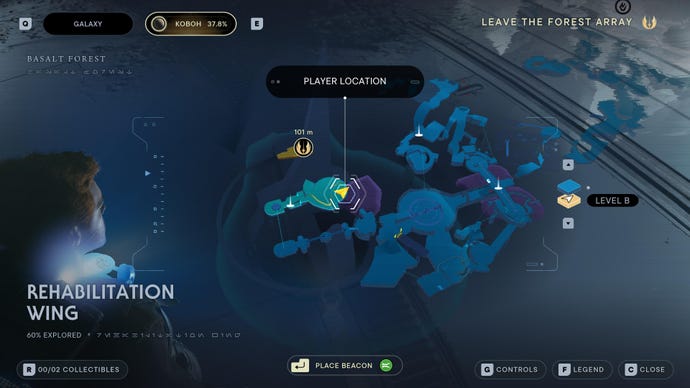

Health Essence:After the fight against Dagan.
Rehabilitation Wing Databanks:


Igneous Fissure collectibles
The tiny little Igneous Fissure is past the guarded gate in Riverbed Watch, and contains just 3 collectibles:
Igneous Fissure Databanks:
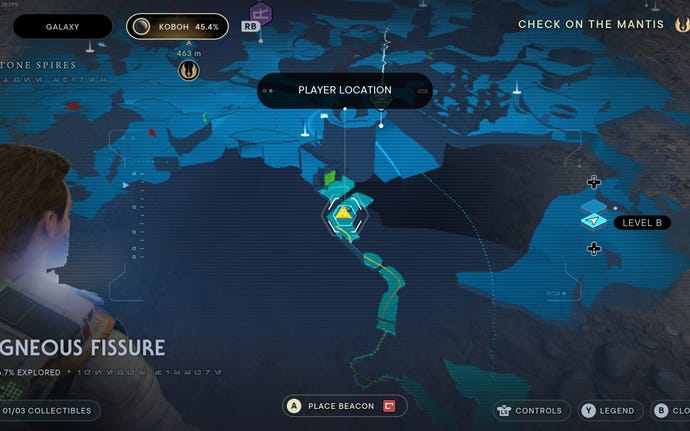
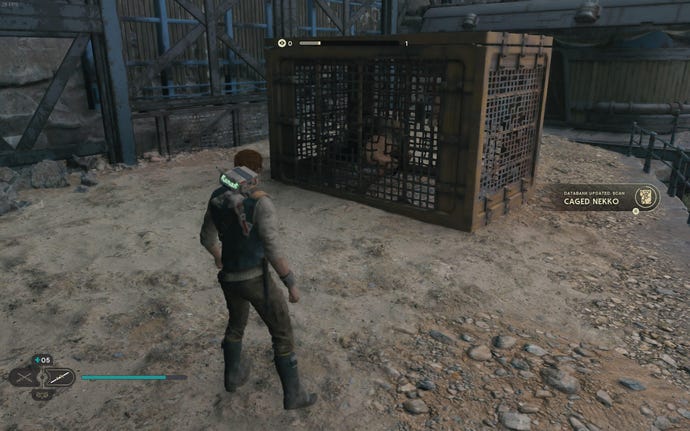
Databank (Caged Nekko):Wall run across from Igneous Fissure Meditation Point and follow path around.


Force Echo (Dark Waters):Wall run across from Igneous Fissure Meditation Point and continue to end of path, then look behind building.
Igneous Fissure Treasures:


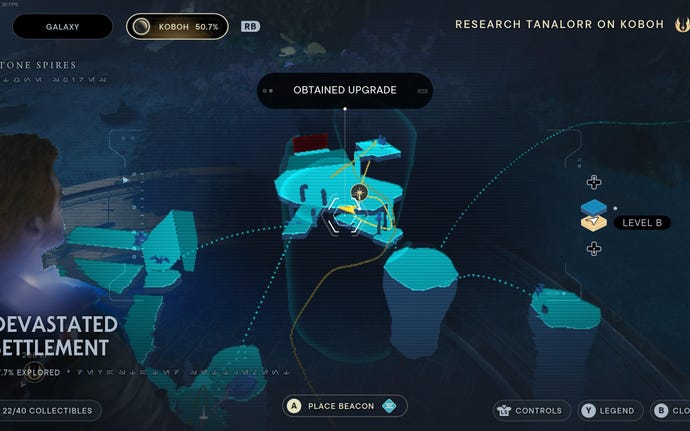
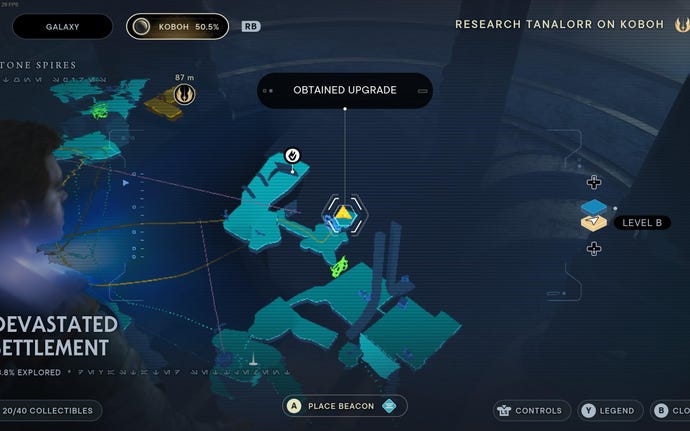
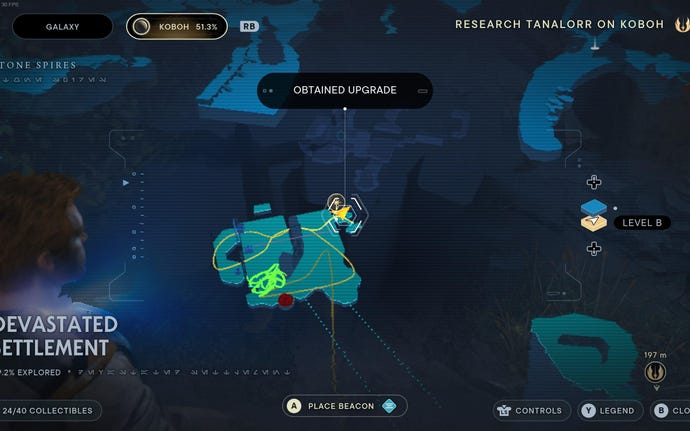
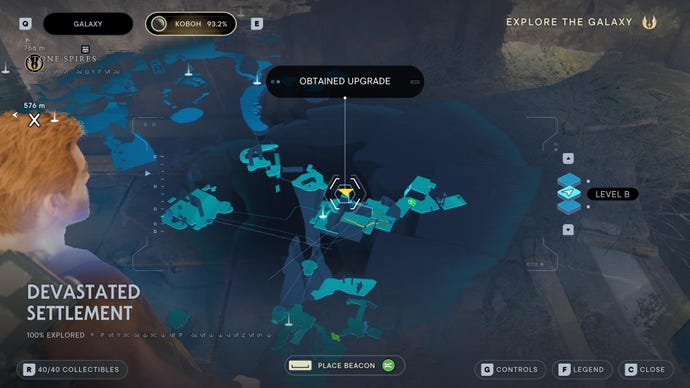
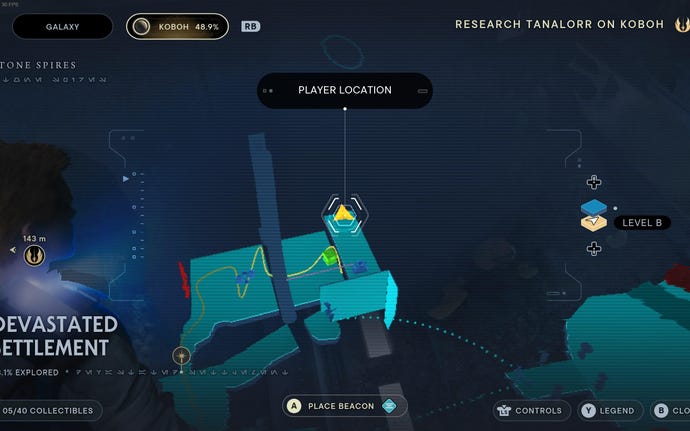
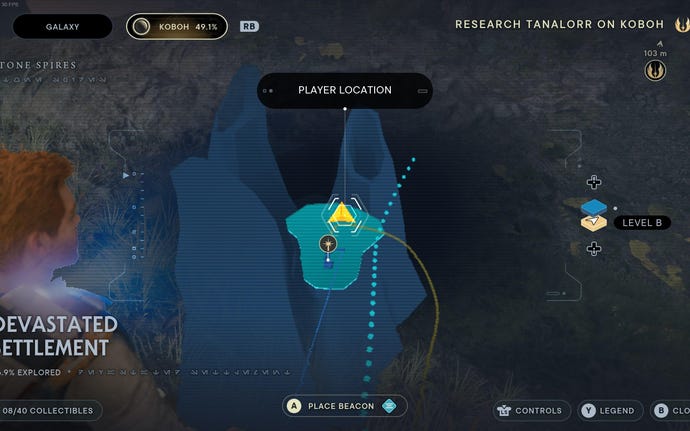
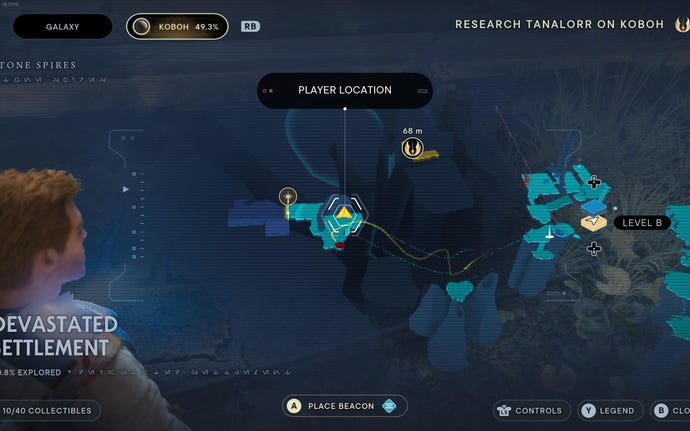
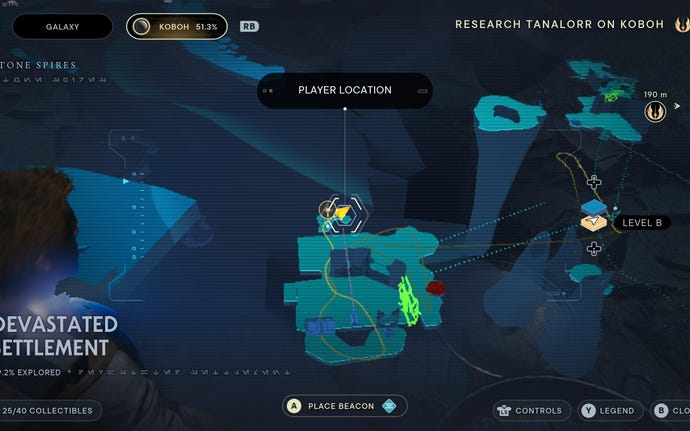
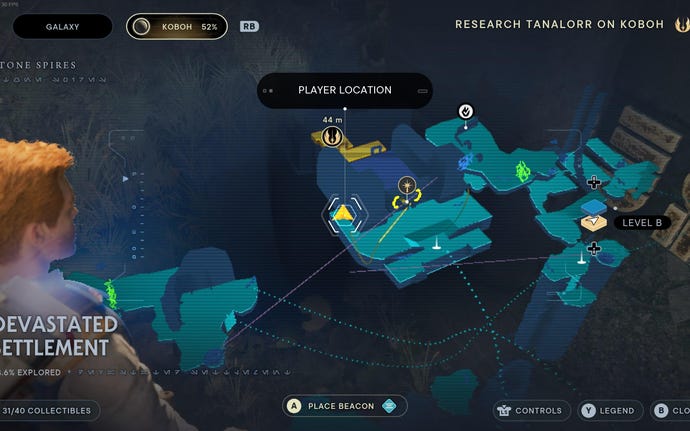
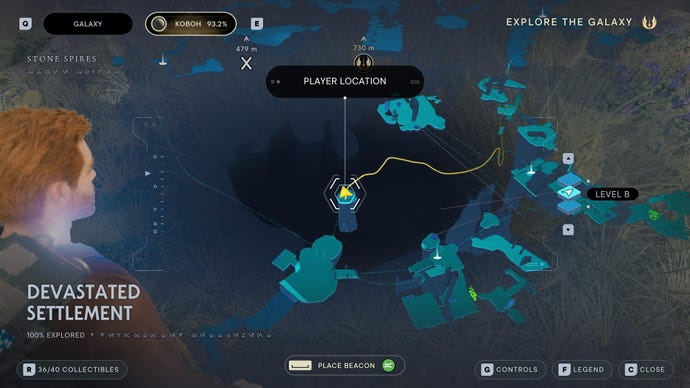
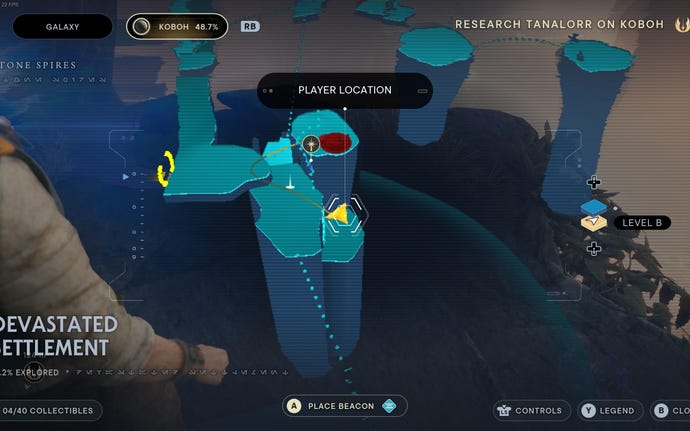
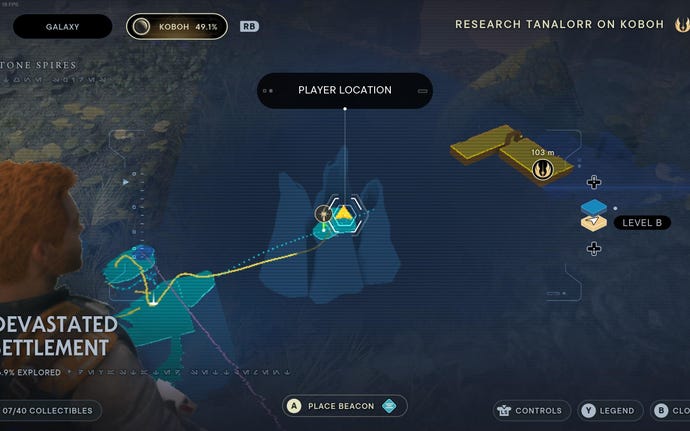
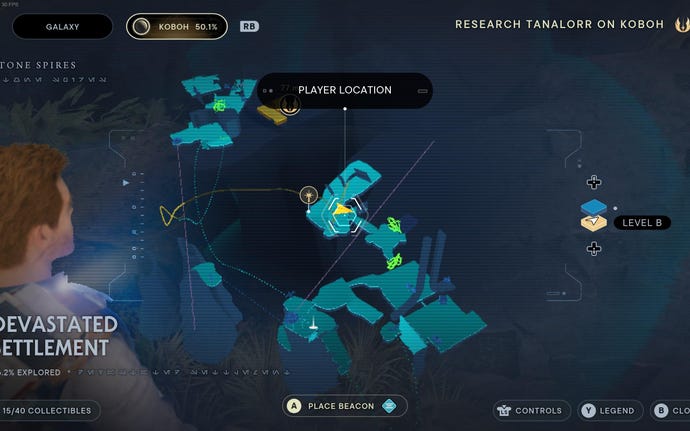
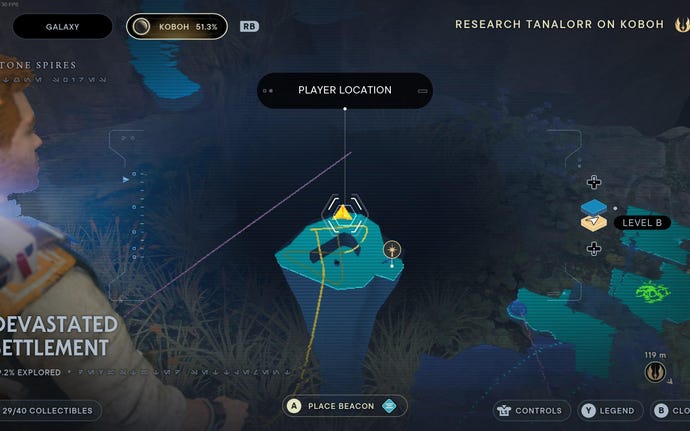
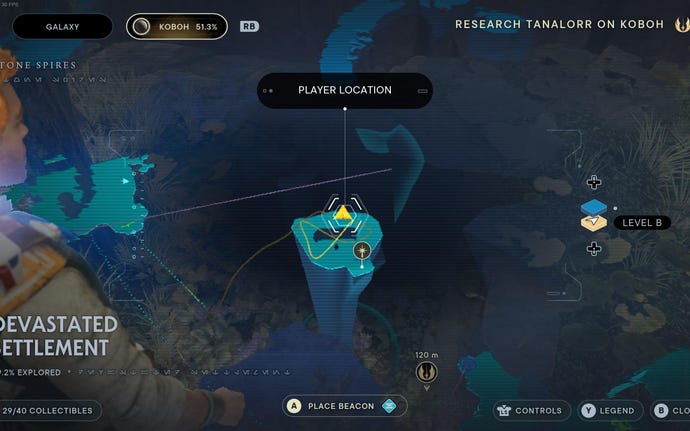
Devastated Settlement collectibles
Devastated Settlement is the largest region in Stone Spires, and consists mainly of tiny pockets of land connected to one another via ziplines. Despite its relatively low landmass, it contains an amazing 40 collectibles:
Devastated Settlement Chests:


Chest #1 (Harmony Switch):Climb up from Caij, and then fly off the platform and immediately glide to podium on the left.


Chest #2 (Hard Leather Weapon Materials):Dive underwater in pool next to Skoova Stev.


Chest #3 (Full Goatee and Mustache):Glide over to platform near Skoova Stev and head into cave on lower ledge. Slide down and wall run across to find chest.
Devastated Settlement Essences:

Health Essence:In room next to Caij after beating Bounty Hunter (need to move orb down from ledge next to laser door, using Koboh Grinder).


Perk (Ambidexterity):From the area where you get the Koboh Grinder upgrade, aim the beam to the left and aim for the ledge where you find the BX and Battle Droids (below the Force Tear). Then, glide over and use the Koboh Grinder to burn away the dust within.
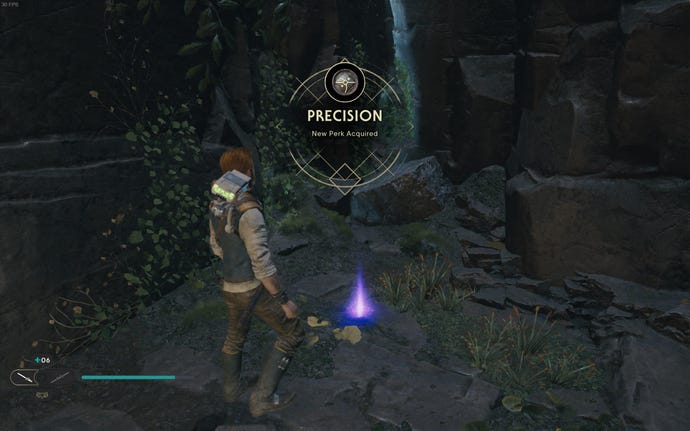
Perk (Precision):Ride the two vents up to next platform and head past the fighting raiders/creatures. Squeeze through gap on left and force pull crate down to block door ahead. Move orb between couplers to send ray through glass, and then use Koboh Grinder to remove the dust blocking path to the left of the beam. Jump up ledge to find perk.

Perk (Marksmanship):At the top of the platform as you exit the area, before you take the glider across.
Devastated Settlement Databanks:


Force Echo (An Instruction):In room next to Caij after beating Bounty Hunter.


Force Echo (Technological Deficit):Climb up from Caij, and then parkour up to right of laser door.
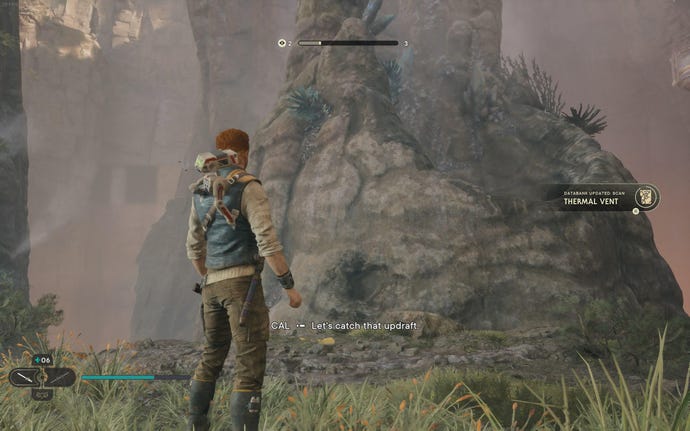
Databank (Thermal Vent):Glide down from Meditation Point to next plaform and look up at air torrent.

Databank (Chamber Mural):Glide across from Meditation Point and use air boost to reach platform with battle droids. Turn right and look up to scan.


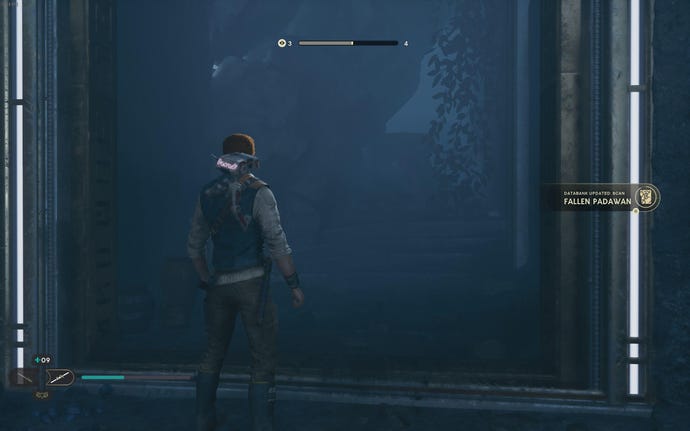
Databank (Fallen Padawan):Glide down from Force Tear platform and enter room directly below, where BX and battle droids are.


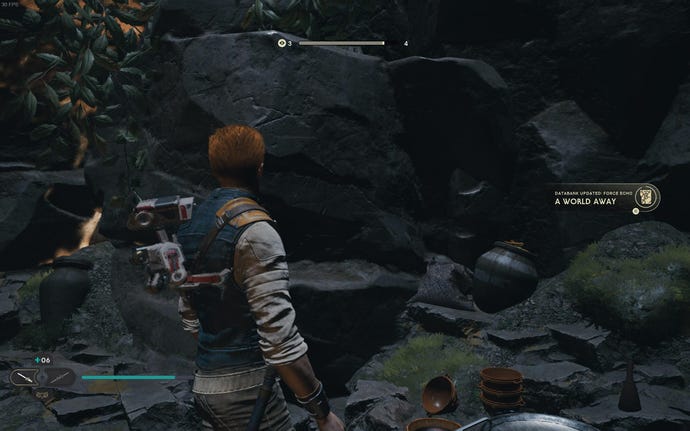
Force Echo (A World Away):Ride the two vents up to next platform and head past the fighting raiders/creatures. Squeeze through gap on left and force pull crate down to block door ahead. Move orb between couplers to send ray through glass, and then use Koboh Grinder to remove the dust blocking path to the left of the beam. Jump up ledge to find echo.
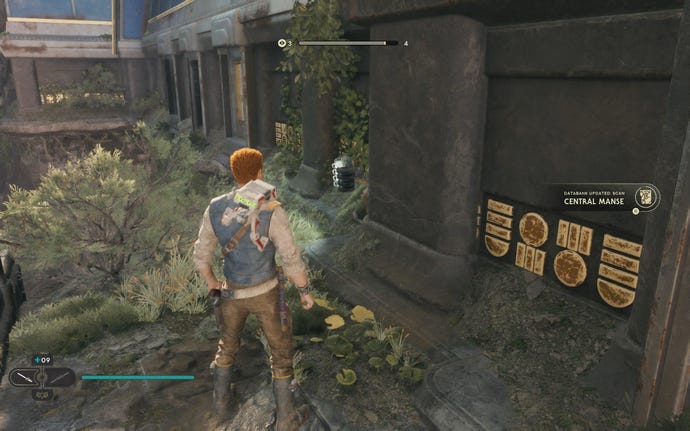
Databank (Central Manse):Up steps and turn left from Meditation Point, and then follow path around.

Databank (Training Courtyard):In the Tague boss fight arena, to the left upon entry.


Databank (Devastated Remains):Turn left after leaving Tague boss fight arena.


Force Echo (Dagan’s Descent):Turn left after leaving Tague boss fight arena, and then head into room on right. Grab main objective item to trigger echo, unmissable.


Databank (Theses of Yaddle):After grabbing main objective, slice out of room using BD and then scan bookshelf ahead.


Force Echo (Cataclysm):Final room before leaving the Grand Courtyard building. Turn right before grappling up.
Devastated Settlement Force Tears:
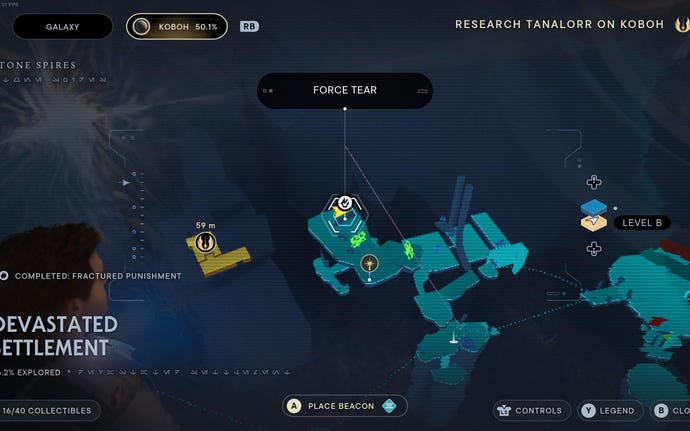

Force Tear (Fractured Punishment):Glide back towards the two air torrents, and turn left to fly towards higher ledge (where the high republic cube thing is). Force Tear is in cube.
Devastated Settlement Treasures:


Datadisc #1:Climb up from Caij, and then parkour up to right of laser door. Use Koboh Grinder (found later in same area) to burn away dust and grab datadisc from next to orb coupler.


Datadisc #2:Climb up from Meditation Point to BX droid chamber and place orb in coupler that slides across. Make it slide across to the left, and then use Koboh Grinder to burn away the dust holding a glint near where you entered.


Datadisc #3:Climp up from Meditation Point, hop across gap, and turn right. Follow path up to glider bird and then wall run and slide down to get datadisc (grabbed automatically as you slide down wall).


Datadisc #4:Glide down from Meditation Point to next plaform and grab datadisc from the edge.


Datadisc #6:Leave Droid Upgrade room and move orb back to original spot. Use Koboh Grinder to spread dust between laser and the area where you originally fell down.

Datadisc #7:Glide down from Force Tear platform and enter room directly below, where BX and battle droids are.


Datadisc #8:Ride the two vents up to next platform and head past the fighting raiders/creatures. Squeeze through gap on left and force pull crate down to block door ahead. Then use the crate to jump up to where the crate was to find the datadisc on the floor.


Datadisc #9:Activate third vent and then ride it up and immediately turn left to reach Skoova Stev platform. Kill scavenger droid for datadisc.
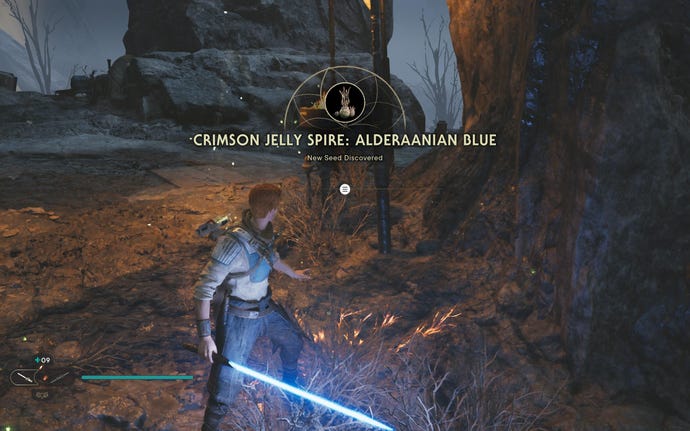
Devastated Settlement Seed Pods:
Crimson Jelly Spire (Felucian Yellow):Climb up from Caij, and then fly off the platform and immediately glide to podium on the left.
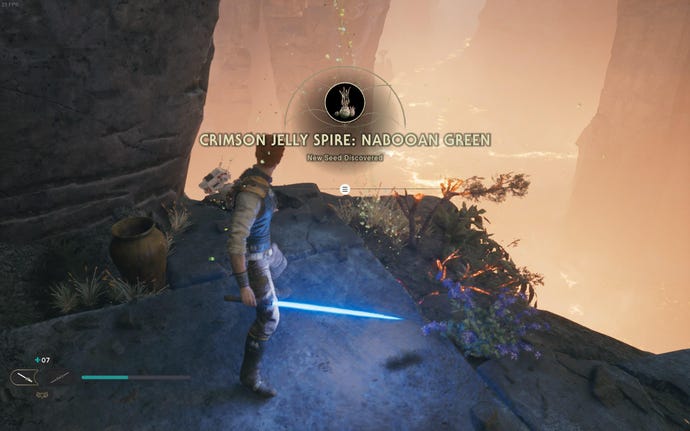
Crimson Jelly Spire (Nabooan Green):Drop down ledge to left of Devastated Settlement Meditation Point.
Crimson Jelly Spire:Glide down from Meditation Point to next plaform and slash glowing plant.
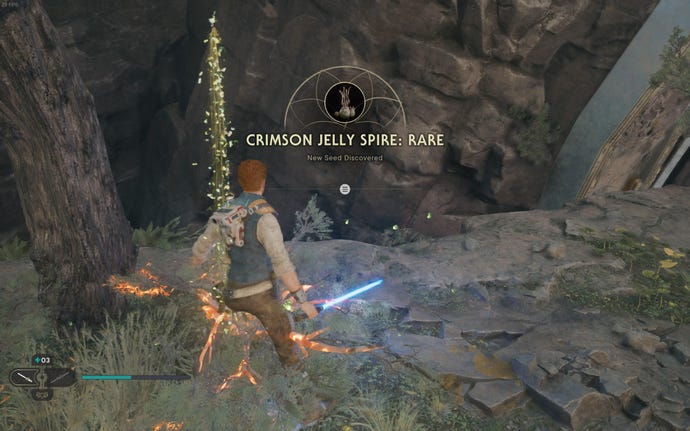
2x Crimson Jelly Spire (Rare):Glide back towards the two air torrents, and turn left to fly towards higher ledge (where the high republic cube thing is). Slash plants at edge of platform.
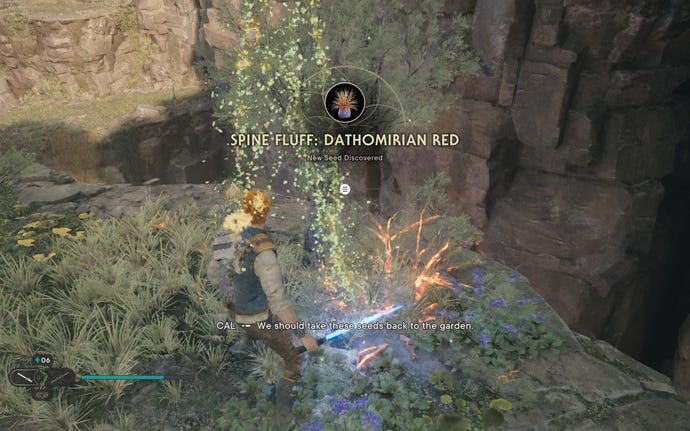
Spine Fluff (Dathomirian Red):Slash glowing plant behind Skoova Stev.
Spine Fluff (Seed Pods):Slash glowing plant behind Skoova Stev.
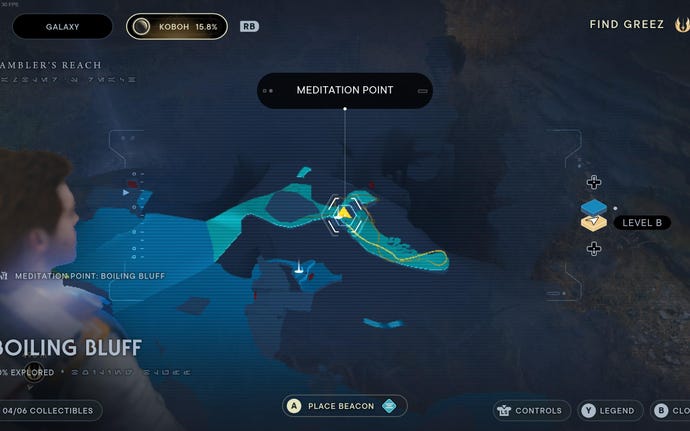
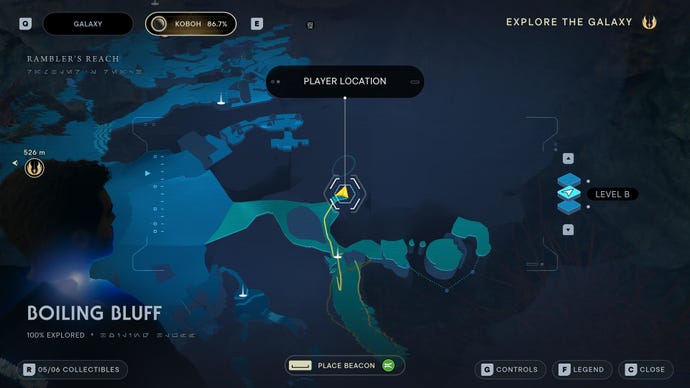
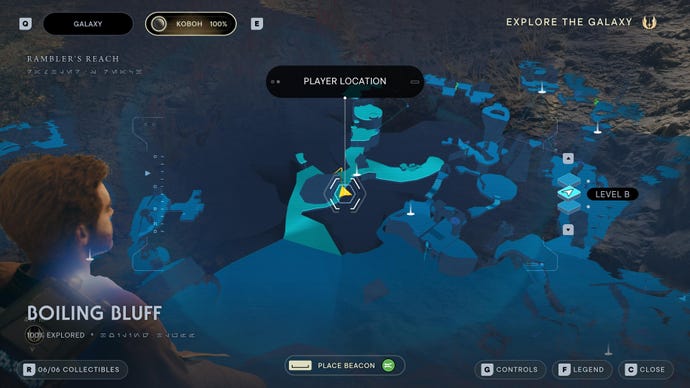
Boiling Bluff collectibles
Boiling Bluff is a small and fairly simple area that you can access only partially at first through Untamed Downs. As well as providing a sneaky across-the-map shortcut to an otherwise inaccessible area of Derelict Dam, Boiling Bluff contains 6 collectibles to find:
Boiling Bluff Databanks:
Image credit:Rock Paper Shotgun / EA

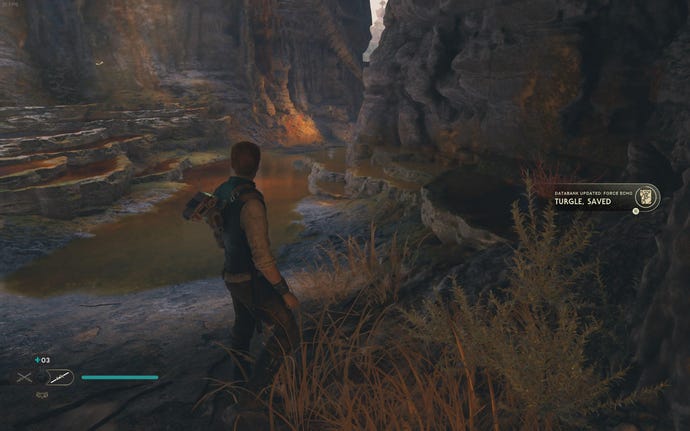
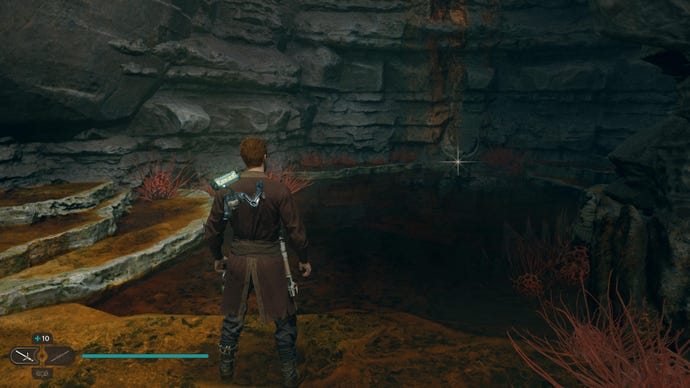
Force Echo (Turgle, Saved):As you enter Boiling Bluff, take the left path and you’ll find the echo near the water.
Image credit:Rock Paper Shotgun / EA
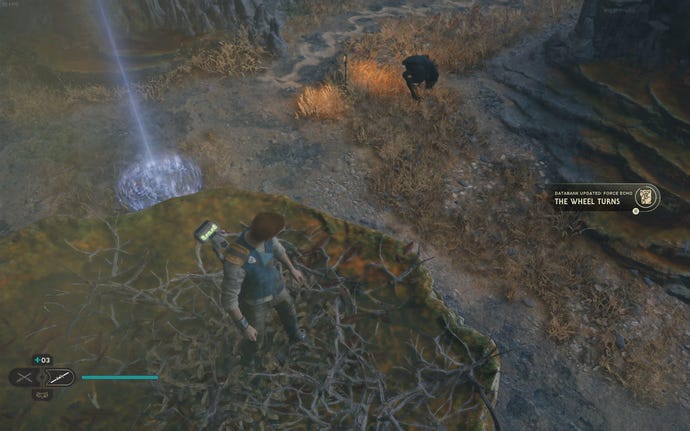
Force Echo (The Wheel Turns):On ridge overlooking the Boiling Bluff Meditation Point.
Boiling Bluff Treasures:
Image credit:Rock Paper Shotgun / EA
Priorite Shard #1:Use Nekko super jump to get up the red rock face.
Image credit:Rock Paper Shotgun / EA
Priorite Shard #2:Nekko super jump up to the wall-climb section from the ground, then follow the path and slide down the final wall-jump section to automatically pick up the Priorite there.
Boiling Bluff Seed Pods:
Image credit:Rock Paper Shotgun / EA


2x Crimson Jelly Spire (Dathomirian Red):As you enter Boiling Bluff, take the left path to find 2 glowing plants.
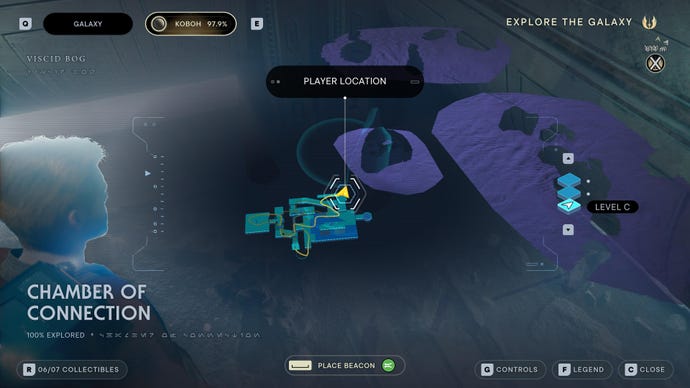
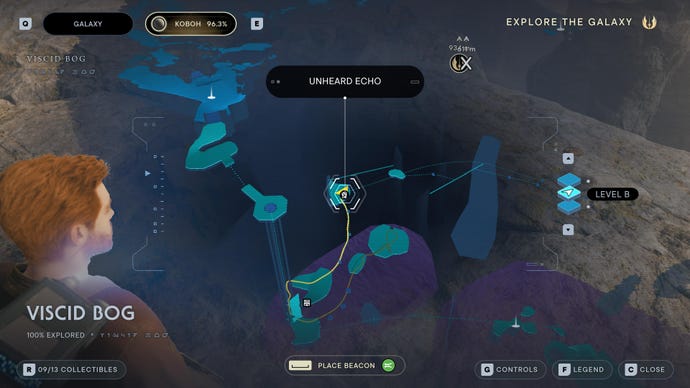
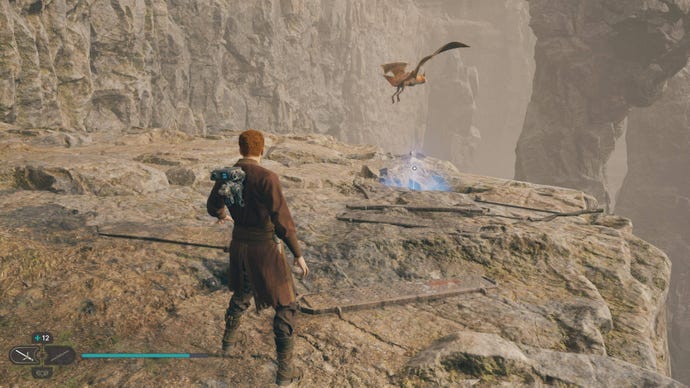
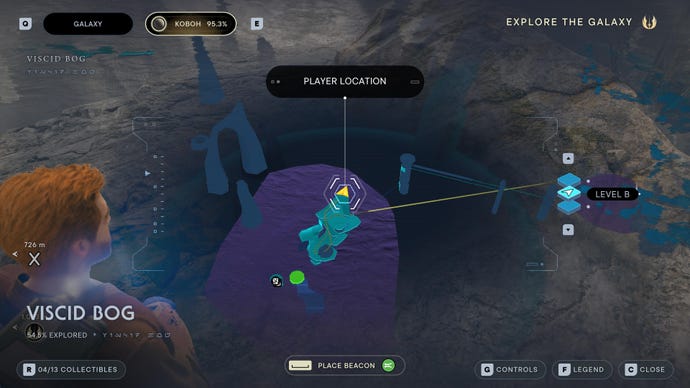
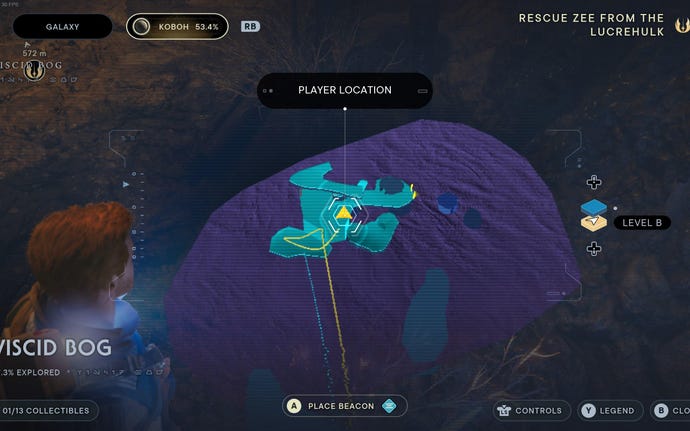
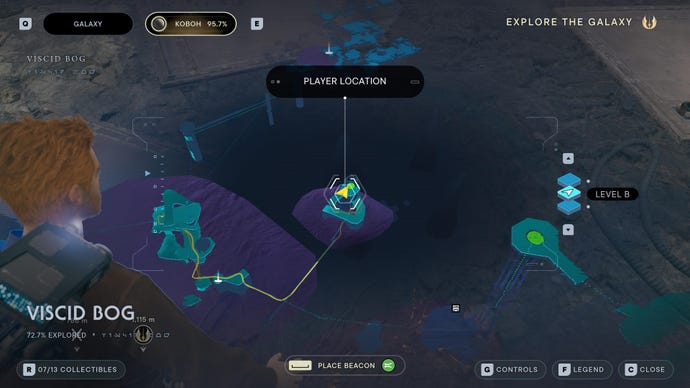
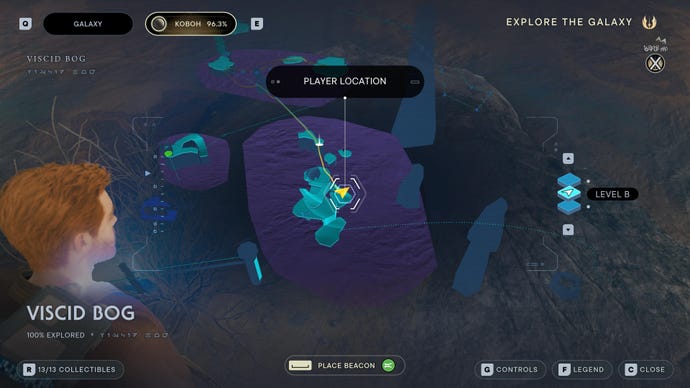
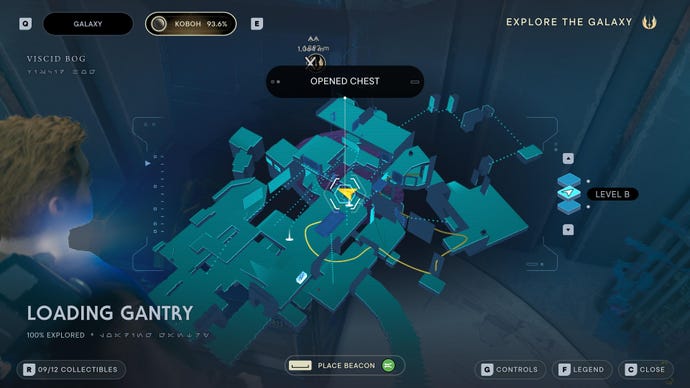
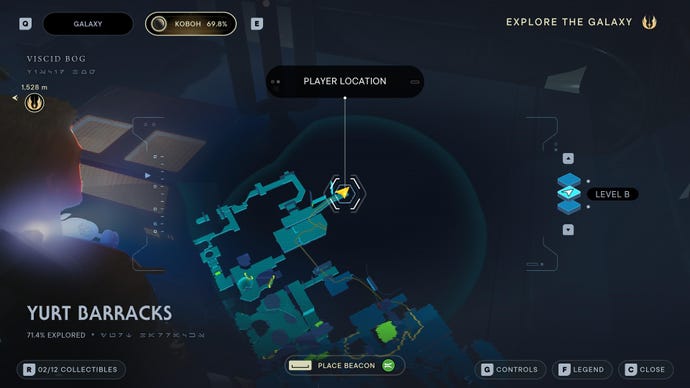
Viscid Bog collectibles
Viscid Bog is a large and unfriendly expanse of tar which cordons off the Lucrehulk from the rest of Koboh. It’s tricky to navigate, so it’s a relief that there are only 13 collectibles to obtain:
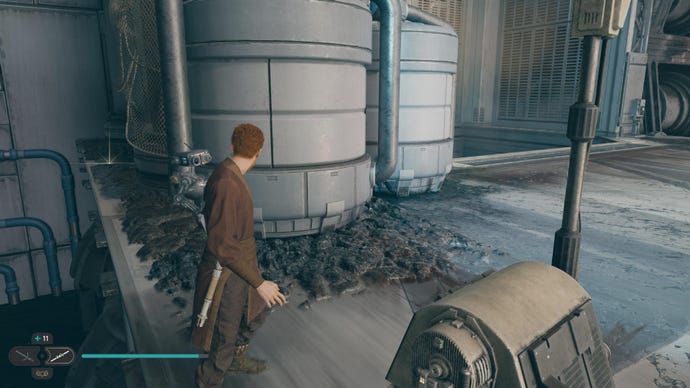
Viscid Bog Chests:
Image credit:Rock Paper Shotgun / EA

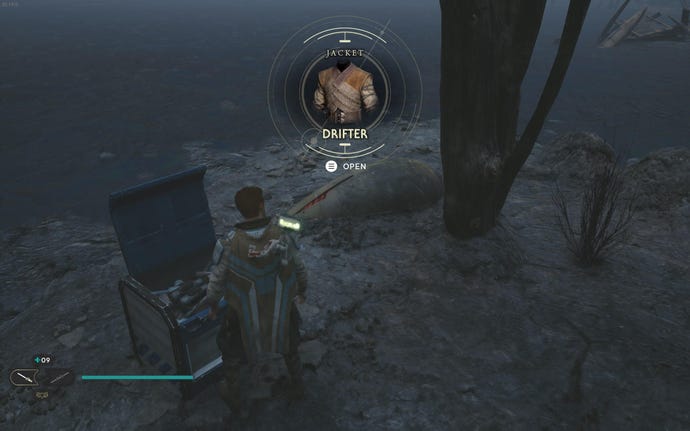
Chest #1 (Drifter Jacket):Jump across rock from Wini Eres' house.
Image credit:Rock Paper Shotgun / EA

Chest #2 (Persistence Switch):Go up the elevator towards Gorge Crash Site, but jump out of the elevator partway up. Turn right for the chest.
Image credit:Rock Paper Shotgun / EA

Viscid Bog Essences:
Image credit:Rock Paper Shotgun / EA


Skill Point Essence:Go up the elevator towards Gorge Crash Site, but jump out of the elevator partway up. Glide far in front until you reach a grapple balloon within range. Use all the grapple points to reach the final ledge with the essence.
Viscid Bog Databanks:
Image credit:Rock Paper Shotgun / EA

Force Echo (Risky Business):Take the first glider across the bog until you hit the platform with the fiery brazier on the left. The Force Echo is just beyond that.
Image credit:Rock Paper Shotgun / EA
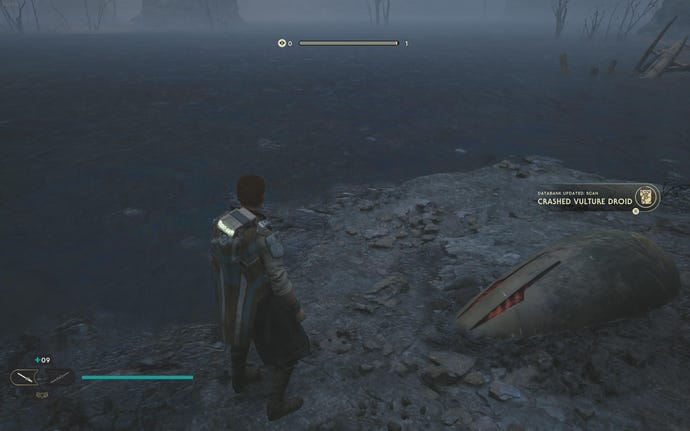
Databank (Crashed Vulture Droid):Jump across rock from Wini Eres' house.
Image credit:Rock Paper Shotgun / EA

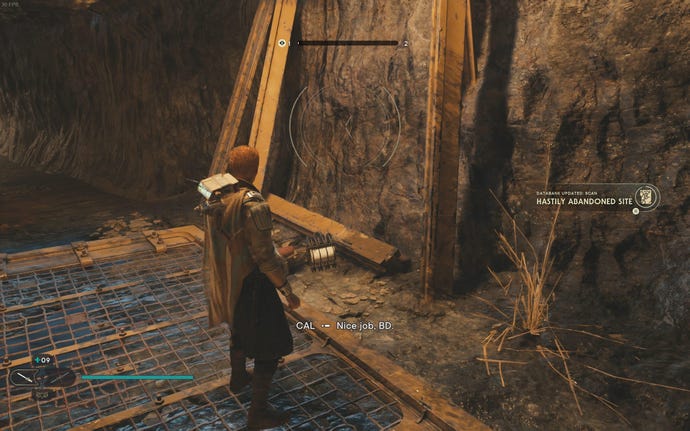
Databank (Hastily Abandoned Site):Jump across rock from Wini Eres' house, and then turn back and jump into the tunnel beneath the house.
Image credit:Rock Paper Shotgun / EA

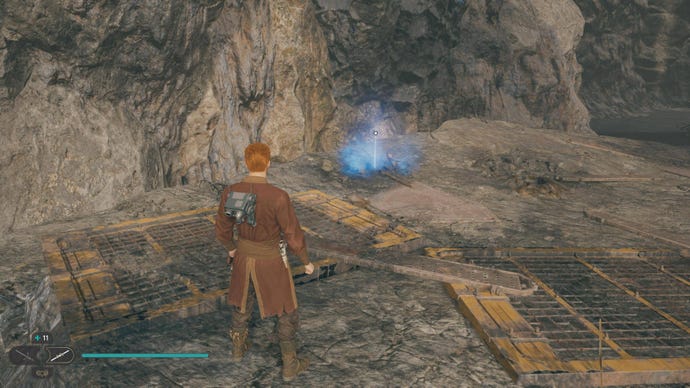
Force Echo (Abominable Bogling):Take the zipline from the Meditation Point, then Force Lift the three platforms in the bog to reach the echo.
Image credit:Rock Paper Shotgun / EA
Force Echo (Sights Set):Go up the elevator towards Gorge Crash Site, but jump out of the elevator partway up. Use the balloons to reach the ledge with the echo.
Viscid Bog Treasures:
Image credit:Rock Paper Shotgun / EA

Viscid Bog Seed Pods:
Image credit:Rock Paper Shotgun / EA
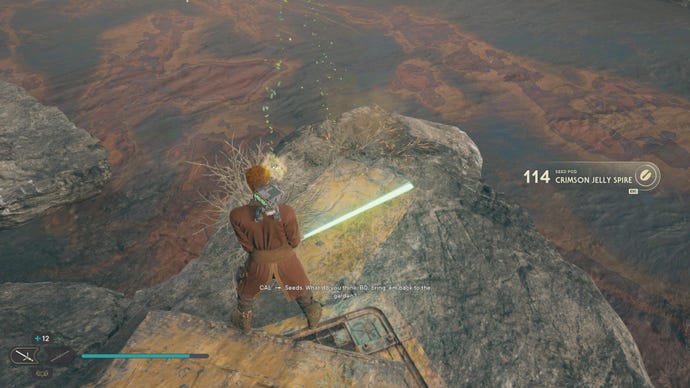
Crimson Jelly Spire (Alderaanian Blue):Take the first glider across the bog til you hit the platform with the fiery brazier thing on the left. Glowing plant is to the right of that.
Image credit:Rock Paper Shotgun / EA
Crimson Jelly Spire:To the right just in front of the Meditation Chamber entrance. Take the zipline from the Meditation Point, then jump over to the other zipline heading left. Go under the archway and grapple up, then follow the path.
Image credit:Rock Paper Shotgun / EA
Crimson Jelly Spire:Down the ledge from Wini’s house.
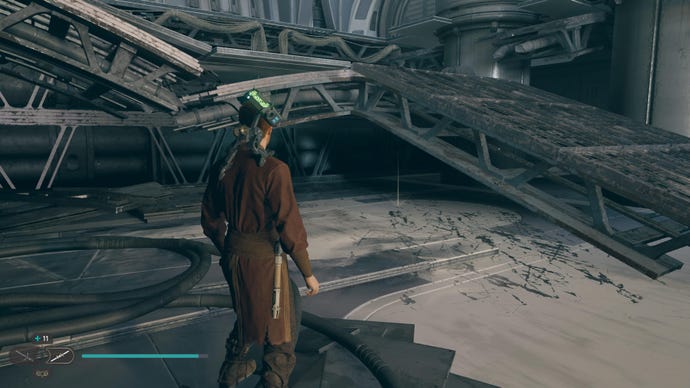
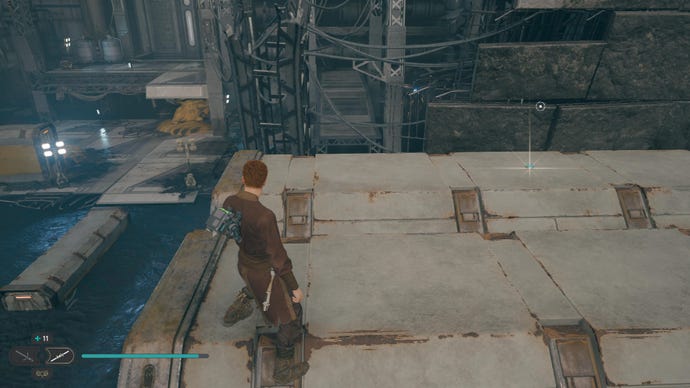
Loading Gantry collectibles
Loading Gantry Chests:
Image credit:Rock Paper Shotgun / EA
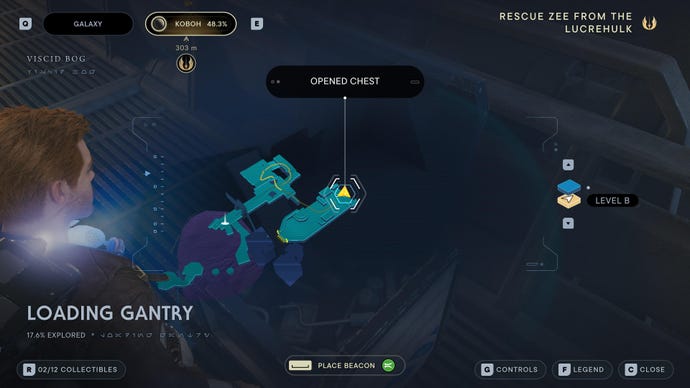

Chest #1 (Short Goatee Beard):In the loading gantry, after the first time you tell Bode to do a special action for you, look to the left after defeating the droids.
Image credit:Rock Paper Shotgun / EA
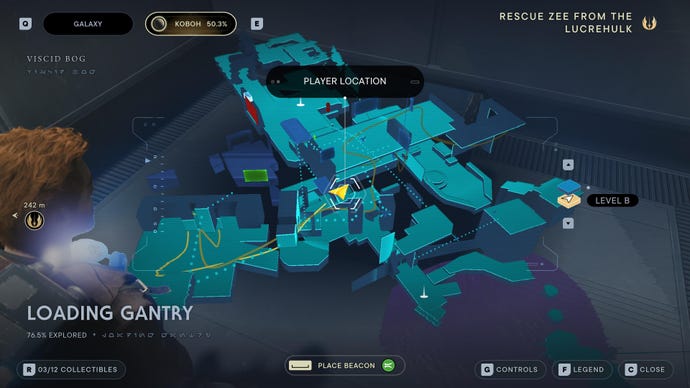

Chest #2 (Enforcer Barrel):Down the ramp from the grey forcefield. Hop into the area on the left and you’ll find the chest next to the shortcut.
Image credit:Rock Paper Shotgun / EA
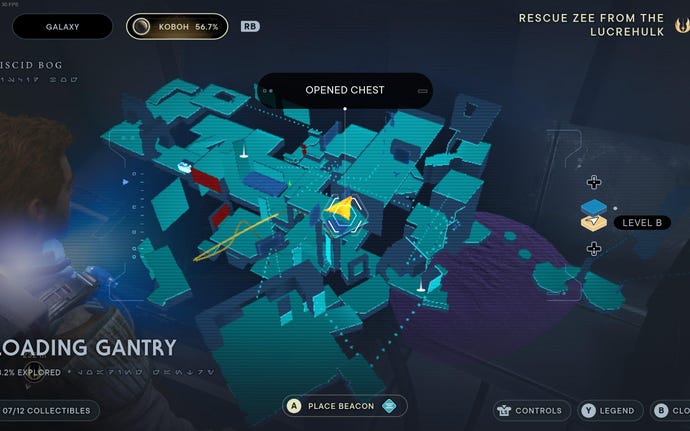

Chest #3 (Persistence Grip):To the right of slice-able door, jump up the wall and parkour around to find chest.
Image credit:Rock Paper Shotgun / EA
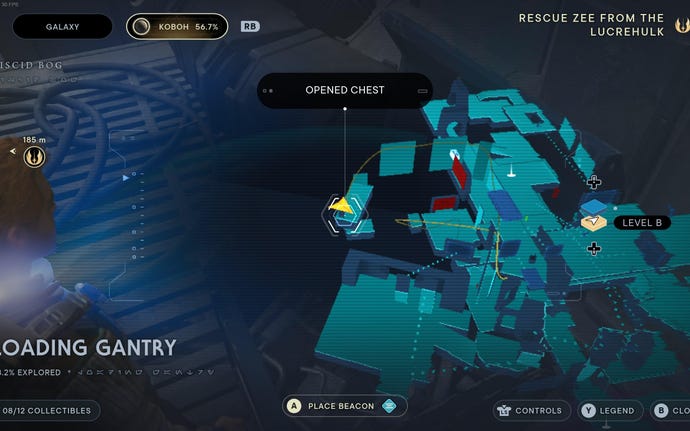

Chest #4 (Commander Material):Jump up wall to right of slice-able door and parkour around until you find the Persistence Grip chest. Then, hop through the open wall from that platform and parkour around further until you find the platform with four battle droids and another chest.
Image credit:Rock Paper Shotgun / EA

Chest #5 (Commander Jacket):From the Meditation Point room, shoot the electrical conduit above with a dart and grapple up to the ledge with the now-turned-off forcefield.
Loading Gantry Databanks:
Image credit:Rock Paper Shotgun / EA


Databank (Sunken AAT):In the room immediately after squeezing through the gap from the Meditation Point.
Image credit:Rock Paper Shotgun / EA


Databank (Storage Tanks):Upstairs in the room immediately after squeezing through the gap from the Meditation Point.
Image credit:Rock Paper Shotgun / EA


Image credit:Rock Paper Shotgun / EA


Force Echo (Brothers):Down the ledge from the Meditation Point. Only available after reaching the end of the main story.
Loading Gantry Treasures:
Image credit:Rock Paper Shotgun / EA

Priorite Shard #1:On the ledge just above the Sunken AAT, look round the edge of the large storage drums for the Priorite.
Image credit:Rock Paper Shotgun / EA

Priorite Shard #2:Just underneath the ramp leading down from the Hangar Rafters Meditation Point.
Image credit:Rock Paper Shotgun / EA

Priorite Shard #3:Jump over the bog to the ship on the far side of the ground floor, then climb to the top of the crates.
Image credit:Rock Paper Shotgun / EA

Priorite Shard #4:To the left of the slice-able door just beyond the grey forcefield.
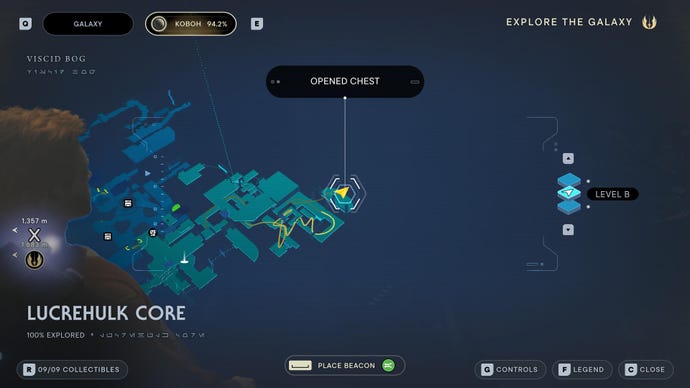
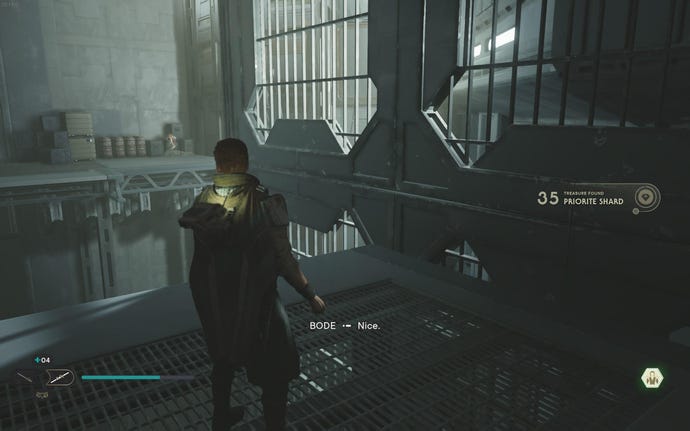
Lucrehulk Core collectibles
The Lucrehulk Core is another major section of the Lucrehulk past Viscid Bog, and contains 9 collectibles:
Lucrehulk Core Chests:
Image credit:Rock Paper Shotgun / EA
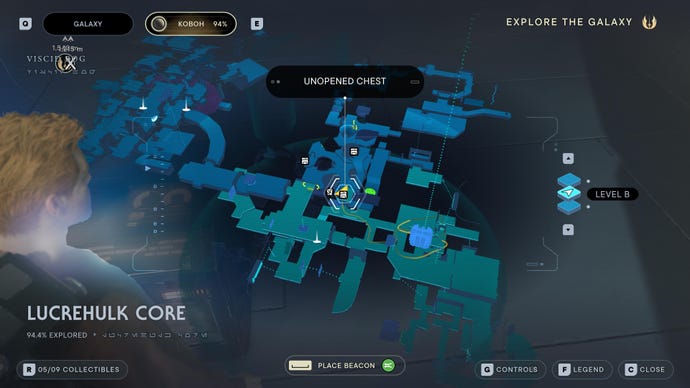

Chest #1 (Geonosian Photoreceptors):Force Lift and Force Slam the two platforms above and to the right of the Meditation Point to reach a small alcove with the chest.
Image credit:Rock Paper Shotgun / EA

Chest #2 (Persistence Pommel):Jump over to the platform with the four shielded turrets.
Lucrehulk Core Essences:
Image credit:Rock Paper Shotgun / EA

Skill Point Essence:Use Force Lift ability on door in shielded turret corridor.
Image credit:Rock Paper Shotgun / EA
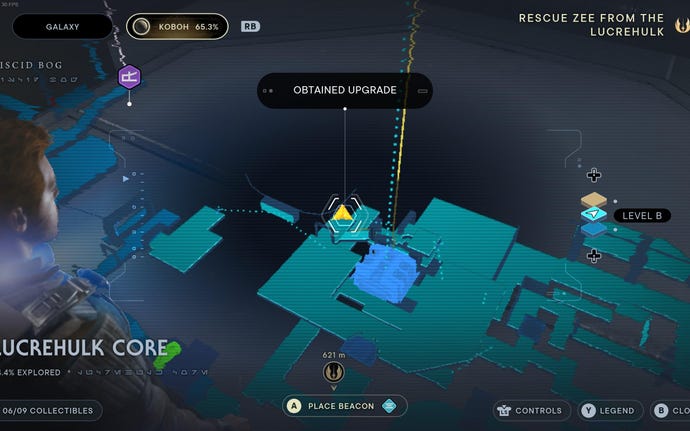

Health Essence:Ride the massive turbo lift down after finding the Forward Control Tower Meditation Point.
Lucrehulk Core Databanks:
Image credit:Rock Paper Shotgun / EA

Force Echo (The Origins Of Purpose):Just beyond the droidekas and after the cutscene where we see Zee.
Image credit:Rock Paper Shotgun / EA

Force Echo (Look On My Works):Follow the path with all the shielded ceiling turrets. Around the corner there’s a body at the end.
Image credit:Rock Paper Shotgun / EA

Force Echo (A New Master):Down the stairs from the Meditation Point, turn right.
Lucrehulk Core Treasures:
Image credit:Rock Paper Shotgun / EA

Priorite Shard #1:On a platform on the left side in the first shielded ceiling turret corridor.
Image credit:Rock Paper Shotgun / EA


Priorite Shard #2:Scav droid in the section with all the shielded ceiling turrets.
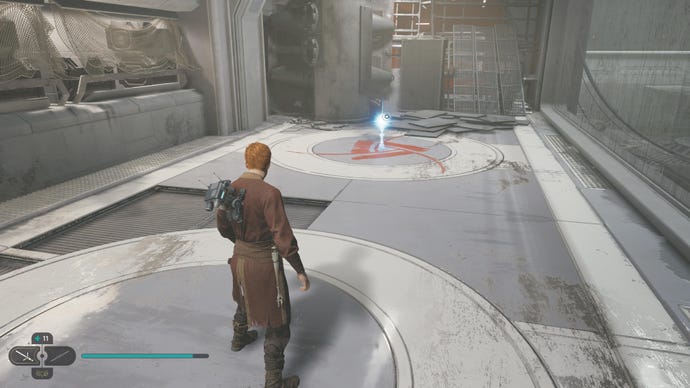
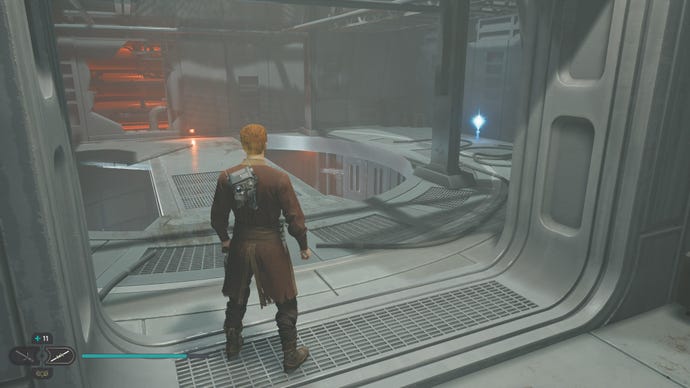
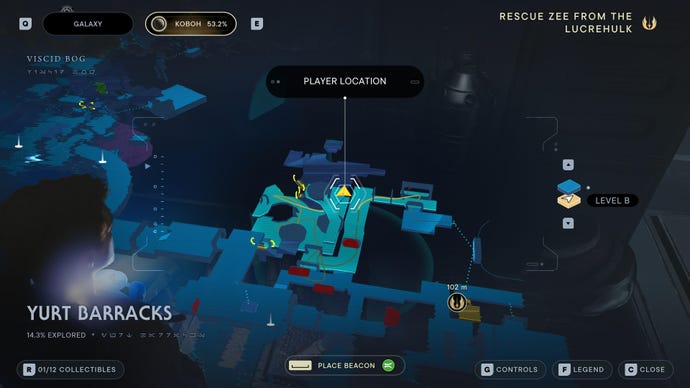
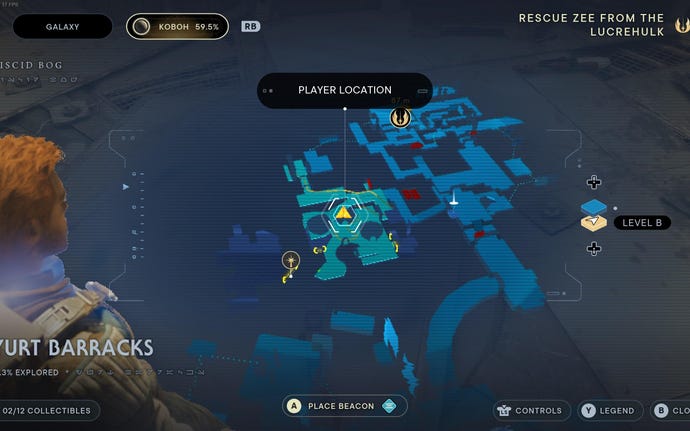
Yurt Barracks collectibles
Yurt Barracks is the third of five regions within the Lucrehulk, and can prove tricky to navigate despite its size, due to its cramped conditions. There are 12 collectibles in this area:
Yurt Barracks Chests:
Image credit:Rock Paper Shotgun / EA
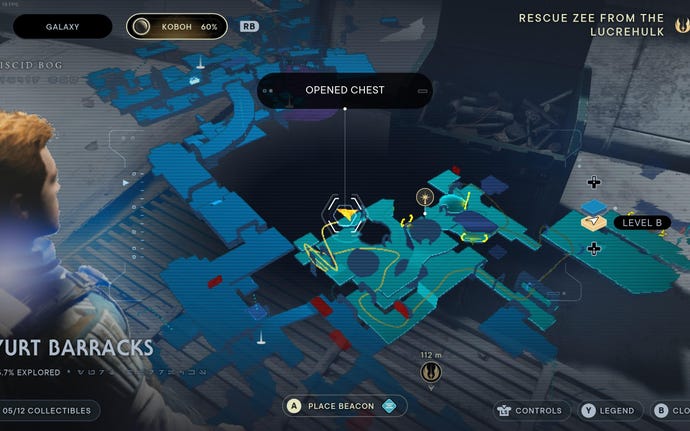

Image credit:Rock Paper Shotgun / EA
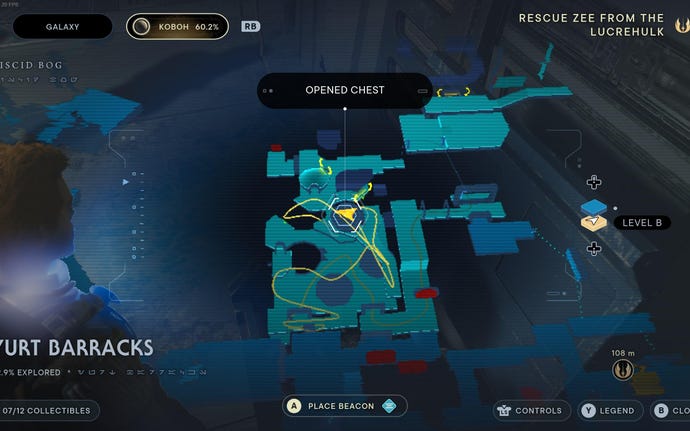

Image credit:Rock Paper Shotgun / EA

Chest #3 (Enforcer Body):Go up to the location marked on the map, turn around, and shoot an Electro-Dart at conduit above you.
Yurt Barracks Essences:
Image credit:Rock Paper Shotgun / EA

Skill Point Essence #1:Defeat The Massiff.
Image credit:Rock Paper Shotgun / EA


Image credit:Rock Paper Shotgun / EA

Skill Point Essence #3:After jumping down onto the area with the multiple enemies (including the Droideka), turn left around the corner of the first yurt and Force Lift the gate at the end of the path. Turn right in the next room to find the essence.
Yurt Barracks Databanks:
Image credit:Rock Paper Shotgun / EA

Force Echo (Location Is Everything):Take a right turn a few steps into the barracks.
Image credit:Rock Paper Shotgun / EA

Databank (Bedlam Raider Yurts):In the first yurt as you enter the barracks, opposite the Location is Everything Force Echo.
Image credit:Rock Paper Shotgun / EA
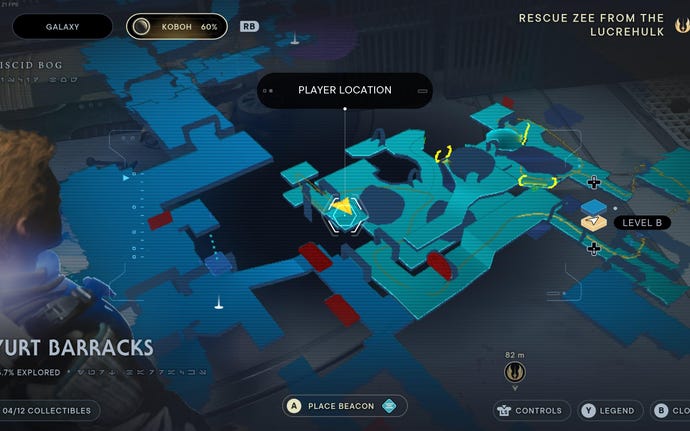

Yurt Barracks Treasures:
Image credit:Rock Paper Shotgun / EA

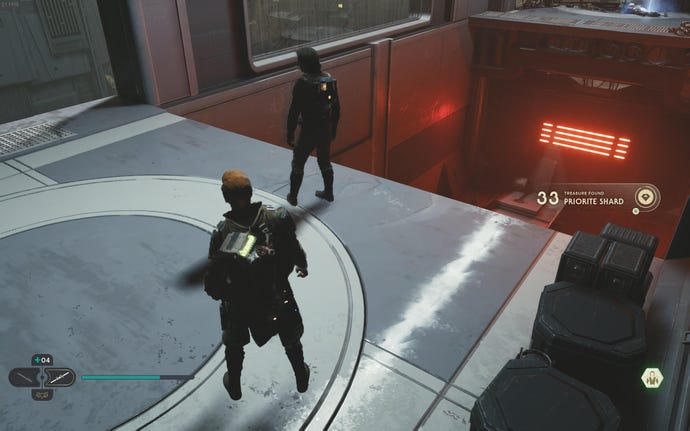
Image credit:Rock Paper Shotgun / EA

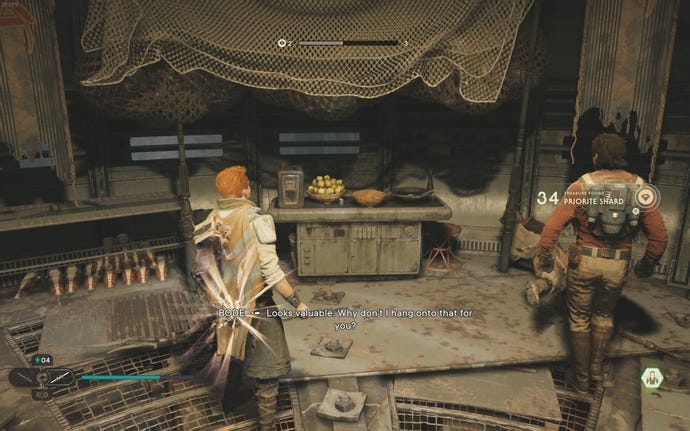
Image credit:Rock Paper Shotgun / EA

Priorite Shard #3:Reach second room of Yurt Barracks and turn right to find small corridor within. Leap across to platform, and then turn back and leap across again to reach priorite shard.
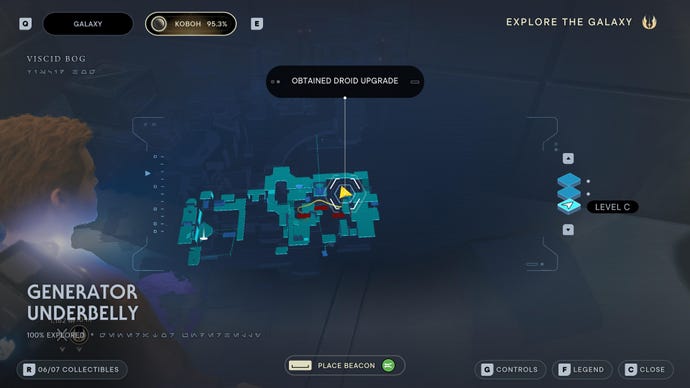
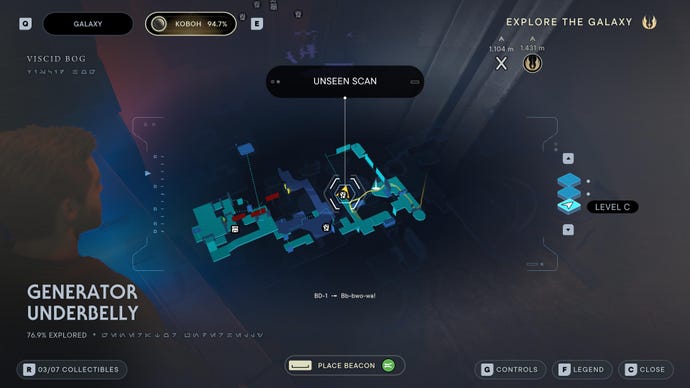
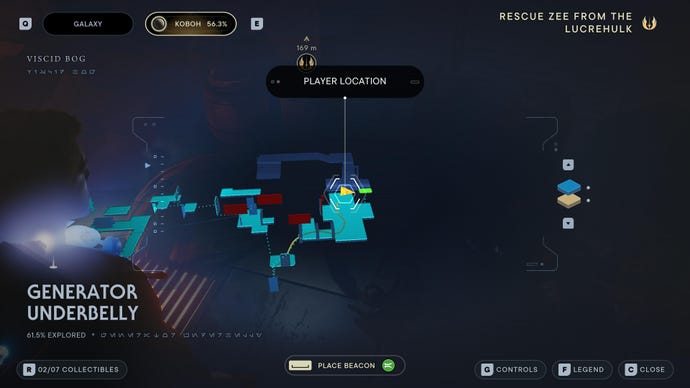
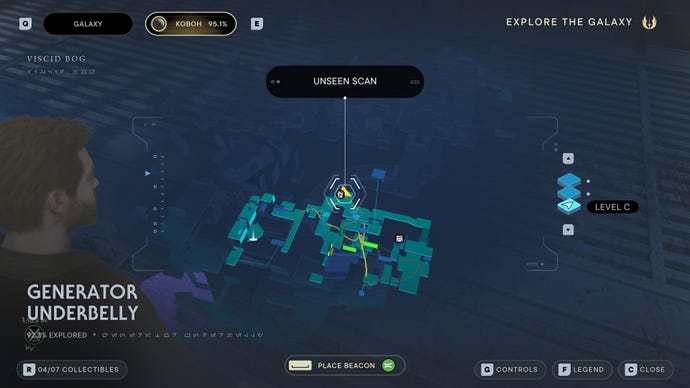
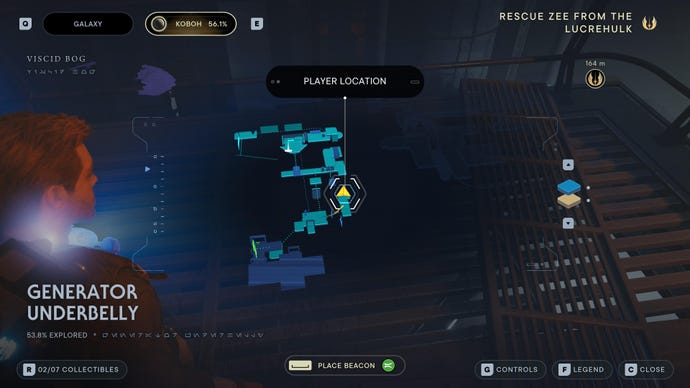
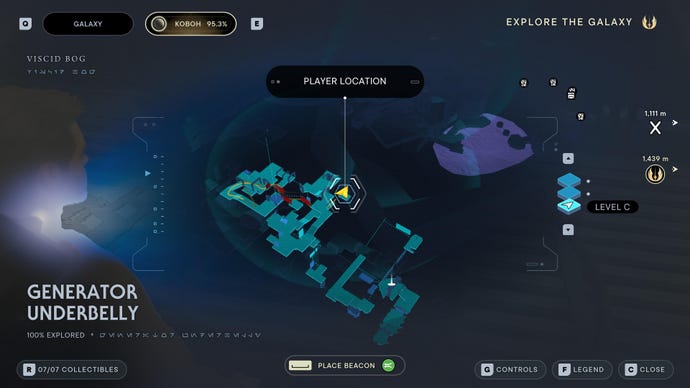
Generator Underbelly collectibles
The Generator Underbelly is found in the lower section of the Lucrehulk, and you’ll breeze through it fairly quickly, making it easy to pick up the 7 collectibles on the way:
Generator Underbelly Chests:
Image credit:Rock Paper Shotgun / EA
Generator Underbelly Essences:
Image credit:Rock Paper Shotgun / EA

Force Essence:Climb all the way up the vertical jumping wall above the platform that you can pull up, and then follow the wall-run path.
Generator Underbelly Databanks:
Image credit:Rock Paper Shotgun / EA

Databank (Landing Hydraulics):Head to next ledge after Meditation Point, and turn right. Scan the landing leg.
Image credit:Rock Paper Shotgun / EA

Force Echo (A Droid Reborn):Follow the main path until you’re in the room with the crates in the centre and droids behind and to the right. Look behind the droids that were behind the crates.
Image credit:Rock Paper Shotgun / EA

Databank (Power Generator):In the upper levels of the Generator Underbelly, where you fight Hytho Pixx.
Generator Underbelly Treasures:
Image credit:Rock Paper Shotgun / EA
Priorite Shard #1:Opposite the platform of enemies that you can pull down with Force Slam, get past the two moveable wall grab sections.
Image credit:Rock Paper Shotgun / EA
Priorite Shard #2:Turn left after the three moveable wall-runs, and jump the gap.
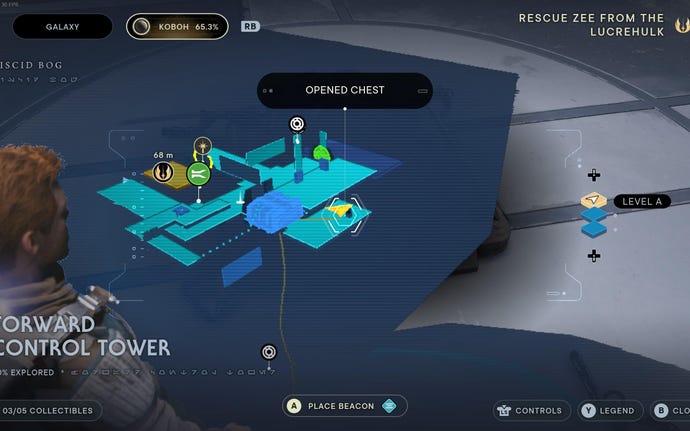
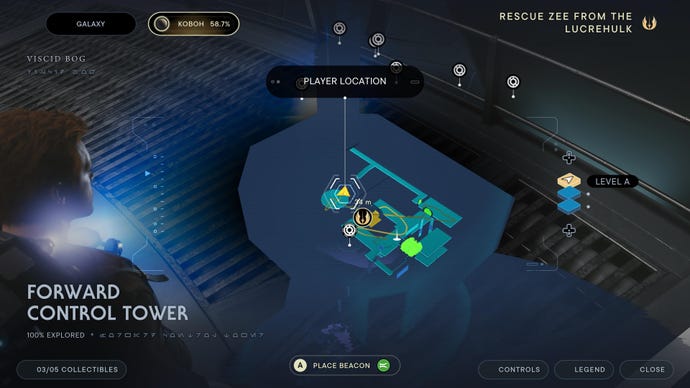
Forward Control Tower collectibles
The Forward Control Tower is located at the very top of the Lucrehulk, and within such a small area there is only room to hide 5 collectibles:
Forward Control Tower Chests:
Image credit:Rock Paper Shotgun / EA

Chest (Center Part Hair):Pass through door near Meditation Point and air-dash across the turbo lift (don’t trigger it or you’ll be stuck heading down the lift for ages!) and enter other side to find the chest.
Forward Control Tower Essences:
Image credit:Rock Paper Shotgun / EA
Health Essence:After second fight with Dagan.
Forward Control Tower Databanks:
Image credit:Rock Paper Shotgun / EA


Force Echo (Emergency Landing):At the control panel left from where you drop down the hole in front of the Meditation Point.
Image credit:Rock Paper Shotgun / EA


Databank (Escape Pod):Head up corridor from Meditation Point and scan the right-most escape pod.
Forward Control Tower Treasures:
Image credit:Rock Paper Shotgun / EA


Priorite Shard:After the cutscene with Rayvis and Dagan, auto-collected on the wall-running section.
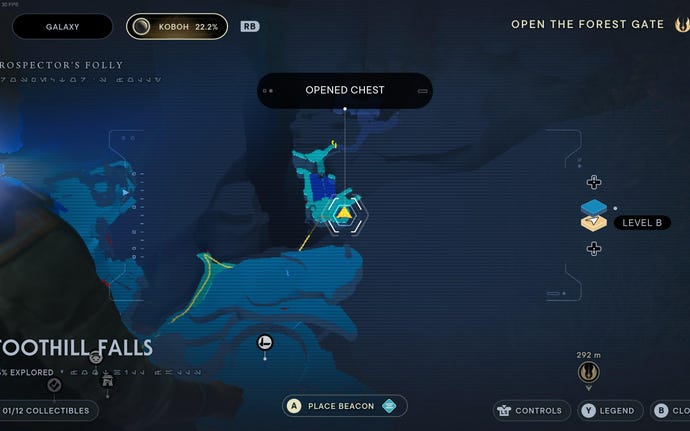
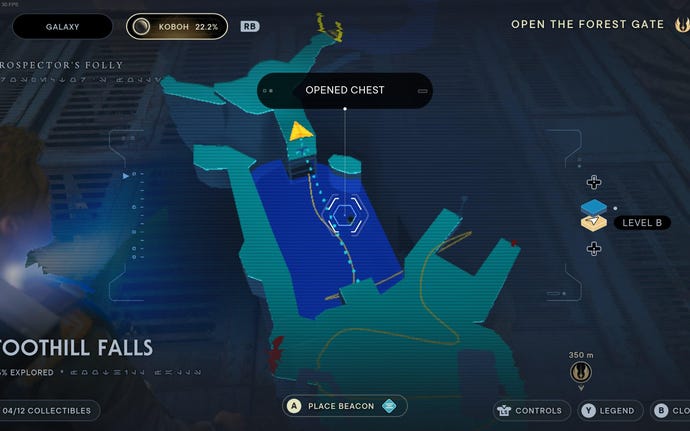
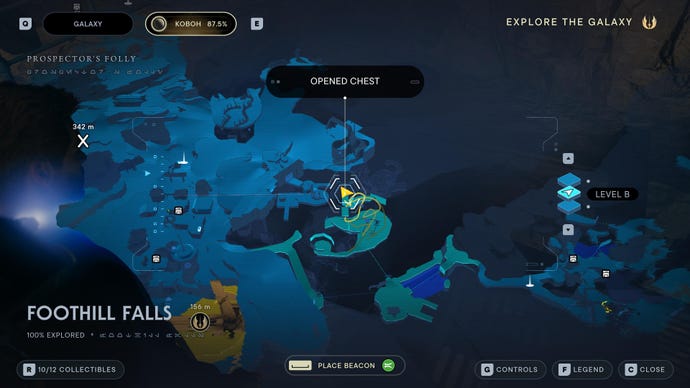
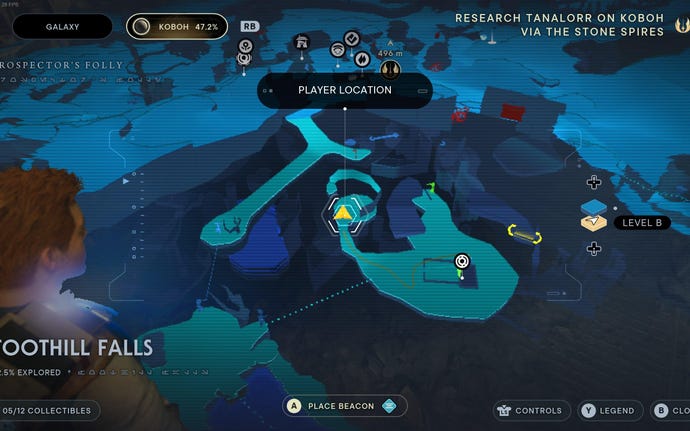
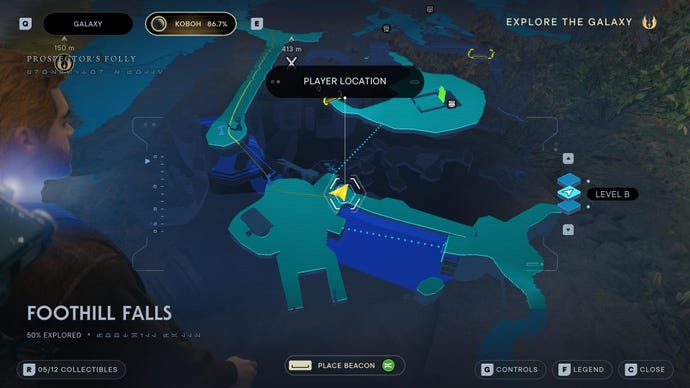
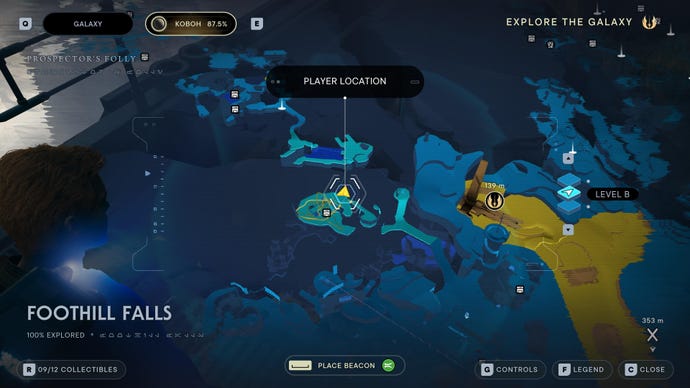
Foothill Falls collectibles
Foothill Falls are accessible from the top of Rambler’s Reach Outpost, and lead directly into Prospector’s Folly. You won’t get far initially, but later on the main story will take you through this whole super-region, giving you ample opportunity to collect the 12 collectibles in Foothill Falls:
Foothill Falls Chests:
Image credit:Rock Paper Shotgun / EA

Chest #1 (Slicked Back Hair):Zipline up to Prospector’s Folly and immediately turn right to find chest behind building.
Image credit:Rock Paper Shotgun / EA

Chest #2 (Patience Pommel):Dive underwater in pool next to Skoova Stev.
Image credit:Rock Paper Shotgun / EA

Chest #3 (Droid Paint weapon materials):This chest requires you to Force Lift and then Force Slam it. Fly across to shack and get nekko from pool. Super jump up behind shack, then grapple to the balloon and launch yourself to the top platform.
Image credit:Rock Paper Shotgun / EA

Stim Canister:Fly across to shack and get nekko from pool. Super jump up behind shack, wall run around, get roller mine and launch it through roof to destroy wall.
Foothill Falls Databanks:
Image credit:Rock Paper Shotgun / EA

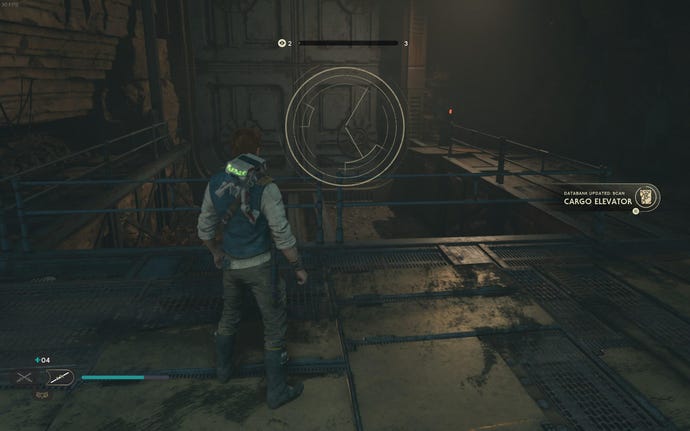
Databank (Cargo Elevator):Turn right from Skoova Stev.
Image credit:Rock Paper Shotgun / EA
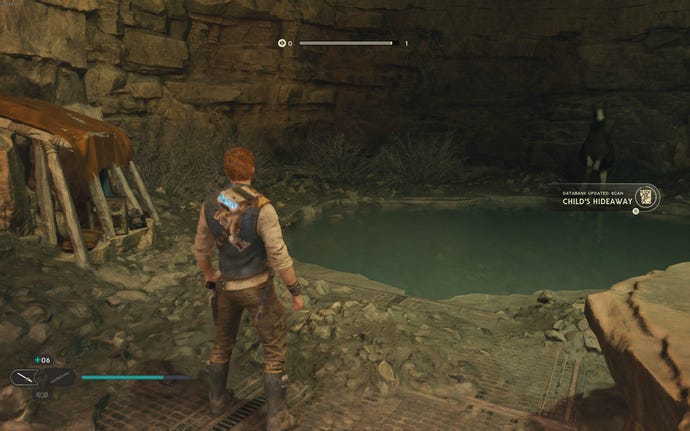
Databank (Child’s Hideaway):Fly across to abandoned shack, and then turn left and follow path towards pool.
Image credit:Rock Paper Shotgun / EA
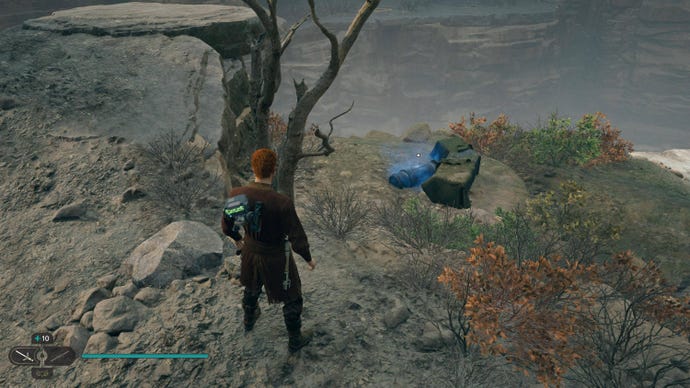
Force Echo (A Curious Pair):Across the first zipline and down the ledge, on the edge of the water and the cliff.
Image credit:Rock Paper Shotgun / EA
Databank (Prospecting Network):Fly across to shack and get nekko from pool. Super jump up behind shack, then grapple to the balloon and launch yourself to the top platform.
Foothill Falls Treasures:
Image credit:Rock Paper Shotgun / EA

Priorite Shard #1:Found in the area of plants on the cliff edge just past the pool of water.
Image credit:Rock Paper Shotgun / EA

Priorite Shard #2:Fly across to abandoned shack, and then turn left and follow path towards pool. Wall run up to ledge.
Foothill Falls Seed Pods:
Image credit:Rock Paper Shotgun / EA

Image credit:Rock Paper Shotgun / EA


Koboh Spiker:Found on the cliff edge on the side with the shack.
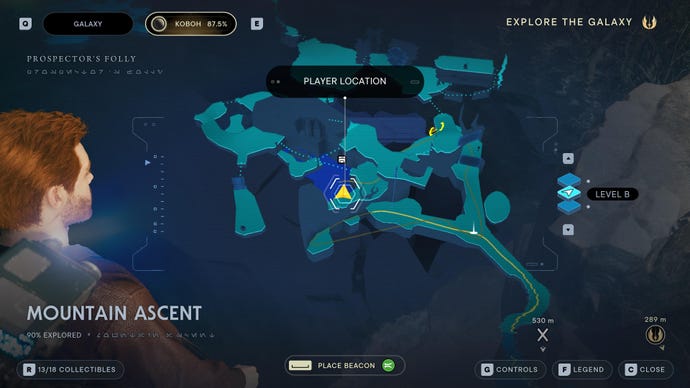
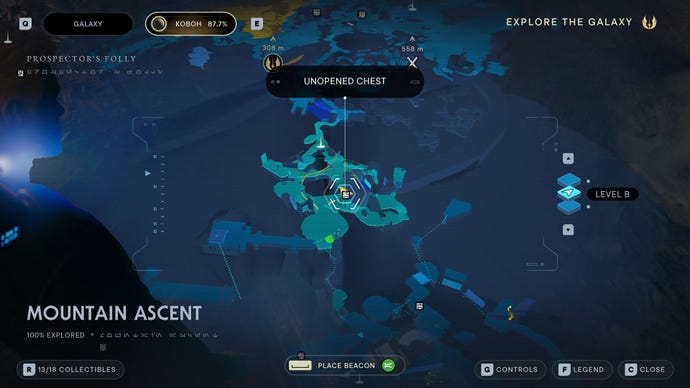
Mountain Ascent collectibles
Mountain Ascent is the next major section of Prospector’s Folly, and contains 18 collectibles within its slopes and crevices:
Mountain Ascent Chests:
Image credit:Rock Paper Shotgun / EA


Chest #1 (Mustache and Patch):In the shiverpede nest to the left after parkouring across the lake past the forcefield.
Image credit:Rock Paper Shotgun / EA


Chest #2 (Drifter Material):This chest requires you to Force Lift and then Force Slam it. Just outside the shiverpede nest, in the lower section with the crashed TIE Fighter.
Image credit:Rock Paper Shotgun / EA

Chest #3 (Scrapyard Audio Sensors):This chest requires you to Force Lift and then Force Slam it. Parkour section next to the large wheel that controls the door.
Image credit:Rock Paper Shotgun / EA

Chest #4 (Light Mustache And Patch):Underwater in the lake past the forcefield.
Image credit:Rock Paper Shotgun / EA

Chest #5 (Bomber material):Past the forcefield, jump off to the lower ledge and look to the left of the waterfall for a piece of dry ground with a chest.
Image credit:Rock Paper Shotgun / EA


Mountain Ascent Databanks:
Image credit:Rock Paper Shotgun / EA
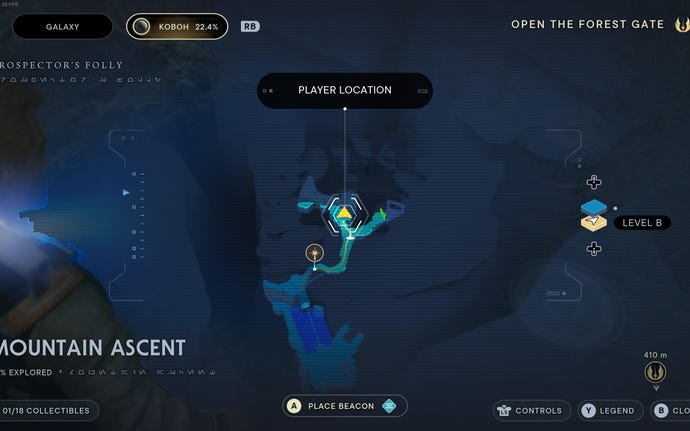

Force Echo (Braving the Heights):Take path left from the Mountain Ascent Meditation Point.
Image credit:Rock Paper Shotgun / EA
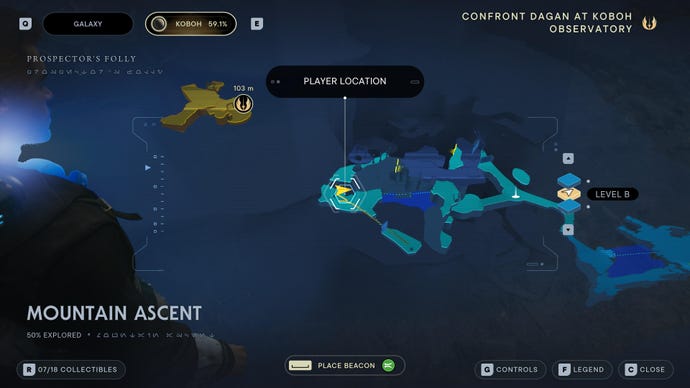

Force Echo (Crashed Tie Fighter):Just outside the shiverpede nest, in the lower section with the crashed TIE Fighter.
Image credit:Rock Paper Shotgun / EA
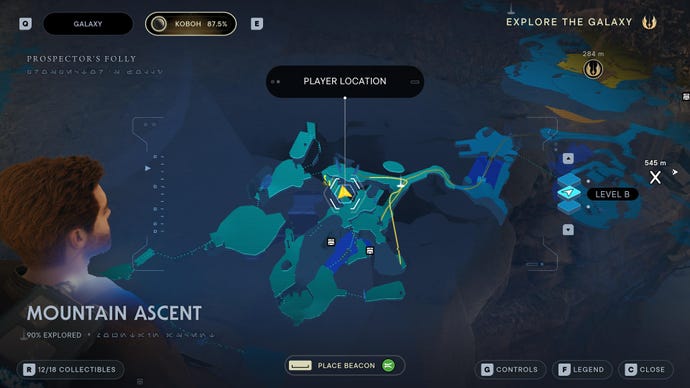
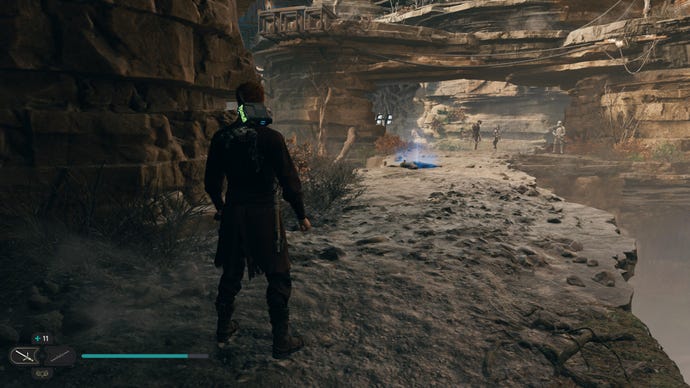
Force Echo (Grock Departed):Turn left just after going through the forcefield just after the Meditation Point.
Mountain Ascent Treasures:
Image credit:Rock Paper Shotgun / EA
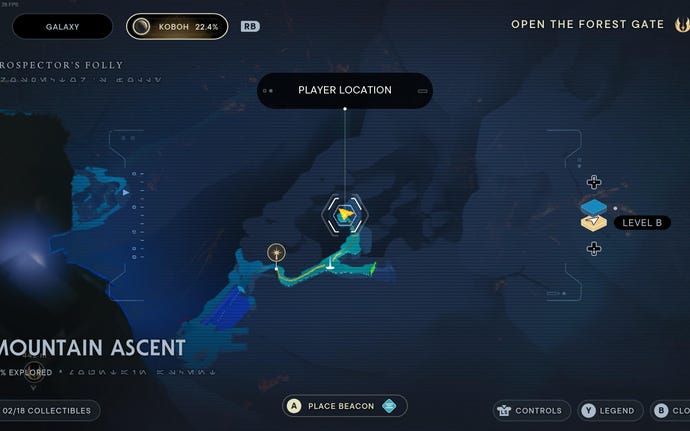

Priorite Shard #1:Take path left from the Mountain Ascent Meditation Point and hop across gap to go through waterfall.
Image credit:Rock Paper Shotgun / EA
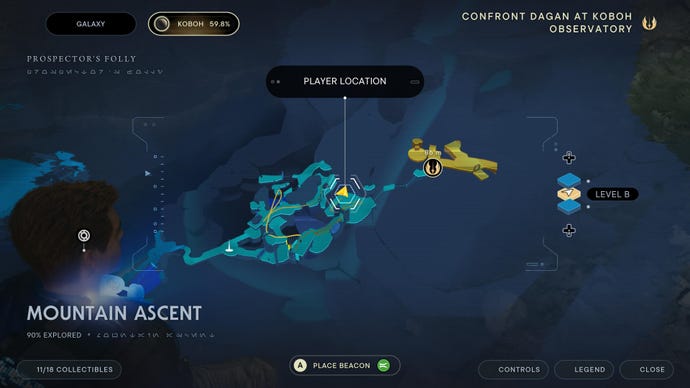

Priorite Shard #2:Lift up the patch of stones in the corner of the flooded area where the two Bilemaws are, just past the wheel-controlled gate.
Image credit:Rock Paper Shotgun / EA
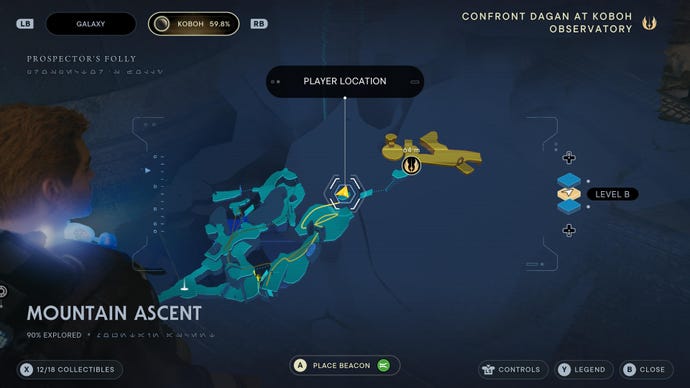

Image credit:Rock Paper Shotgun / EA
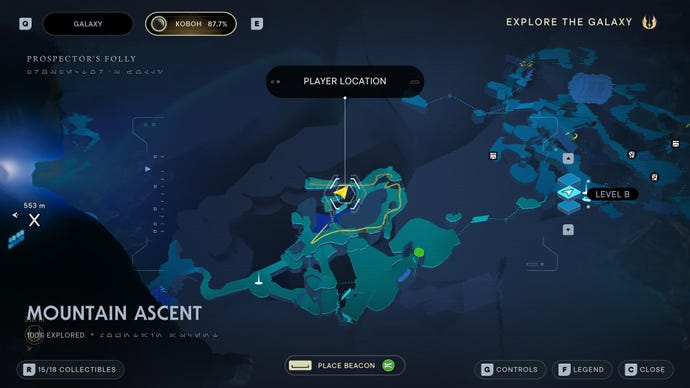
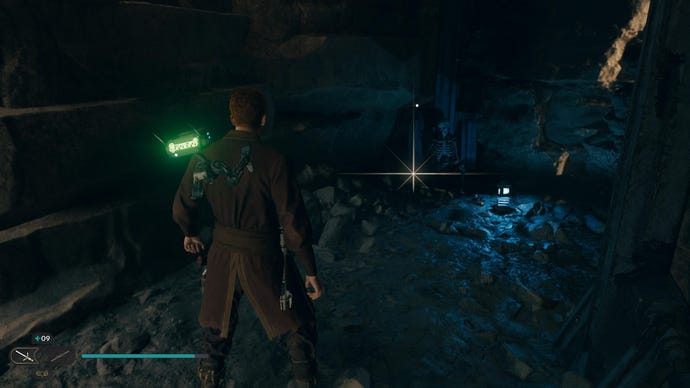
Mountain Ascent Seed Pods:
Image credit:Rock Paper Shotgun / EA

Koboh Spiker (Felucian Yellow):Take path left from the Mountain Ascent Meditation Point and hop across gap to go through waterfall.
Image credit:Rock Paper Shotgun / EA

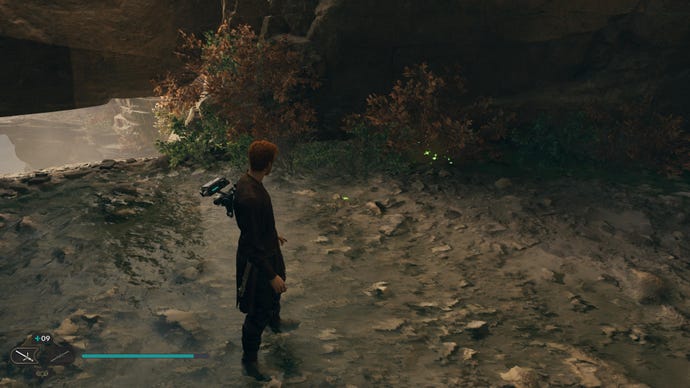
Koboh Spiker:On the left edge of the arena with the two Bilemaws.
Image credit:Rock Paper Shotgun / EA


Koboh Spiker (Rare):On top of the green forcefield, turn right after the big tree on the upper levels.
Image credit:Rock Paper Shotgun / EA

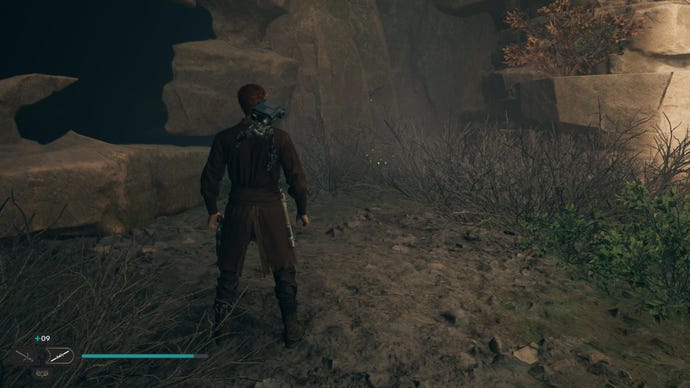
Koboh Spiker:Past the forcefield, jump off to the lower ledge and look to the left of the waterfall for a piece of dry ground with the Bomber material chest. To the right is a plant to cut.
Marl Cavern collectibles
Marl Cavern is a very small section adjoining the Fogged Expanse (below), and contains just 4 collectibles to find:
Marl Cavern Essences:
Image credit:Rock Paper Shotgun / EA

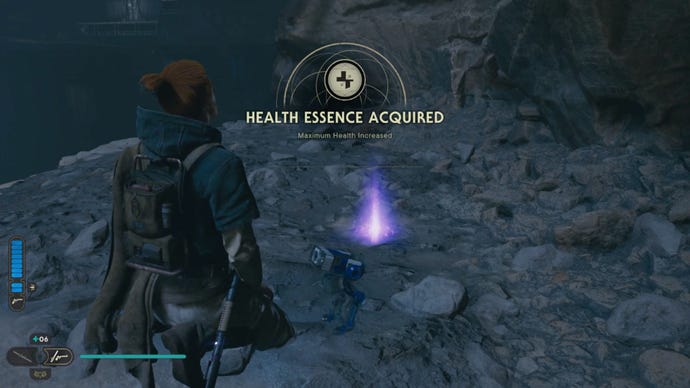
Health Essence:After wall running across the cavern, turn around and jump through the hanging stoage area. Can see it from the Force Tear location.
Marl Cavern Databanks:
Image credit:Rock Paper Shotgun / EA
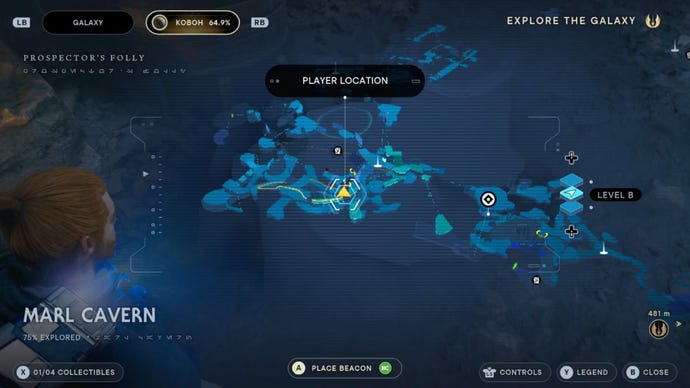
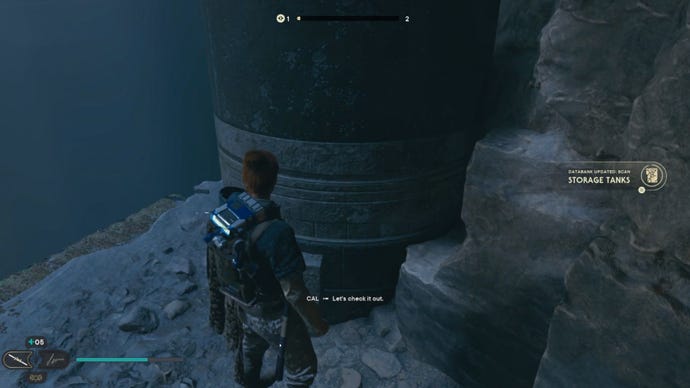
Databank (Storage Tanks):Black container to your left as you enter the area.
Marl Cavern Force Tears:
Image credit:Rock Paper Shotgun / EA

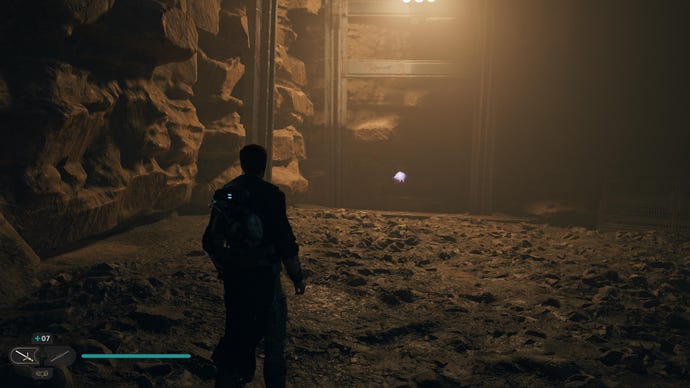
Force Tear (Fractured Power):After first parkour section in Marl Cavern, grapple to the balloon thing and past it onto the ledge.
Marl Cavern Treasures:
Image credit:Rock Paper Shotgun / EA

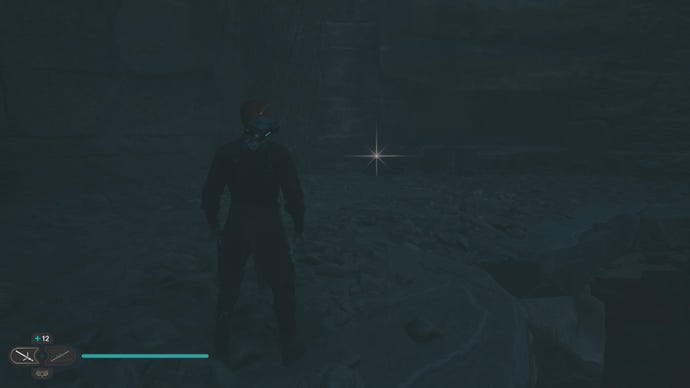
Priorite Shard:Drop down from the ledge immediately at the start of Marl Cavern.
Fogged Expanse collectibles
Fogged Expanse is a large and tricky region deep in Prospector’s Folly, with lots of winding paths to explore. It contains a total of 24 collectibles:
Fogged Expanse Chests:
Image credit:Rock Paper Shotgun / EA
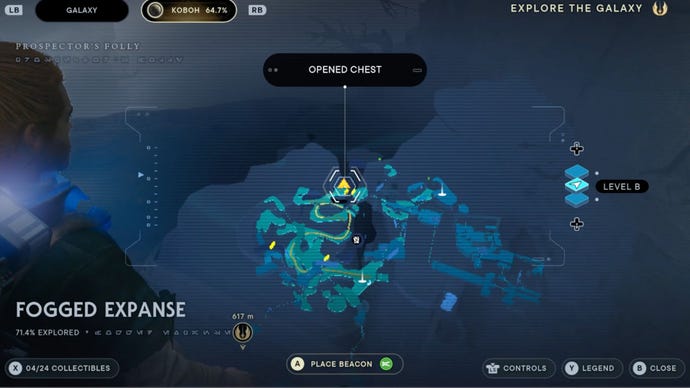

Chest #1 (Soul Patch beard):Follow the left path from the Meditation point down past the wall running bit, follow the path to the left but turn right at the Mogu door and check behind the Roller Mines.
Image credit:Rock Paper Shotgun / EA
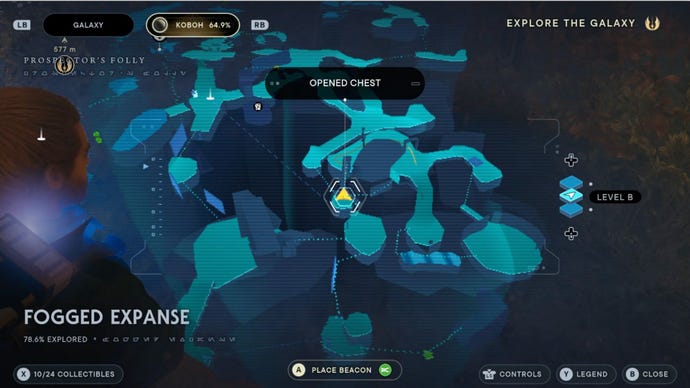

Chest #2 (Detachment Pommel):Open door with mogu behind it and follow it around to an area where you can jump over a wall running platform to a ledge. Jump over it and look behind you to find the barrel. Shortcut rope from the Fogged Expanse Meditation Point also leads right to it.
Image credit:Rock Paper Shotgun / EA
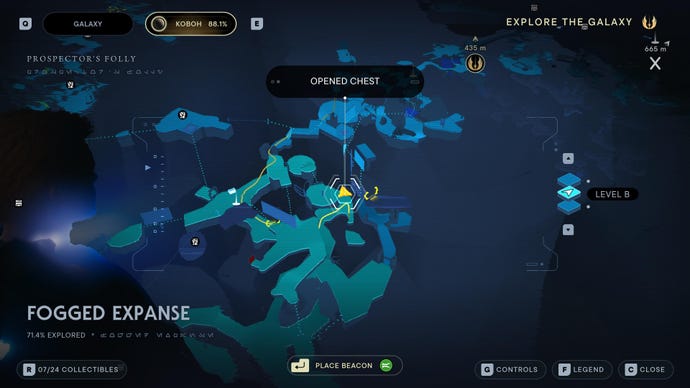
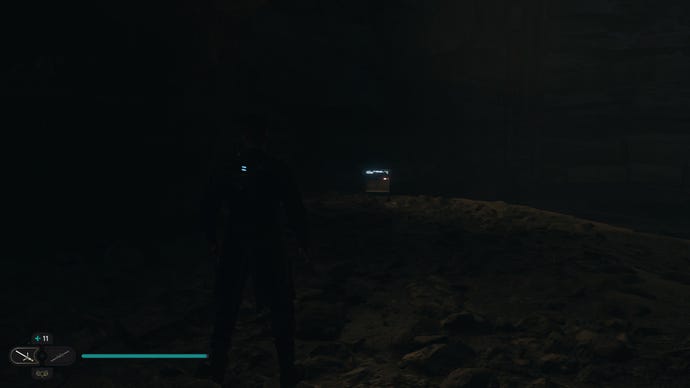
Chest #3 (Exile jacket):Follow the left path from the Meditation Point, past the Bramliks. Chest is on the edge of a cliff.
Fogged Expanse Essences:
Image credit:Rock Paper Shotgun / EA


Perk (Fortitude):Behind the Vile Bilemaw, accessible once you defeat it.
Image credit:Rock Paper Shotgun / EA
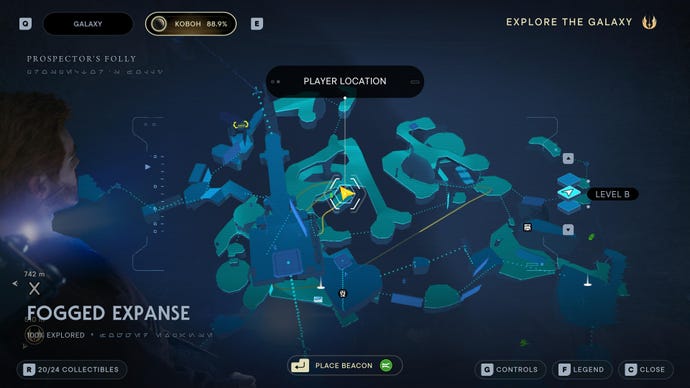
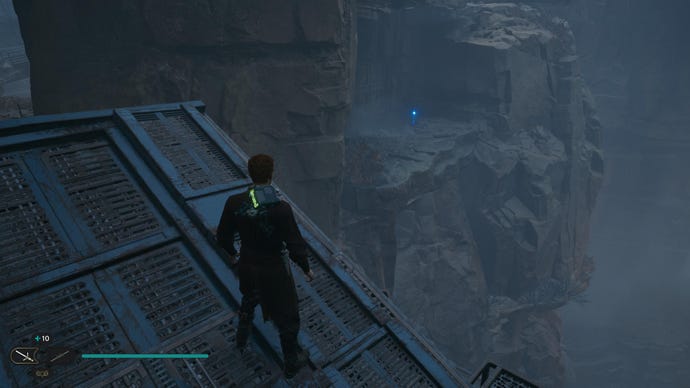
Fogged Expanse Databanks:
Image credit:Rock Paper Shotgun / EA
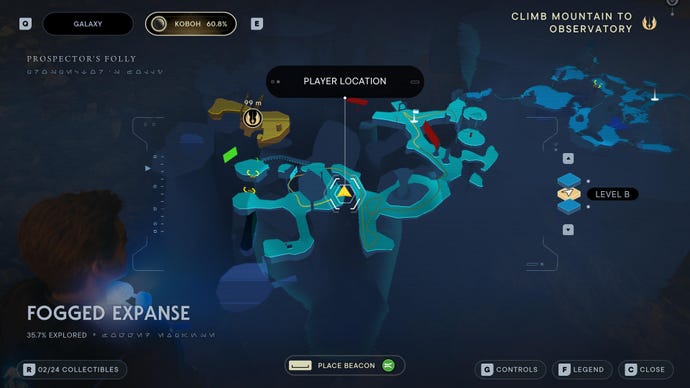

Force Echo (A Deadly Encounter):Pull open the big double doors on the left at one point after a wall-running section, and a Mogu will attack you. Behind the Mogu is a Force Echo.
Image credit:Rock Paper Shotgun / EA
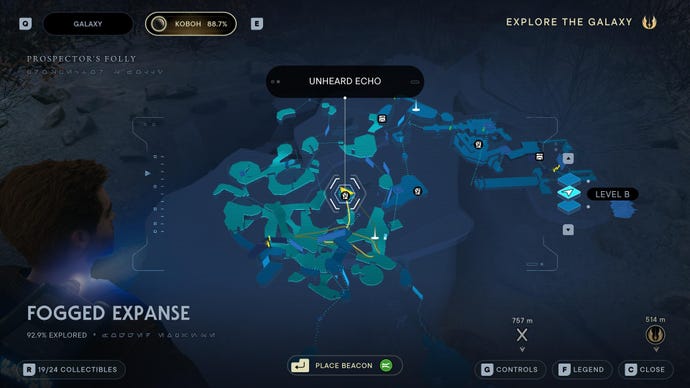

Fogged Expanse Treasures:
Image credit:Rock Paper Shotgun / EA

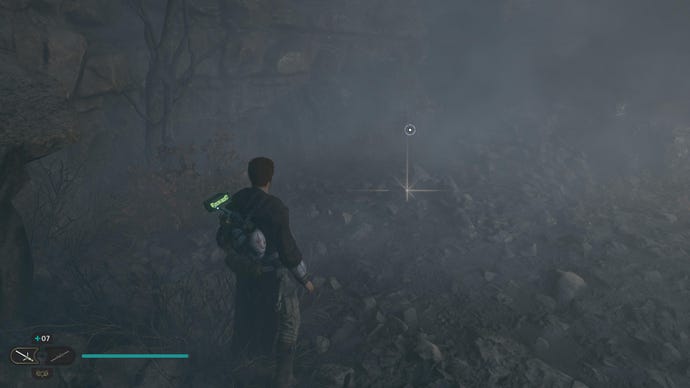
Priorite Shard #1:Take a left when the Mogu attacks you, and lift the stone pile at the end.
Image credit:Rock Paper Shotgun / EA

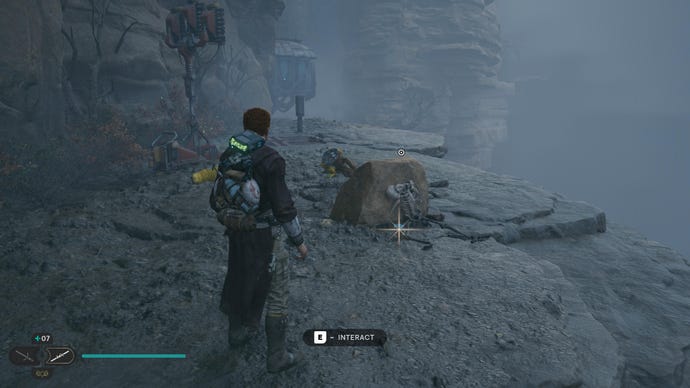
Priorite Shard #2:Continue on past the double doors with the Mogu behind, and look behind the rock past the elevator.
Image credit:Rock Paper Shotgun / EA

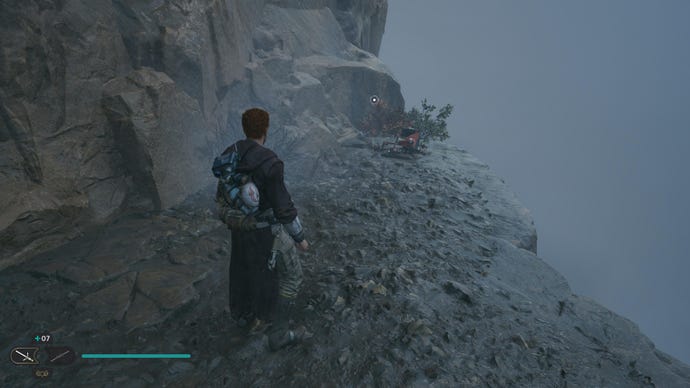
Priorite Shard #3:Kill the Scavenger Droid which runs past the Security Droid on the cliff edge, a short time after getting the Electro-Dart.
Image credit:Rock Paper Shotgun / EA


Priorite Shard #4:Follow the left path from the Meditation Point, past the Bramliks. Turn right at the cliff edge and jump the gap. Inspect the skeleton on the ground for the Priorite.
Image credit:Rock Paper Shotgun / EA
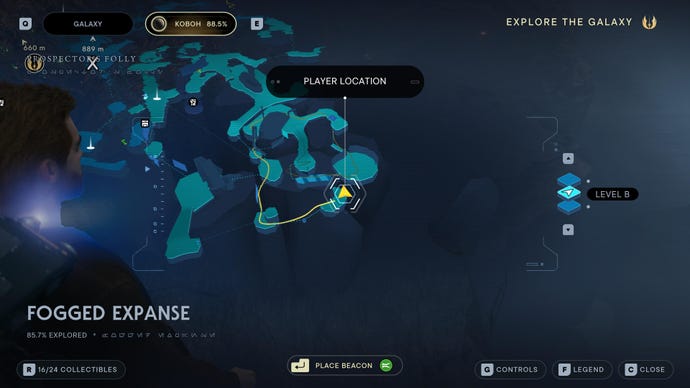

Image credit:Rock Paper Shotgun / EA


Image credit:Rock Paper Shotgun / EA


Priorite Shard #7:After pushing the wall-run section to get across to the ledge, use the balloon and launch yourself back where you came, onto the higher ledge with the Priorite.
Fogged Expanse Seed Pods:
Image credit:Rock Paper Shotgun / EA
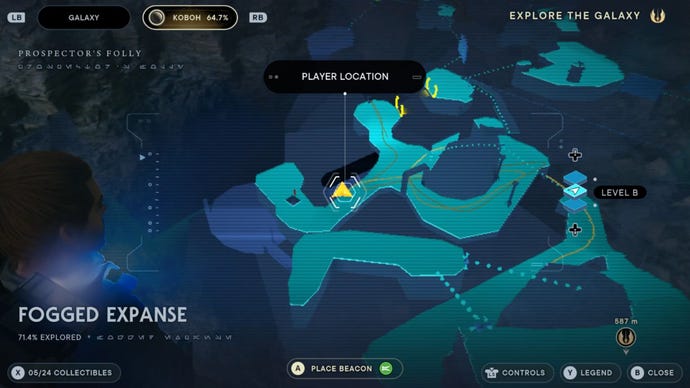
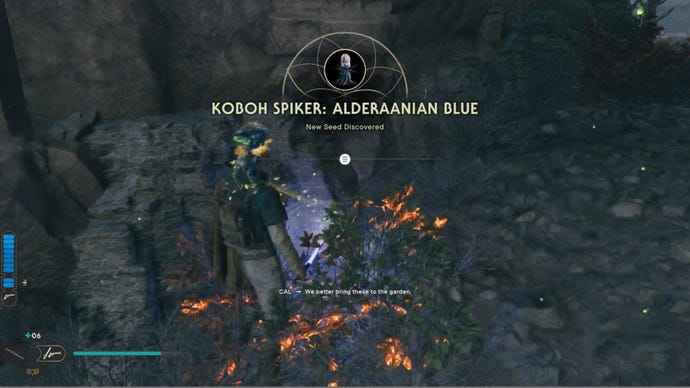
Koboh Spiker (Alderaanian Blue):Near the mogu door, just before the Soul Patch beard chest.
Image credit:Rock Paper Shotgun / EA
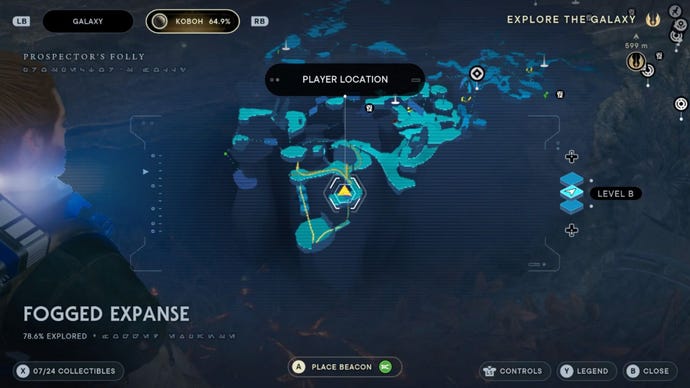

4x Koboh Spiker:Take the lift after the Vile Bilemaw fight.
Image credit:Rock Paper Shotgun / EA
Imperial Post 8L-055 collectibles
Prospector’s Folly culminates with Imperial Post 8L-055, a sizeable Empire-controlled region that nonetheless only contains 4 collectibles:
Imperial Post 8L-055 Chests:
Image credit:Rock Paper Shotgun / EA

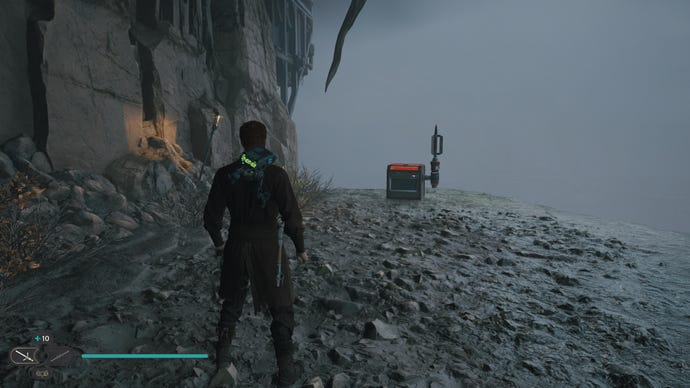
Chest #1 (Textured Rubber weapon materials):Drop down to the lower ledge from the Meditation Point, and follow the path round. Shoot Electro-Dart at the conduit behind you to open the chest.
Image credit:Rock Paper Shotgun / EA

Chest #2 (RSKF-44 Barrel):Drop down on a red platform just after the Rick, the Door Technician fight and cross the gap.
Imperial Post 8L-055 Databanks:
Image credit:Rock Paper Shotgun / EA

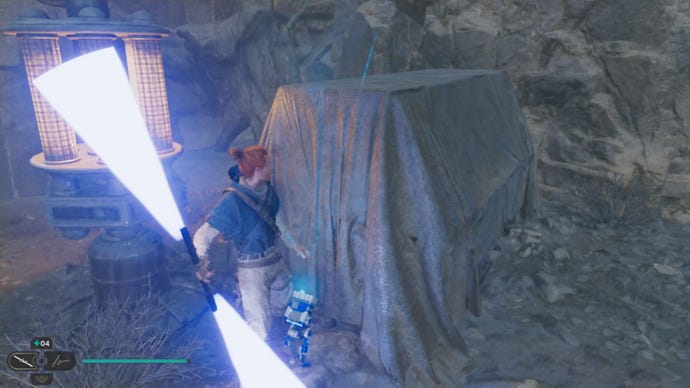
Databank (Abandoned Prospector Equipment):Just after zipline, fight the two Stormtroopers and it’s ahead on your right.
Image credit:Rock Paper Shotgun / EA


Databank (Docking Clamp Overrides):Follow the grate around to the protruding area on the left that has a computer terminal
Summit Ridge collectibles
Summit Ridge, located high above Prospector’s Folly, is little more than a short path that takes you up into the Mountain Observatory. Nonetheless, it contains 8 collectibles to keep an eye out for:
Summit Ridge Essences:
Image credit:Rock Paper Shotgun / EA

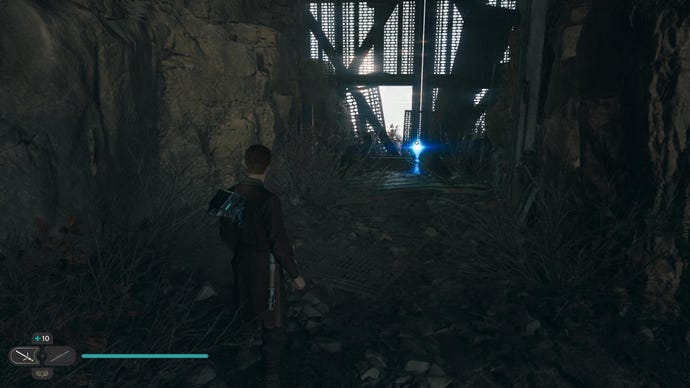
Skill Point Essence:Use the Grapple balloon spawner and throw it behind you to reach the higher ledge. Then wall-run to continue along the upper path until you reach the essence.
Summit Ridge Databanks:
Image credit:Rock Paper Shotgun / EA
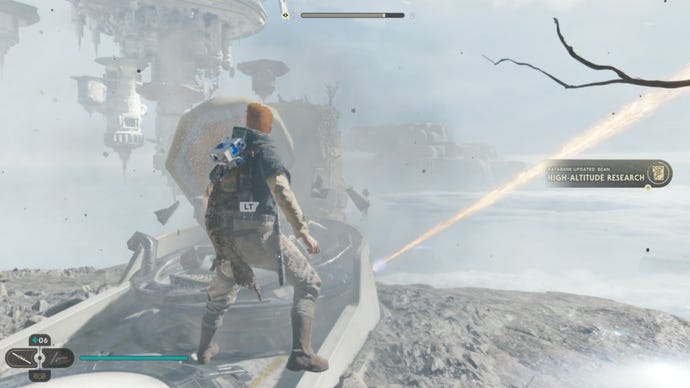
Databank (High-Altitude Research):Jump off the platform and scan the balloons that you can lift
Image credit:Rock Paper Shotgun / EA
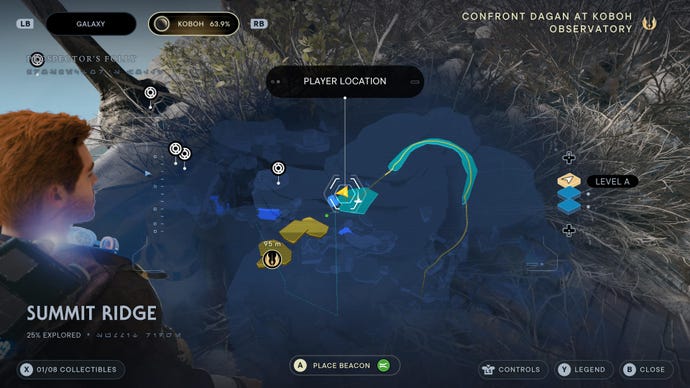

Force Echo (Journey’s End):Next to Meditation Point.
Summit Ridge Treasures:
Image credit:Rock Paper Shotgun / EA
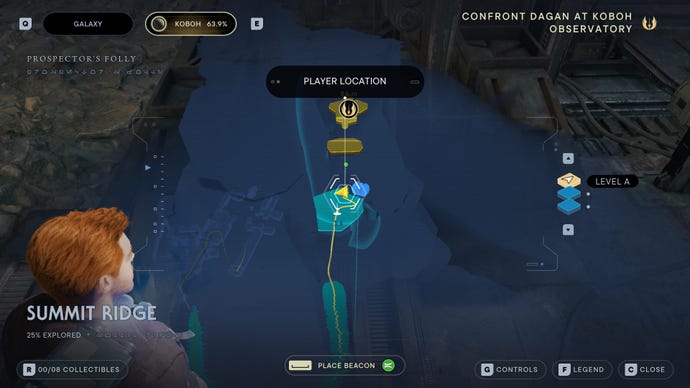

Priorite Shard:Next to Meditation Point.
Image credit:Rock Paper Shotgun / EA
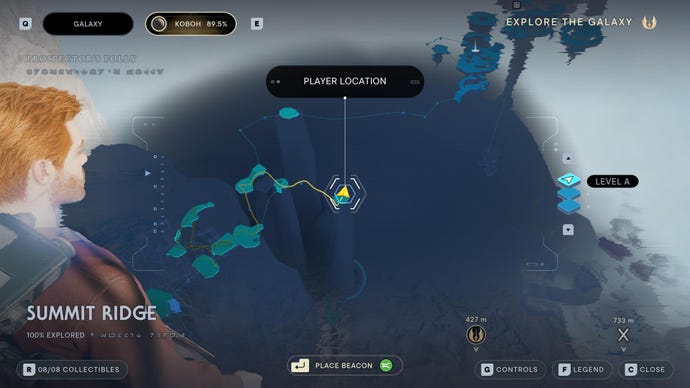
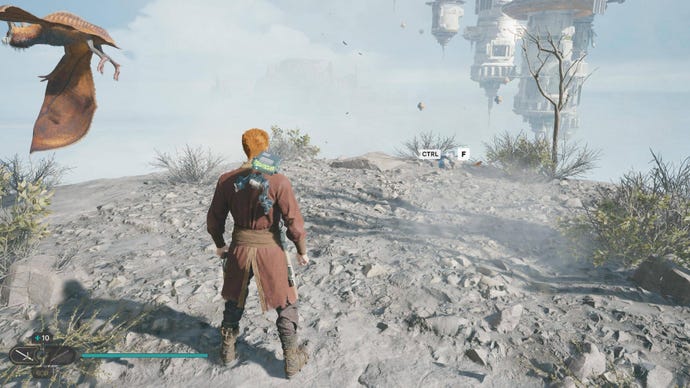
Datadisc:Use the second grapple balloon spawner to launch yourself onto the solitary platform to your right. Force Lift the stones on the ground once you’ve climbed up.
Summit Ridge Seed Pods:
Image credit:Rock Paper Shotgun / EA


Koboh Spiker (Dathomirian Red):Just after grappling the balloon and launching yourself to the next ledge. Look to the left for the plant to cut.
Image credit:Rock Paper Shotgun / EA


Koboh Spiker:Drop down onto the ledge with the grapple balloon spawner, and slash the plant on your left.
Image credit:Rock Paper Shotgun / EA


Koboh Spiker:Use the grapple balloon spawner and throw it in front of you to reach the higher ledge. Slash the plant on your left.
Observatory Understructure collectibles
The Observatory Understructure is accessible through Summit Ridge, and contains 6 collectibles:
Observatory Understructure Chests:
Image credit:Rock Paper Shotgun / EA
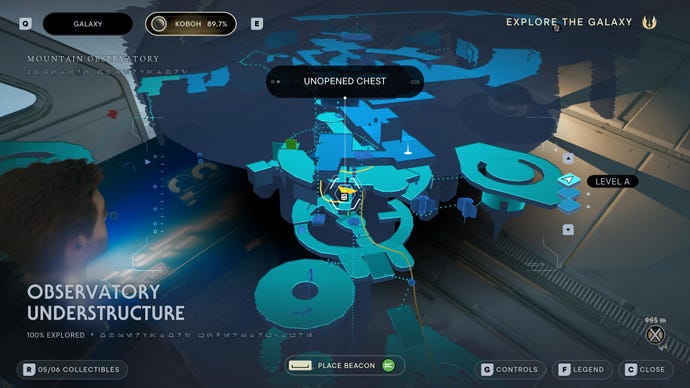

Chest (Showdown Grip):Go through the Force Lift door next to the elevator, turn right, then go through the next door and step down onto the ledge below. Then drop off the side and dash over to the hidden ledge beneath with the chest.
Image credit:Rock Paper Shotgun / EA

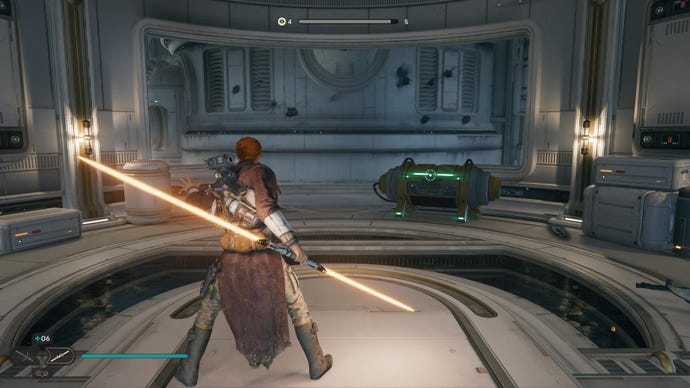
Stim Canister:After the Forfeit Your Lives Force Echo, climb up until you see a gap you can squeeze through into a room with a balloon grapple point spawner. Throw it out through the window, then use it to reach the ledge above where you’re standing.
Observatory Understructure Databanks:
Image credit:Rock Paper Shotgun / EA


Force Echo (Forfeit Your Lives):After Bode’s ship takes out the three droids, climb up to the next ledge and turn left. Force Echo is at the edge.
Observatory Understructure Treasures:
Image credit:Rock Paper Shotgun / EA
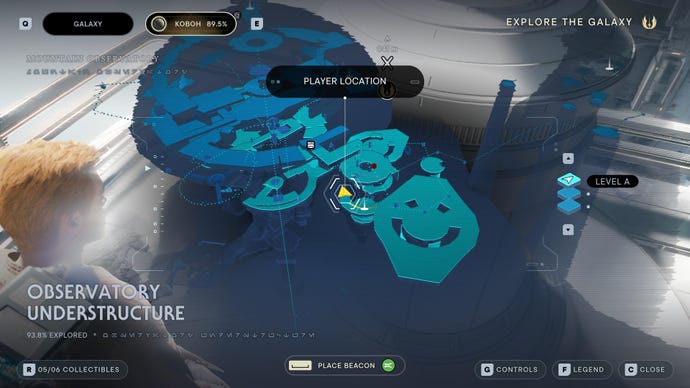

Datadisc #1:Climb up the outside path around the Meditation Point room, datadisc is at the end.
Image credit:Rock Paper Shotgun / EA
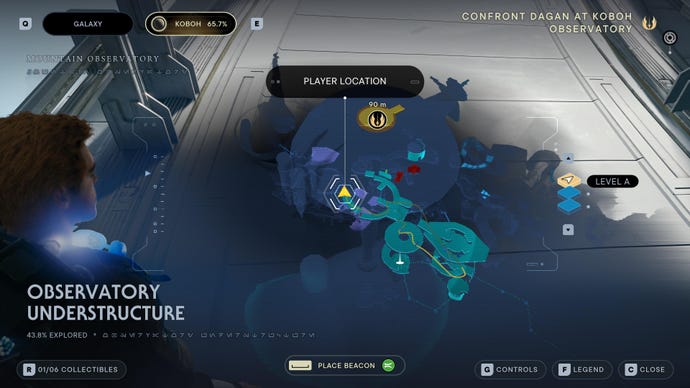

Datadisc #2:Kill the Scavenger droid on the left path after the two droidekas.
Diagnostics Corridor collectibles
The Diagnostics Corridor is a small region within the Mountain Observatory, containing a total of 5 collectibles:
Diagnostics Corridor Essences:
Image credit:Rock Paper Shotgun / EA

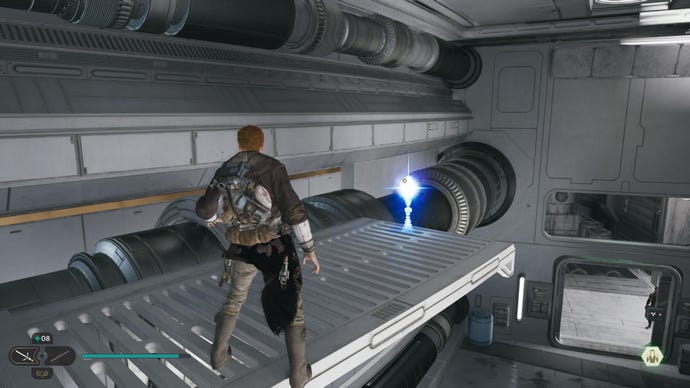
Force Essence:After going through the multi-stage area of enemies, throw a balloon grapple point out of the window once you reach the locked door, then grapple round and back in through the green forcefield. After going through the forcefield, immediately jump and dash again to reach the upper ledge.
Image credit:Rock Paper Shotgun / EA
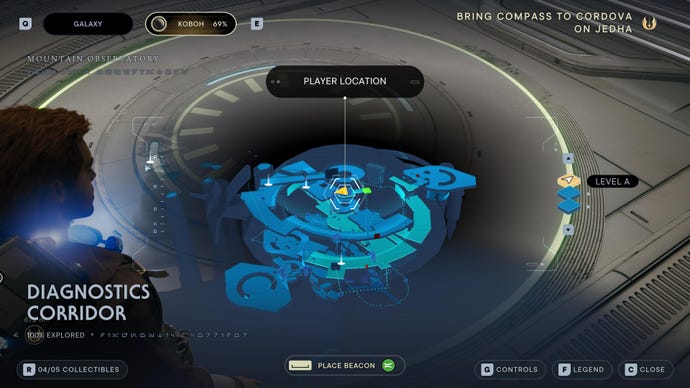

Perk (Perplexity):Take the elevator down from the Grand Oculus after the fight with Dagan.
Diagnostics Corridor Databanks:
Image credit:Rock Paper Shotgun / EA
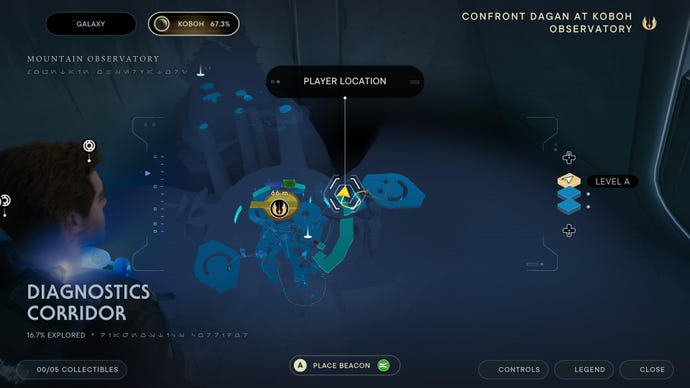
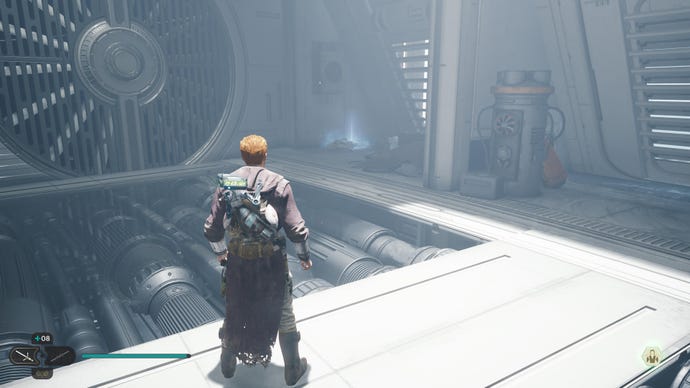
Force Echo (Merciless Rampage):After meeting up with Bode again, use BD to spawn a new balloon grapple point and enter the Diagnostics Corridor. Turn right on entrance to see the Force Echo.
Diagnostics Corridor Treasures:
Image credit:Rock Paper Shotgun / EA


Datadisc:After going through the multi-stage area of enemies, throw a balloon grapple point out of the window once you reach the locked door, then grapple round and back in through the green forcefield. Datadisc is on a crate in front of you as you enter.
Observation Deck collectibles
If you’ve reached the Observation Deck, you’re nearing the summit of the Mountain Observatory. This Deck contains just 2 collectibles:
Observation Deck Essences:
Image credit:Rock Paper Shotgun / EA


Health Essence:After defeating the dual bosses, Mads Gresh and San Dersen.
Observation Deck Databanks:
Image credit:Rock Paper Shotgun / EA
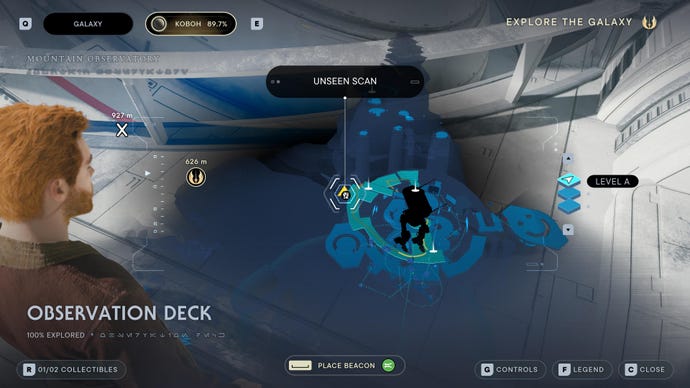

Databank (Grand Oculus):Just off the ledge after all the B1 droids.
Chamber Of Fortitude collectibles
The Chamber Of Fortitude is down the elevator at the end of Corroded Silo way back in Rambler’s Reach. To learn more about how to solve the puzzle inside, check out ourJedi: Survivor Chamber Of Fortitudeguide. It contains just 5 collectibles:
Chamber Of Fortitude Chests:
Image credit:Rock Paper Shotgun / EA


Chest (Two-tone metal BD-1 materials):First room of the Meditation Chamber.
Chamber Of Fortitude Essences:
Image credit:Rock Paper Shotgun / EA


Perk (Persistence):Second room of Meditation Chamber.
Chamber Of Fortitude Databanks:
Image credit:Rock Paper Shotgun / EA
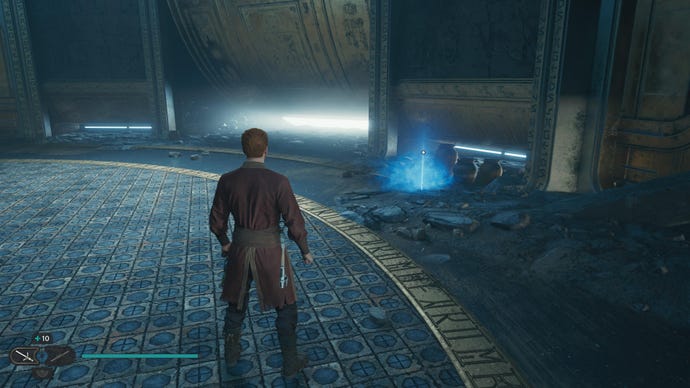
Force Echo (A World Of Wonder):First room of the Meditation Chamber.
Image credit:Rock Paper Shotgun / EA

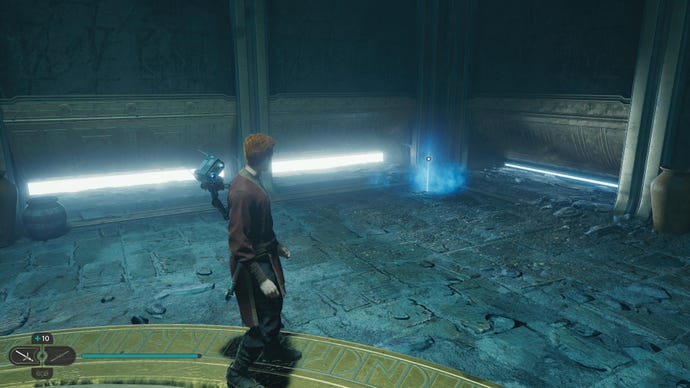
Force Echo (Hand In Hand):Second room of Meditation Chamber.
Chamber Of Fortitude Treasures:
Image credit:Rock Paper Shotgun / EA
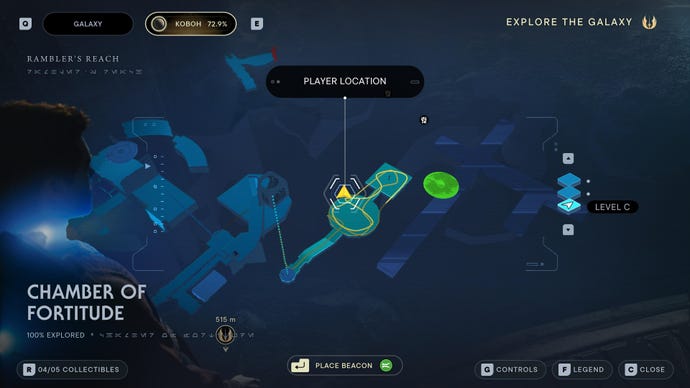

Datadisc:In first room of the Meditation Chamber, in one of the pots to the right of the yellow-lit broken wall.
Chamber Of Duality collectibles
The Chamber Of Duality is where you first find Zee, and as such it is the only Chamber on Koboh that forms part of the main story. To learn more about it, check out ourJedi: Survivor Chamber Of Dualityguide. Accessible from the Smuggler’s Tunnels beneath Pyloon’s Saloon, this chamber contains 4 collectibles:
Chamber Of Duality Chests:
Image credit:Rock Paper Shotgun / EA
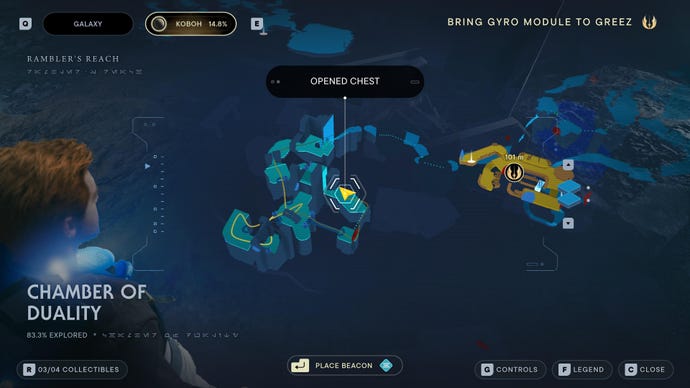
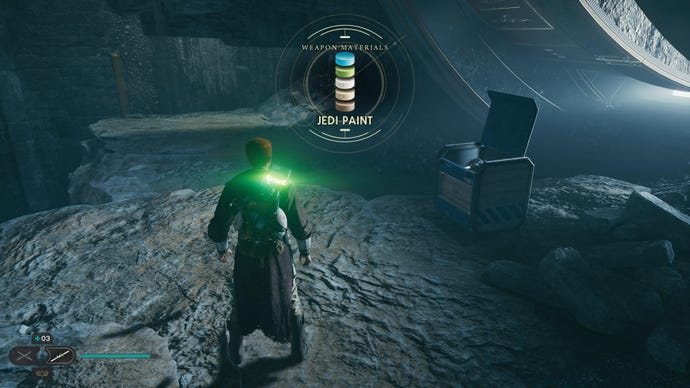
Chest (Jedi Paint weapon materials):In the room where Zee is found, after dropping down from across the 2-orb path.
Chamber Of Duality Essences:
Image credit:Rock Paper Shotgun / EA
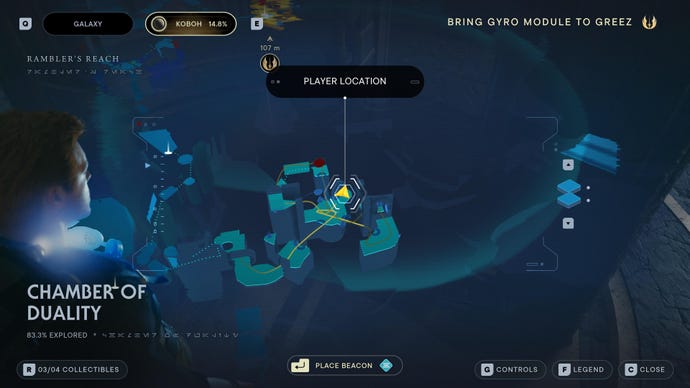

Perk (Resilience):Free Zee, she’ll give it to you.
Chamber Of Duality Databanks:
Image credit:Rock Paper Shotgun / EA
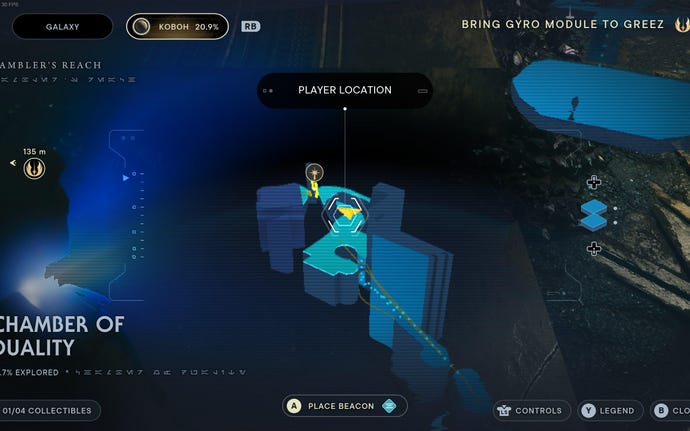

Databank (Disaster):After climbing the wall jump section, scan wall in next corridor.
Chamber Of Duality Treasures:
Image credit:Rock Paper Shotgun / EA

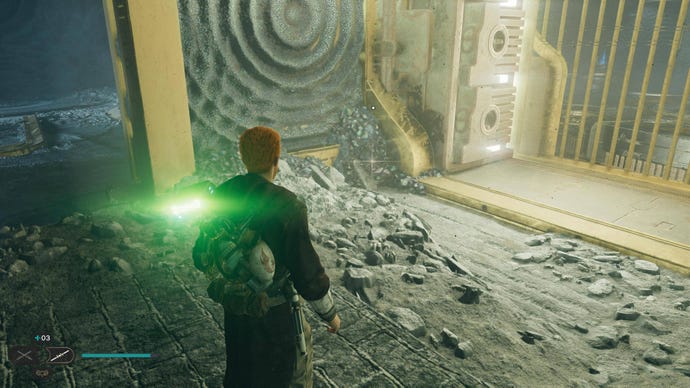
Datadisc:In the room where Zee is found, on the other side of the barred gate.
Chamber Of Clarity collectibles
Accessible from an elevator in the Untamed Downs, the Chamber Of Clarity contains a sizeable 7 collectibles, mostly Databank entries. To learn more, check out ourJedi: Survivor Chamber Of Clarityguide, but for just the collectibles, here’s where to go:
Chamber Of Clarity Chests:
Image credit:Rock Paper Shotgun / EA


Chest (Unique Non-Metal Weapon Materials):Pull first crate and parkour around to Force Echo. Then, continue around and traverse the next two crates to find chest.
Chamber Of Clarity Essences:
Image credit:Rock Paper Shotgun / EA

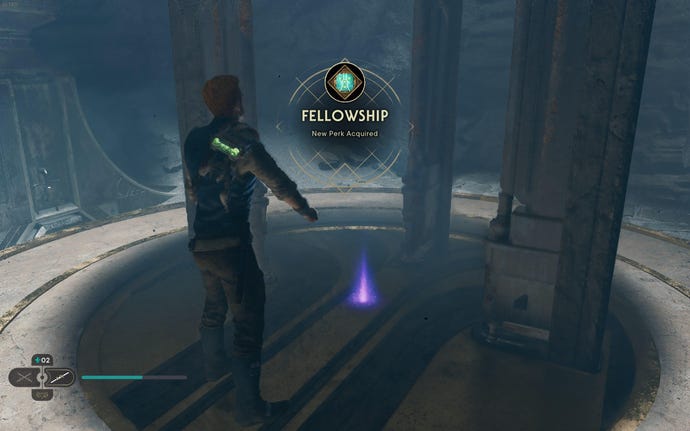
Perk (Fellowship):Force push door open, use crate to jump through, and then force push crate down back into main chamber. Then, force pull bar down from ceiling of main chamber, and use to hop onto crate and jump over to the perk bit.
Chamber Of Clarity Databanks:
Image credit:Rock Paper Shotgun / EA


Force Echo (Tenacity):Enter Chamber and look down and left. Force Pull crate out of wall, and then hop into gap and parkour up to find runes on the wall.
Image credit:Rock Paper Shotgun / EA


Force Echo (Trials):Head back to main corridor and pull second crate out. Then, pull it back the way it came, but jump onto vines and ride it through. Once there, head into next chamber, force pull crate, and look behind for Force Echo.
Image credit:Rock Paper Shotgun / EA


Force Echo (Concerted Effort):Head back to main corridor and pull second crate out. Then, pull it back the way it came, but jump onto vines and ride it through. Once there, head into next chamber, force pull crate, climb on top, and jump onto ledge on the left.
Image credit:Rock Paper Shotgun / EA


Force Echo (A Candid Moment):Pull crate out and jump onto ledge on left, and then follow path around and force push door across the gap. Then, use crate to leap over to open doorway to find more runes.
Chamber Of Clarity Treasures:
Image credit:Rock Paper Shotgun / EA


Datadisc:Enter chamber and look down and left. Force pull crate out of wall, and then hop into gap. Drop down ledge to get datadisc, before wall-running.
Chamber Of Reason collectibles
The Chamber Of Reason is in Basalt Forest, and can only be reached via the elevator in Basalt Rift. For help on completing the puzzle within, check out ourJedi: Survivor Chamber Of Reasonguide. It contains 8 collectibles:
Chamber Of Reason Chests:
Image credit:Rock Paper Shotgun / EA


Chest (Diligence Emitter):From Perk area, use lever to open path back to entrance. Climb down rope and squeeze through gap and move orb coupler to the other side. Then, go back up to top level and follow the ledge around until you can force pull orb up to top level, using the second orb at the elevator to open path around. Grab orb from lower level, and then head to bridge and sling it over the wall to reach the chest.
Chamber Of Reason Essences:
Image credit:Rock Paper Shotgun / EA

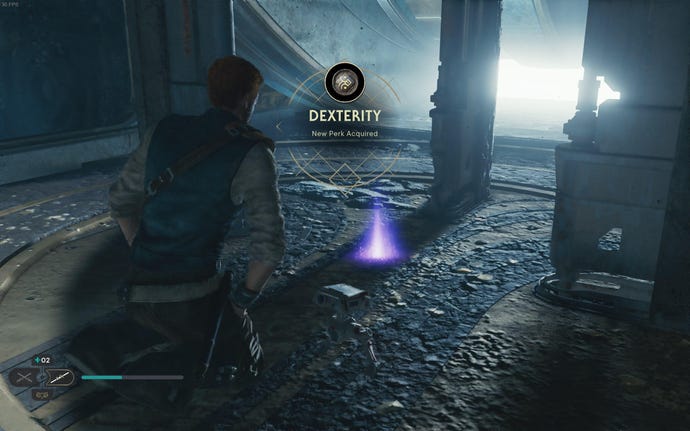
Perk (Dexterity):Grab Orb Coupler while on mid level bridge, and then take it up elevator. Sling it across gap to land it in another orb coupler, and then take bridge across and interact with structure to get perk.
Chamber Of Reason Databanks:
Image credit:Rock Paper Shotgun / EA


Force Echo (The Goals of Khri):In Basalt Rift High Republic structure (follow rumor on map), take lift into chamber and then climb down rope. Halfway down, swing to ledge and squeeze through gap in the wall.
Image credit:Rock Paper Shotgun / EA
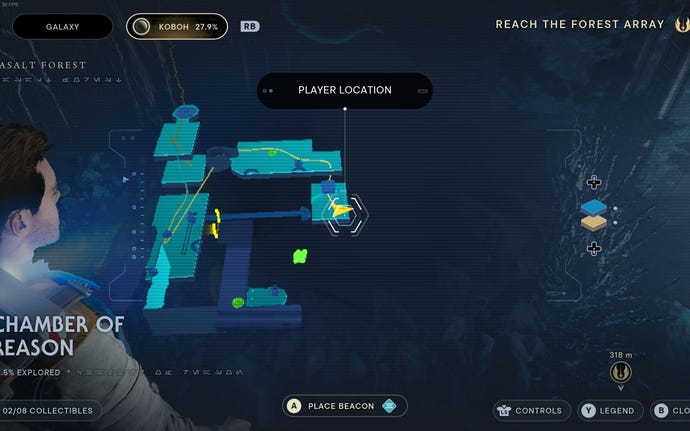

Force Echo (Talk of the Future):Slide to bottom of rope and move orb into the power slot. Use the force to push the lever so that the orb moves to the left side, and then cross the bridge to find the Force Echo.
Image credit:Rock Paper Shotgun / EA
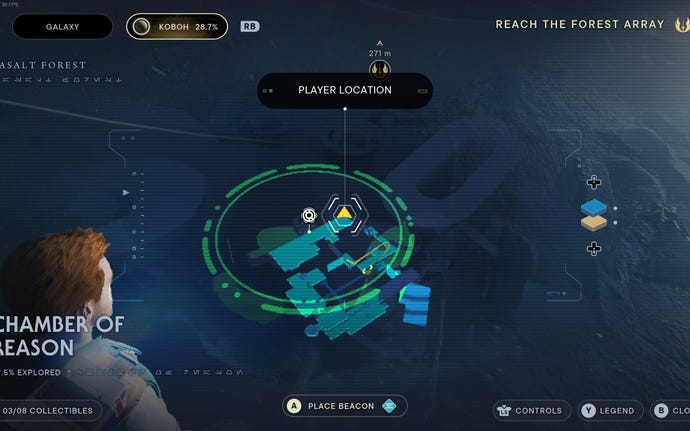

Image credit:Rock Paper Shotgun / EA
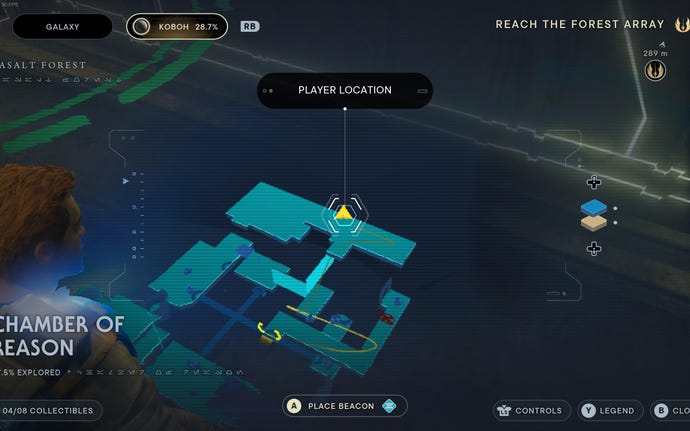

Databank (A Secret Meeting):Take the elevator up and leap across the chasm, then parkour up to the ledge. Follow the path and hug the right wall to scan a small drawing on the wall.
Image credit:Rock Paper Shotgun / EA
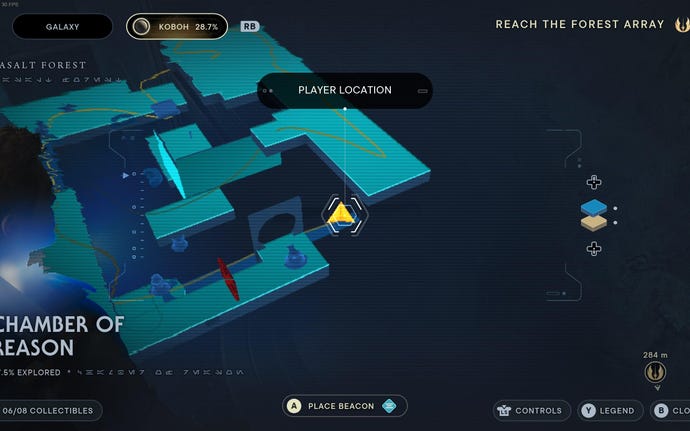

Chamber Of Reason Treasures:
Image credit:Rock Paper Shotgun / EA


Datadisc:Take the elevator up and leap across the chasm, then parkour up to the ledge. Follow the path to the end and grab Datadisc from the ledge.
Chamber Of Detachment collectibles
The Chamber Of Detachment is a tricky chamber to find - the elevator is on the bottom level of Mountain Ascent, behind the waterfall. For more information check out ourJedi: Survivor Chamber Of Detachmentguide. This small but confusing chamber contains 6 collectibles:
Chamber Of Detachment Chests:
Image credit:Rock Paper Shotgun / EA


Chest (Jedi Paint BD-1 materials):Spray Koboh matter onto the cube as it passes through the beam to burn away the Koboh matter on the side of the room you begin on. Then pull out the second cube and open the chest behind it.
Chamber Of Detachment Essences:
Image credit:Rock Paper Shotgun / EA

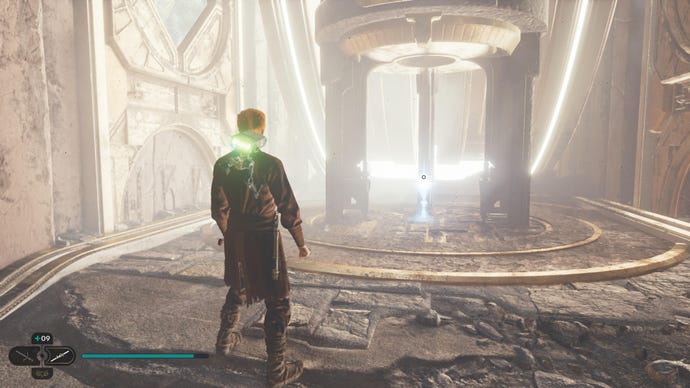
Perk (Patience):Set both cubes going so that the one nearest the entrance stops on the pressure plate. Then send the second cube to the other side, so it’s on top of the elevator. Finally, pull the first cube back off the pressure plate, and immediately jump atop the second cube before the elevator lifts. You’ll be lifted up high enough to reach the area with the essence.
Chamber Of Detachment Databanks:
Image credit:Rock Paper Shotgun / EA
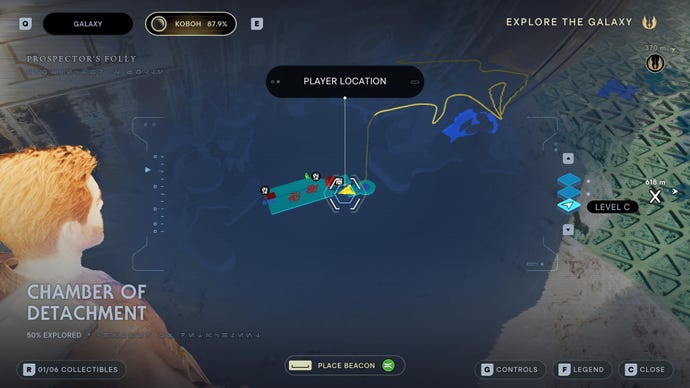
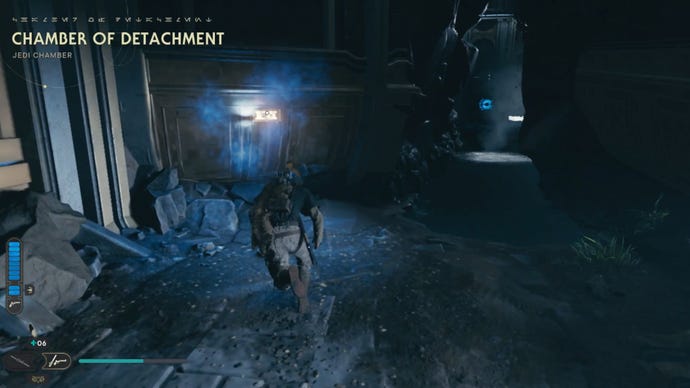
Force Echo (A Rare Find):As you enter the chamber, just to the left.
Image credit:Rock Paper Shotgun / EA

Force Echo (Missing in Action):Main room of chamber, to the right.
Image credit:Rock Paper Shotgun / EA
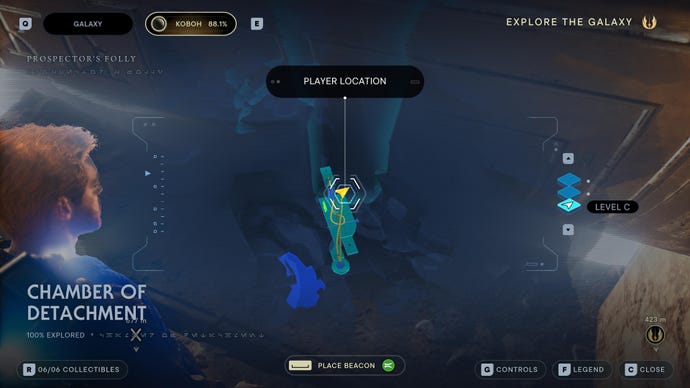
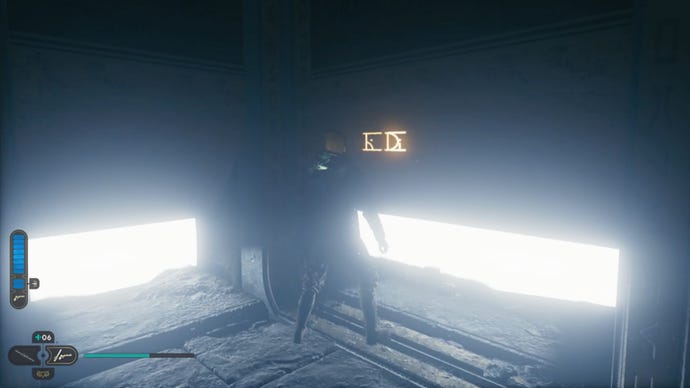
Force Echo (Worlds Away):Main room of chamber, back right.
Chamber Of Detachment Treasures:
Image credit:Rock Paper Shotgun / EA


Datadisc:Burn away the Koboh matter on the wall above and to the right of where the beam hits, and a datadisc will drop to the floor.
Chamber Of Connection collectibles
The Chamber Of Connection is one of the best-guarded secrets of the Viscid Bog, and only reachable via some nifty zipline-work within the bog. To be exact, you need to reach the Viscid Bog Meditation Point, take the zipline from there, then jump off partway along and onto the perpendicular zipline crossing the first. From there you can reach theJedi: Survivor Chamber Of Connection puzzle, which houses 7 collectibles in total:
Chamber Of Connection Chests:
Image credit:Rock Paper Shotgun / EA

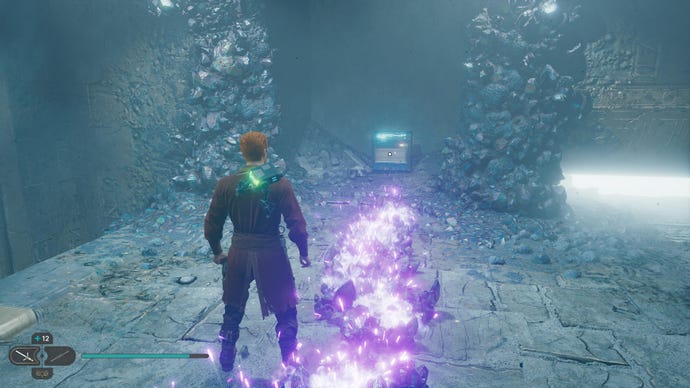
Chest (Persistence Emitter):Use the beam to destroy the third wall of Koboh matter on the right-hand side of the chamber as you enter.
Chamber Of Connection Essences:
Image credit:Rock Paper Shotgun / EA

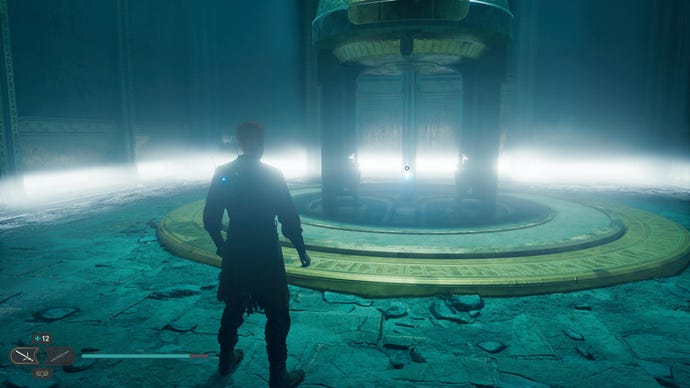
Perk (Recuperation):In the final room, behind the fourth wall of Koboh matter. Must create a trail of Koboh matter up the side-passage, take the orb and put it into the other socket to create a path, then continue the Koboh matter trail across the path and onto the final wall.
Chamber Of Connection Databanks:
Image credit:Rock Paper Shotgun / EA

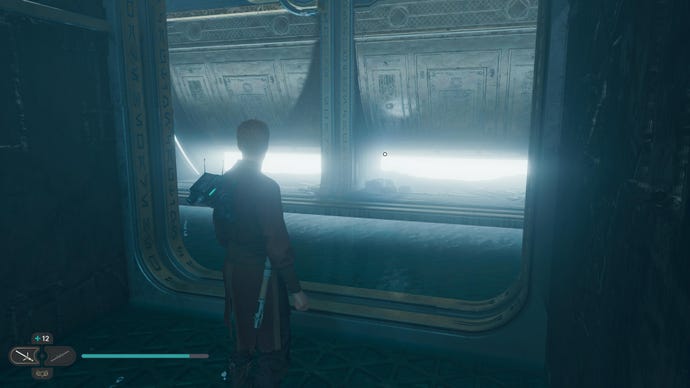
Force Echo (Homesick):Turn left as you enter the chamber and head through the archway.
Image credit:Rock Paper Shotgun / EA

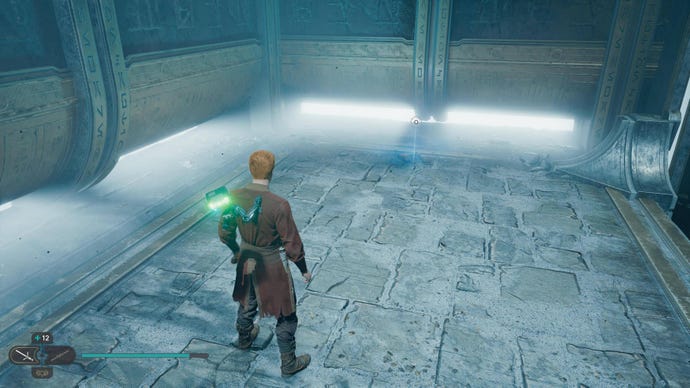
Force Echo (Insolence, Or Bravery):Use the beam to destroy the first two walls of Koboh matter and follow the pole path across.
Image credit:Rock Paper Shotgun / EA


Force Echo (Mind Challenge):Use the beam to destroy the first two walls of Koboh matter and follow the pole path across. Jump down onto the ledge with the door and listen to the Force Echo in the middle of the platform.
Image credit:Rock Paper Shotgun / EA

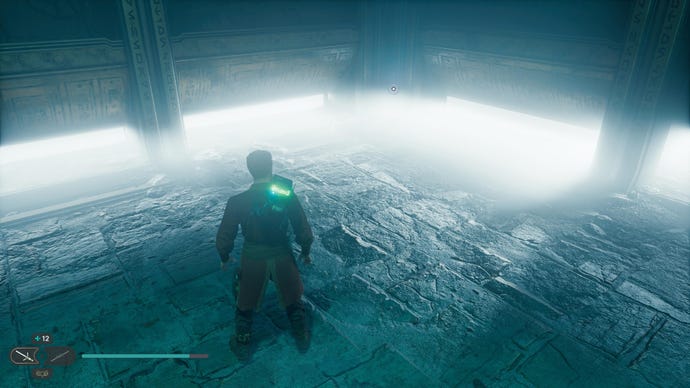
Force Echo (Private Doubts):In the back-left corner of the final Perk room.
Chamber Of Connection Treasures:
Image credit:Rock Paper Shotgun / EA