HomeHardwareGuides
How to tidy cables, reassemble your PC case and connect peripheralsThe final hardware steps to a completed PC build
The final hardware steps to a completed PC build
With all the internal components installed and connected, congrats: you basically have acustom built gaming PC, albeit one that won’t be functional until youinstall Windows. There are also just a few more details to attend to first, including a spot of cable management (optional, but highly recommended) and putting your opened-up case back together.
How To Tidy Up Loose PC CablesWatch on YouTube
How To Tidy Up Loose PC Cables

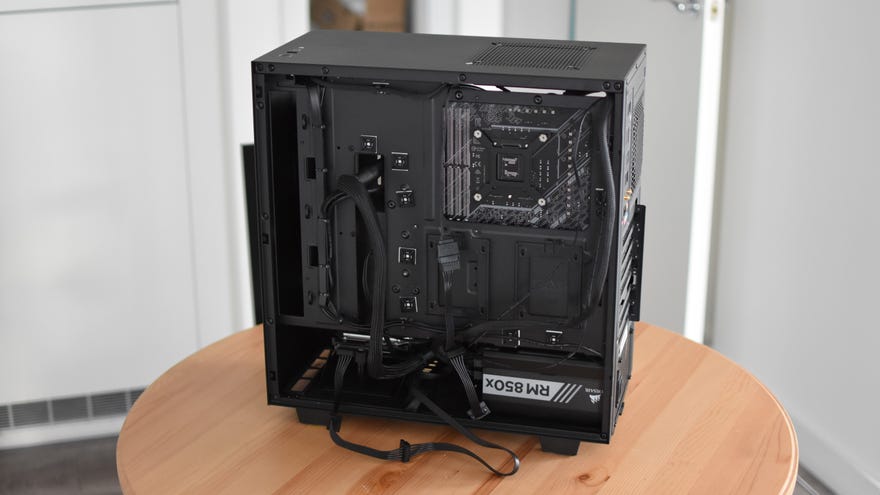
With a little intuition, you’ve probably been using some cable management techniques already, likepassing PSU cablesthrough routing holes to get them into the motherboard chamber. But even if your PC currently resembles a box of neglected Christmas lights, now that you know where all the cables need to plug in, there’s no shame in going back, rerouting and reconnecting them for a cleaner build. Here are some general cable tidying tips, as well as how to close up your case and get all your peripherals ready for that final push into OS installation.
How to build a PC: cable management guide
Routing channels
These provide a handy guide for where to direct your cables. The gold standard of a routing channel is that which includes its own fastening mechanism, like Velcro straps – a reusable fastener like this makes it really easy to remove and replace cables later, so make full use if your case includes them.


Generally, effective use of routing channels will help you avoid criss-crossing wires or letting them come in contact with sensitive areas like the motherboard. Channels are your friends.
Routing holes
The other nice thing about routing channels? They lead you to routing holes, cutouts around the internal chassis that let you pass cables in and out of the main chamber.
If it sounds like I’m explaining the obvious, I am a bit, because it’s practically impossible to avoid using these routing holes in a PC build. That said, it is possible to use the wrong ones for the wrong cables, which can lead them stretching, tangling, or otherwise just getting messier than they need to be.

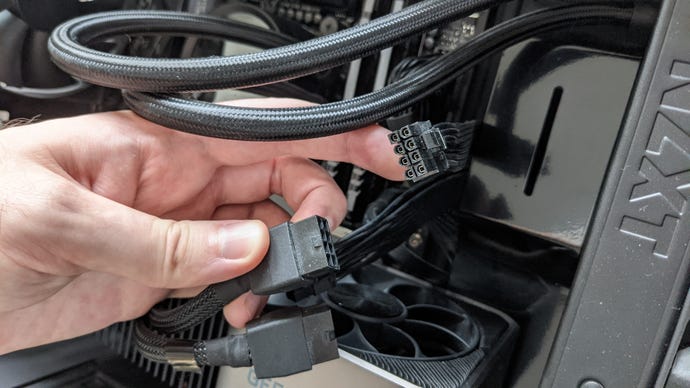
For instance: the CPU power cable should always thread through the routing hole at the top-rear corner of the motherboard tray (pictured), while the honking great 24-pin power cable is best fed through a hole next to the motherboard’s right edge. Pay special attention to the routing holes along the base of the motherboard, too – if you find the appropriate header for a cable first, you can identify the nearest routing hole and thread it through that one, avoiding a situation where you have multiple overlapping cables squished in that awkward little space.
Just stuff the cables under the PSU shroud, basically
Meh, it’s hardly elegant, but that empty space under the PSU shroud? Between the PSU and the HDD cage? That’s prime storage space for excess cabling. It’s best done once all the more skillful cable tidying is complete, especially any fastening with straps or cable ties, but the rest you can simply stuff inside that gap.

The PSU gets its own airflow from under the case, so it doesn’t matter that you’re blocking off cooling from the front intake fans.
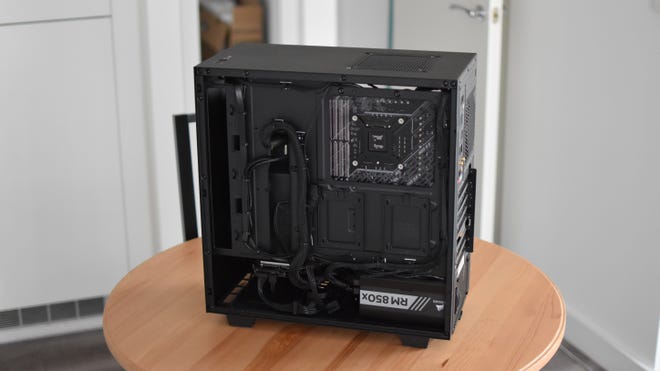
How to reassemble your PC case
“Reassemble” is perhaps a strong word in this context, as all you really need to do now is replace the PC case’s side panels that you removed earlier.
Step 1:Place the PC down flat on its left side, and grab the right side panel. Make sure it’s aligned with any latches or hooks that will keep it in place, then lay it down flat. If it won’t go flat, take a look inside to make sure that no lingering cable bundles are getting in the way.

Step 2:Once the right side panel is in place, insert and tighten the thumbscrews at the back. These don’t need to be screwdriver-tight, just nice and firm.

Step 3:Flip the PC onto its freshly-covered right side, and place the left side panel (or window) back on. Just as you did before, secure the panel/window in place with any thumbscrews or other locking mechanisms it uses.


How to build a PC: connecting peripherals
Tantalisingly close to the finish line now. At this point you can go ahead and hook up your mouse and keyboard, network cable or adapter, and your monitor.
Step 1:Connect any USB peripherals. This step has the distinction of being the most obvious and self-explanatory step in our ten-page guide.


Step 3:Connect your monitor to a display output on thegraphics card–noton the motherboard I/O panel. A DisplayPort connection is best for gaming, as it supports higher resolutions and faster refresh rates than HDMI, and you should receive a DisplayPort cable with any halfway decentgaming monitor.

Aaaaaand you’re all sorted. Ready for your PC’s first boot?
