HomeHardwareGuides
How to test RAM and find errorsBad memory
Bad memory
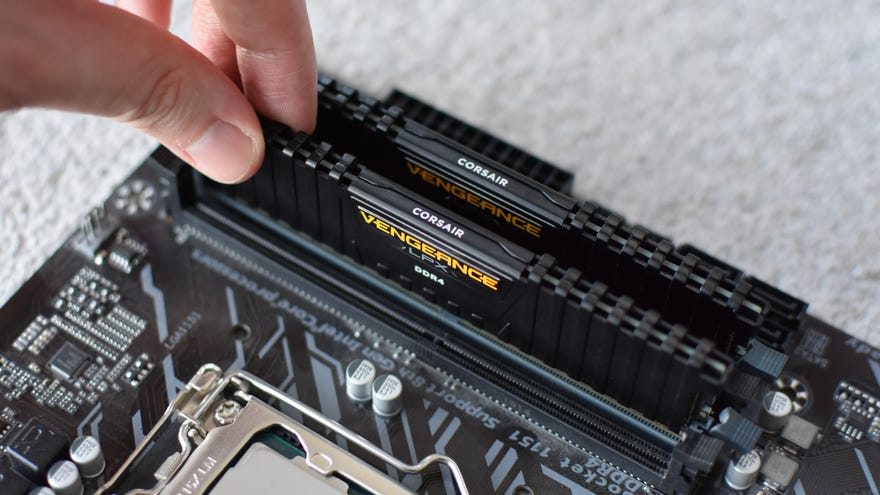
Gaming PCs are, unfortunately, no more resistant to memory mishaps than any other type of computer. But if you learn how to test RAM for errors, you can at least figure out the true cause of a crash or a booting error, in turn opening up the chance to find a fix (or just letting yourself know that you need to buy new RAM).
Year In Review | Mystery Steam Reviews (2021 Video Games)Watch on YouTube
Year In Review | Mystery Steam Reviews (2021 Video Games)

In this guide we’ll go over a couple of different RAM testing tools, both free to download and use. The first, Windows Memory Diagnostic, is built right into Windows (includingWindows 11) and offers an easy option for finding possible RAM problems. For a deeper investigation, you can also try MemTest86, which requires a bit more legwork (including some BIOS changes) but will more thoroughly search your RAM for errors.
How to test RAM using Windows Memory Diagnostic
This is your simplest and easiest option if you don’t fancy installing any other tools, as everything is built into Windows. However, you’ll need to block out some time for it; the tool itself claims its usage “might take several minutes”, but can actually take close to an hour, and you won’t be able to use your rig normally during that time.
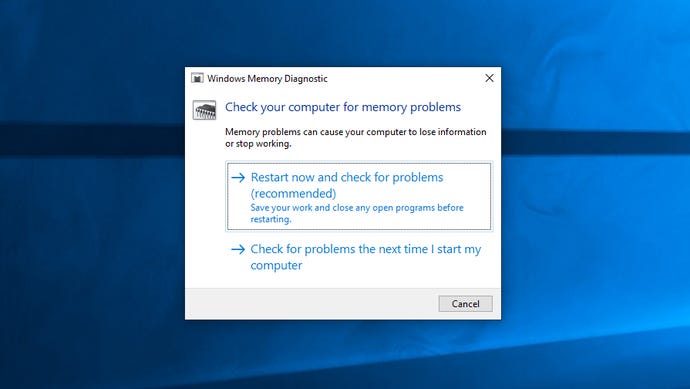
Step 2:Your PC will shut down and you’ll be treated to the sight of a blue screen for many, many minutes as Windows Memory Diagnostic searches for RAM issues. You can go off and do something more productive, as your input isn’t required at this stage, though it’s worth checking on it sporadically as the tool will say if it’s found a problem.
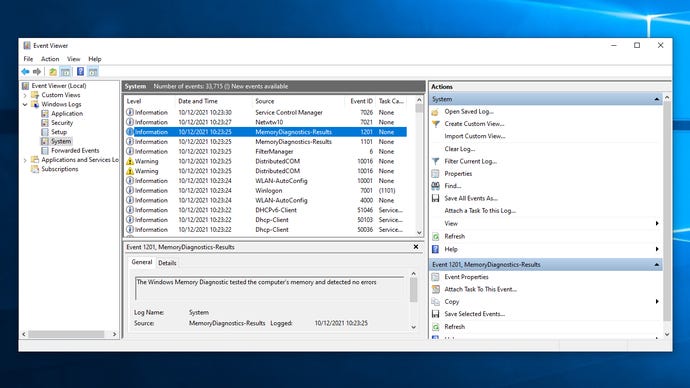
Step 3:Once the test pass is complete, you’ll return to your desktop. Windows Memory Diagnostic should apparently display its results automatically at this point, though it didn’t when I tried it. Luckily, you can find a recap in Windows’s Event Viewer.
Step 4:Right-click the Windows icon then click “Event Viewer”.
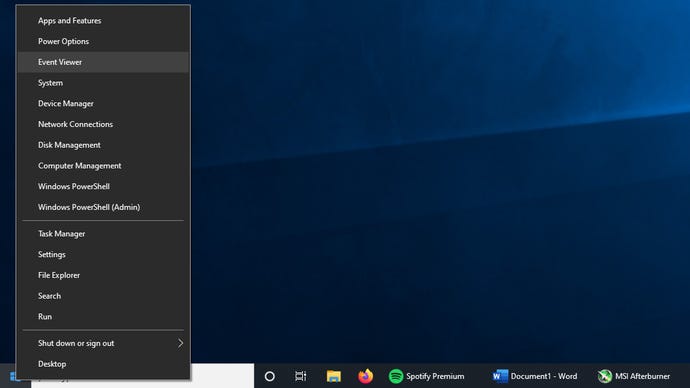
Step 5:In Event Viewer, navigate to Windows Logs > System in the leftmost pane, then look in the “Source” column for an event named “MemoryDiagnostics-Results”. This will detail the results of the test in the pane at the bottom.
How to test RAM using MemTest86
Step 1:Head to theMemTest86 siteand click “Download”.

Step 2:Extract the .zip file you’ve just downloaded and plug in a USB drive. Setting up MemTest86 will wipe everything else off the drive, so if it’s not already clean, back up its contents.
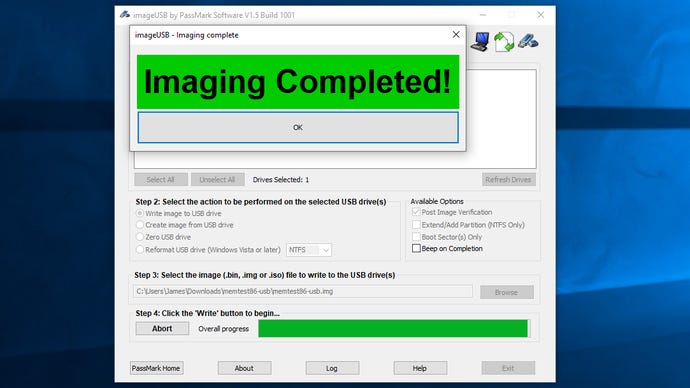
Step 3:Launch the “imageUSB” executable in the extracted folder. When asked if you want to allow it to make changes, click “Yes”.

Step 4:Select your USB drive from the list in the “Step 1” box. In the “Step 2” section, make sure “Write image to USB drive” is selected, then in the “Step 3” section, check that the memtest86-usb.img file is selected – it should be already. Finally, click the “Write” button, then “Yes” on the next two dialogue boxes to confirm.

Step 5:After a few moments the image will have been written to the USB – you’ll know because you’ll get a big flashing, slightly GeoCities confirmation message. Hit “OK” and either restart your PC, or if you’ve used a different computer to create the USB image, plug the USB drive into the PC you want to test and boot it up.

BIOS interfaces can differ but they usually have a Boot menu, so navigate to this and set any USB drive partitions to the top of the boot priority order list. You can always change this back after you’ve finished testing. Savr your changes and exit to restart.
Step 7:On restarting, your PC will load up MemTest86, which will start running automatically. It will take a while to finish the default four-pass testing run – two and a half hours when I tried it with 16GB of DDR4 – so let it do its thing, and upon completion, press any key to view the results. If you like, you can press the Y key when prompted to save a copy to an HTML file, for future reference.
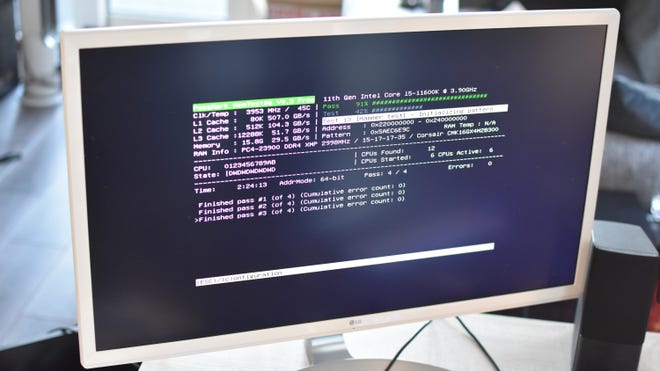
Step 8:Press the X key to exit. You can choose to restart, shut down your PC or exit MemTest86, though remember that you’ll keep loading into it (rather than Windows) until you remove the USB drive or re-enter the BIOS to set Windows Boot Manager back to the primary boot option.

How do I fix RAM errors?
Sadly, not all memory errors are fixable. If there’s a serious hardware problem with one of your RAM sticks, you won’t be able to mend it with troubleshooters, and are best off just replacing it.
And even when one of your RAM modules is terminally broken, if you have more than one stick in your motherboard you don’t need to throw them all out. Try repeatedly booting your PC while removing a different RAM stick each time; if you stop experiencing errors, you’ll know which module needs replacing and which one(s) you can keep.
