HomeHardwareGuides
How to enable Auto HDR in Windows 11Get brighter lights and more vibrant colours in almost any game
Get brighter lights and more vibrant colours in almost any game
Windows 11may not be an essential upgrade yet, but itsAuto HDR featureis mightily impressive: in games that don’t support HDR (high dynamic range) natively, it can apply similar brightness-boosting, colour-emboldening effects. There’s no performance loss, so if you’ve going toupgrade to Windows 11on your gaming rig, it’s worth giving Auto HDR a try – and this guide will show you how to enable it.
Far Cry 6 Is At Its Best When You Just Explore | My Fav Thing In… (Far Cry 6 Review)Watch on YouTube
Far Cry 6 Is At Its Best When You Just Explore | My Fav Thing In… (Far Cry 6 Review)

The first thing you’ll need is an HDR-compatible monitor. Yes, Auto HDR is all about making HDR’s vivid-isation effect more accessible, but you’ll still need a display that can output the brightness levels required to make a visible difference. Auto HDR is tied into the general system HDR settings in Windows 11, meaning it can detect whether you have an HDR monitor or not – and if not, you can’t so much as attempt to enable Auto HDR. Ourbest gaming monitorslist includes a few HDR-ready models, including some relatively affordable ones.
How to enable Auto HDR using Windows 11 settings
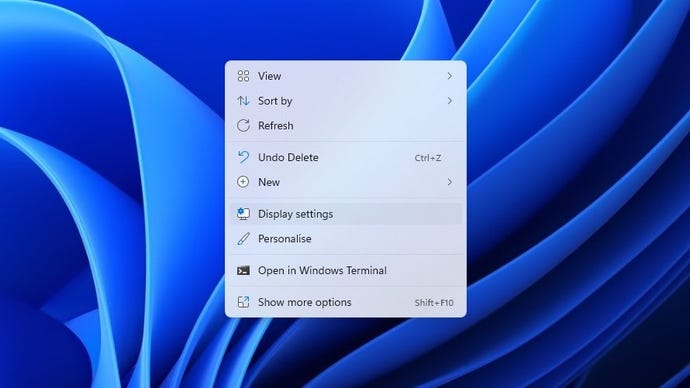
Step 1:Right click anywhere on the desktop (anywhere except on an icon or shortcut, obviously) and click on Display settings.
You could also open up Windows 11’s settings through the Start menu search bar, but this is quicker.
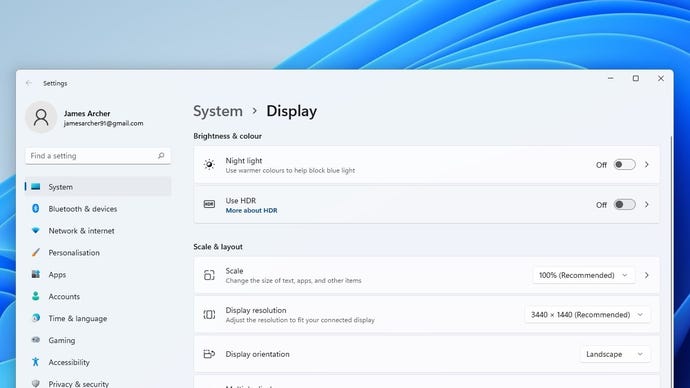
Step 2:Assuming, again, that your monitor supports HDR, there should be a Use HDR section in the Display settings menu. To the right, click to ‘Off’ toggle to enable HDR support in general, the click anywhere within the Use HDR section to open the HDR submenu.
You can skip this step if you already had HDR turned on.
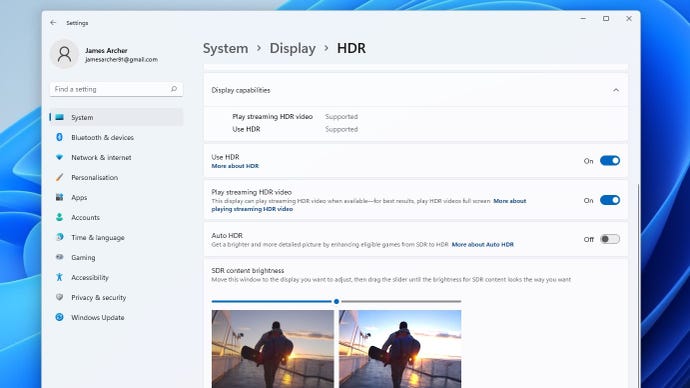
Step 3:Scroll down to the Auto HDR section and hit the ‘Off’ toggle to enable it. And there you have it: Windows 11 will automatically apply Auto HDR to previously non-HDR games for as long as the option is switched on.
A flick of the switch, and all your games will get HDR. Or the next best thing.
How to enable Auto HDR using Xbox Game Bar
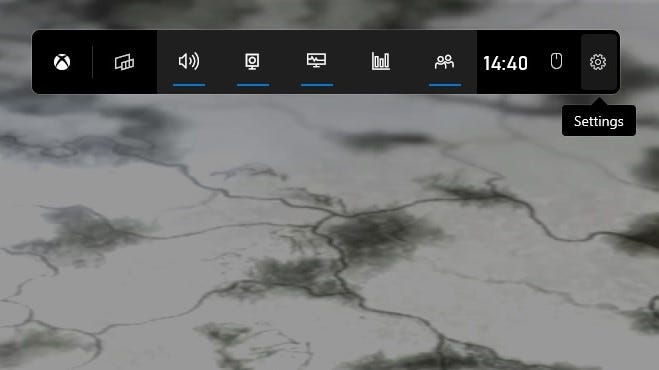
Step 1:Press the Windows key + G at the same time to open the Game Bar. You can do this anywhere, any time, including if you’re not actually playing a game. Presumably “Xbox Game and Everyone Else Bar” didn’t focus test as well. Anyhow, click on the cog icon in the central bar to open Settings.
Right a bit. Bit more. There you go.
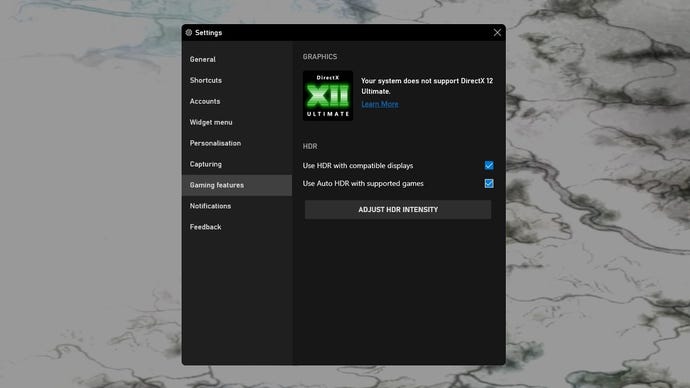
Step 2:Click the Gaming features tab on the left, and make sure both the “Use HDR with compatible displays” box and the “Use Auto HDR with supported games” box are checked.
This method also lets you check whether HDR is working in games with native support.
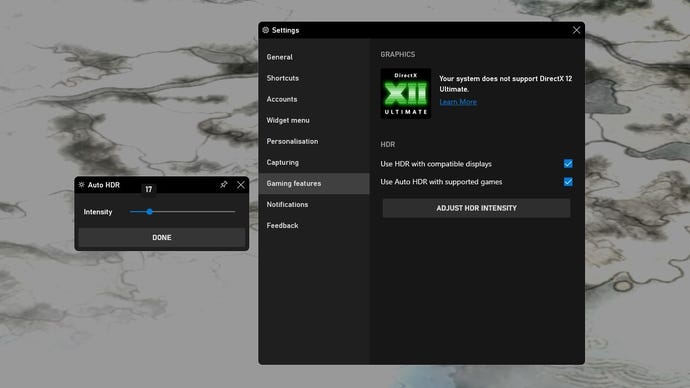
Step 3:Optionally, you can click Adjust HDR Intensity and use the slider to make the image brighter or darker. I found the degree to which this makes a difference varies from game to game, but you can see any changes in real time as you move the slider, so just find your desired level of intensity and click Done to apply.
Unlike the checkboxes, you need to be running a game to adjust intensity, though it’s best to adjust on a per-game basis anyway.
If you want to leave HDR on but switch Auto HDR off – for example, when you’re playing a game that supports HDR natively – this is perhaps the fastest and easiest way to do it.
If you decide touninstall Windows 11 and go back to Windows 10, you can roll back within 10 days of installing the new OS, though you’ll naturally lose Auto HDR in the process.
