HomeGuides
Dead Space walkthroughOur Dead Space walkthrough will guide you through every chapter, noting any collectibles throughout
Our Dead Space walkthrough will guide you through every chapter, noting any collectibles throughout

Page1of12Next page
Page1of12
Page1of12
Next page
Looking for a Dead Space remake walkthrough?Isaac Clarke is once again stomping around the USG Ishimura in theDead Spaceremake, but things have changed over the years. While this is a remake of the original, franchise veterans will notice that it all looks a little different. Layouts have changed, there are Security Clearance doors scattered around, and there are even side quests to complete as you chop off Necromorph limbs. Of course, those new to the series might just want a guiding hand to help them through thishorror classic.
In this extensive Dead Space remake walkthrough, we’ll guide you through all 12 chapters of the game. We’ll break down the main quest, and point out where to find weapons, Power Nodes, Text and Audio Logs, Upgrade Schematics, and Security Clearance doors along the way.
Dead Space chapters
There are twelve chapters in the Dead Space remake, and each takes about an hour to complete. With an hour per chapter, Dead Space will take about 12 hours total to beat, but expect to add a little extra if you plan on backtracking to mop up any collectibles.
Below, you’ll find a list of all Dead Space chapters:
Dead Space PC Review - An Excellent Remake Of A Horror ClassicWatch on YouTube
Dead Space PC Review - An Excellent Remake Of A Horror Classic

Dead Space Walkthrough Chapter 1: New Arrivals
The Dead Space remake opens with a short cutscene in which you fly towards a “planet-cracker” ship called USG Ishimura. Things go wrong pretty fast, though, and you end up crashing onto the ship in a fiery wreck. When you land, you’ll gain control of Isaac Clarke.
Upon gaining control of Isaac inside the crashed Kellion, turn around and enter the fiery side-room to find aText Log.
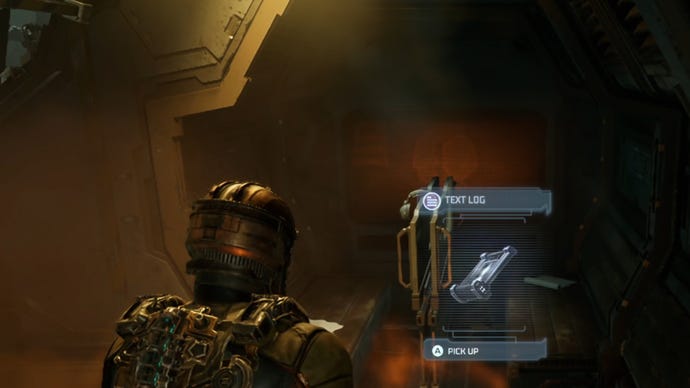
You’ll also find the secondText Login front of the bright “Welcome Aboard!” sign inside the Flight Lounge.

How to escape the Flight Lounge and get the Plasma Cutter
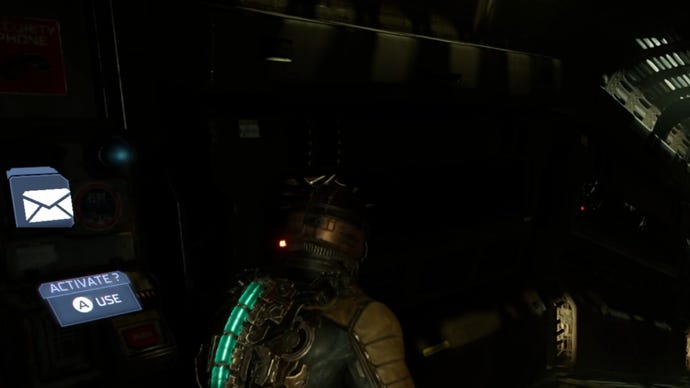
As you proceed through the next corridor towards the Tram Control Room, you’ll see a message terminal. Interact with it to get your firstAudio Log.
Where to get the Stasis Module
When you enter the Tram Control Room, snoop around to find some more ammo, credits, and a save station. After scooping up any items, head through the door that leads to the Tram Tunnel and go down the stairwell.
At the bottom of the stairs, you’ll find a Security Door that requiresClearance Level 1. You cannot access this immediately, as you won’t get Security Clearance 1 until later in the story, so note its location and otherwise ignore it for now.
Continue through the Tram Tunnel towards the loud slamming noise, where you’ll find aStasis Moduleon the floor. Use the module to shoot the faulty door, slowing it down so that you can pass through unharmed. Continue through the following hallways, grabbing the Stasis pack off the floor, and interact with the save station ahead. As you approach, the lights will cut out, plunging you into darkness. Continue through the dark corridors until you reach the Tram Repair Room.
Repairing the tram
It’s also worth noting that one of the claws is faulty and will not connect. To fix this, shoot a Stasis blast as the hook hits the tram to lock it in place, and then run back up the slope and interact with the blue terminal to complete your objective. Finish off any remaining Necromorphs and head back towards the main Tram Control Room.
Where to get the Data Board
As you enter, you’ll need to make your way down to an elevator while clearing any Necromorphs, of which there are a few in the room. After using the elevator to reach the upper level, use the circuit breaker to divert power from the lights to the Maintenance Room, unlocking a door on the bottom floor.
Near the circuit breaker, you’ll find anotherText Logon a chair. You’ll also find some containers that you can open for more ammo, so quickly restock.

Take the elevator back down, killing any Necromorphs on the way, and enter the previously locked room that you’ll find opposite on the lower level. Grab the Data Board inside to complete your current objective!
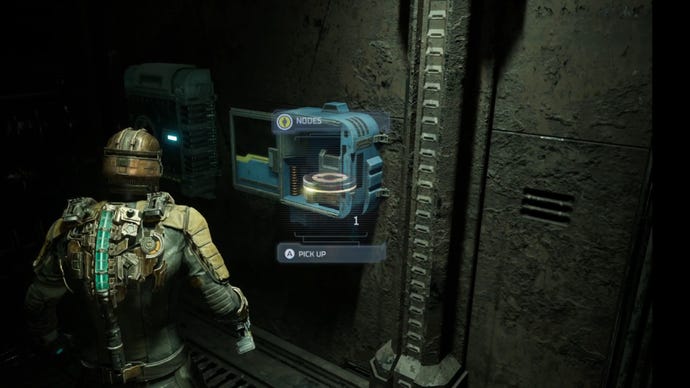
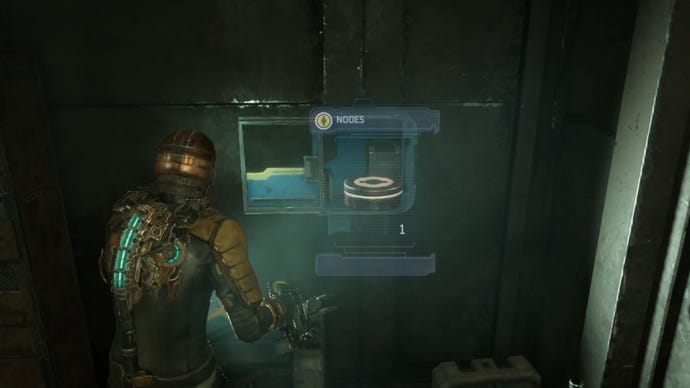
After grabbing the Data Board, search the room for a couple of other key items. AText Logsits opposite the desk where you found the Data Board, and aPower Nodeis in a container opposite the door.
Upon exiting the room, more Necromorphs will attack Isaac as you make your way out of the Maintenance Bay. Kill them and then go back to the Tram Control Room, making sure to save on the way.
Journey to Medical
After a short, and particularly explosive cutscene, you’ll find yourself back in the Hangar with the Kellion now destroyed. A few Necromorphs will make their way towards you, including a new variant that crawls. This new variant has a large tail that you should shoot to limit its movement, making it easier to kill.
Finish them off and return to the Flight Lounge for your next objective. A new path to the Flight Deck Tram Station has now unlocked, so head through when you’re ready. Make your way to the elevator and descend further into the Ishimura.
In the corridor leading to the Medical Cargo Depot, you’ll find another sealed door that requiresSecurity Clearance level 1. You’ll get this in the next chapter, so note the location and continue on for now.
After entering the Depot, you will completeChapter 1: New Arrivals.
For help with Chapter 2: Intensive Care, take a look at the next page of our Dead Space remake walkthrough.
Page1of12Next page
Page1of12
Page1of12
Next page
